TimeTec TA Mobile App - Personal Clocking

Note: This post was originally published in June 2017 and was updated in May 2018.
Introduction
To cater to employees who are always on the go and those with flexible working arrangements, TimeTec TA offers 4 different ways for users to clock their attendance from a smartphone. The options available for personal clocking in TimeTec TA mobile include:
- GPS Geolocation
- Beacon
- NFC
- Wifi Checkpoint
Before the employees can use mobile clocking, the admins first need to make a few configurations in the TimeTec TA account, which we have covered here.
Process
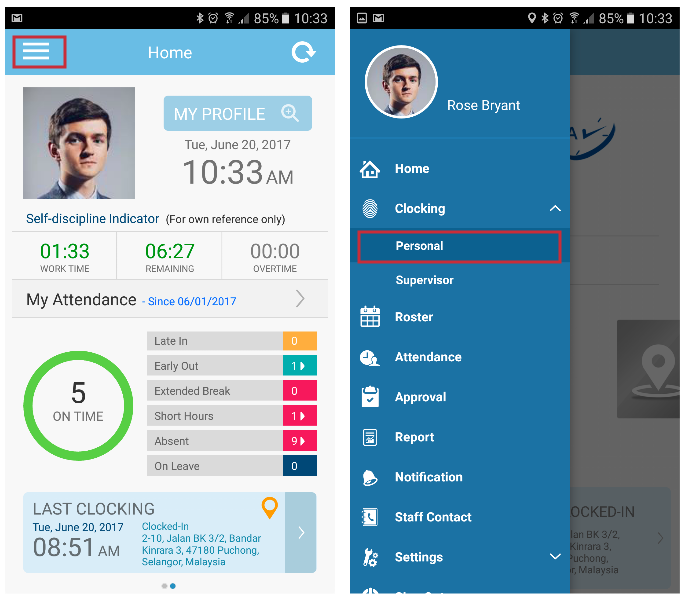
1. To clock your attendance, go to Menu > Clocking > Personal
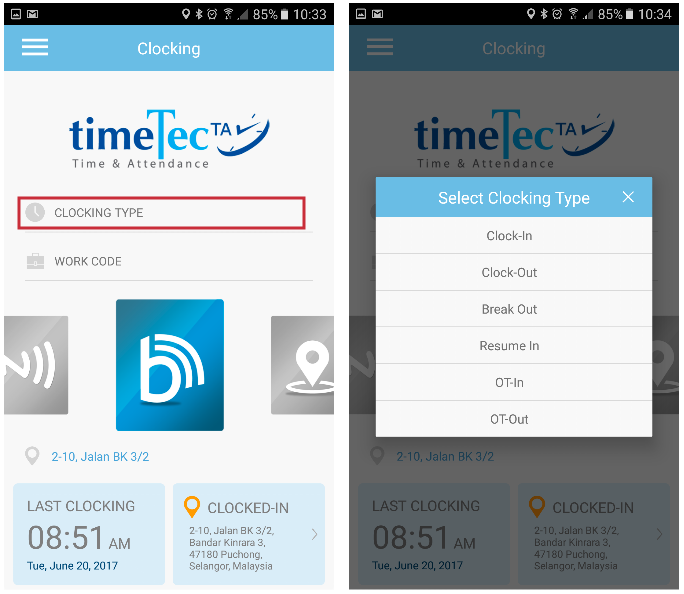
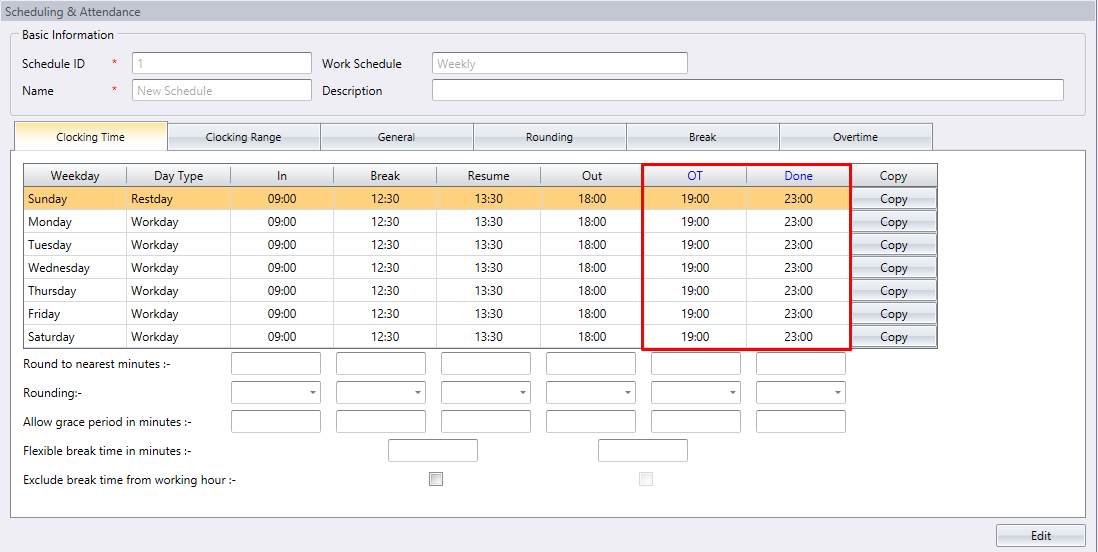
2. Select your Clocking Type; Clock-In, Clock-Out, Break Out, Resume In, OT-In or OT-Out. This step is optional, depending on your company’s policy. By default, system will determine the clocking type automatically and insert the time into the relevant clocking column based on the schedule set.
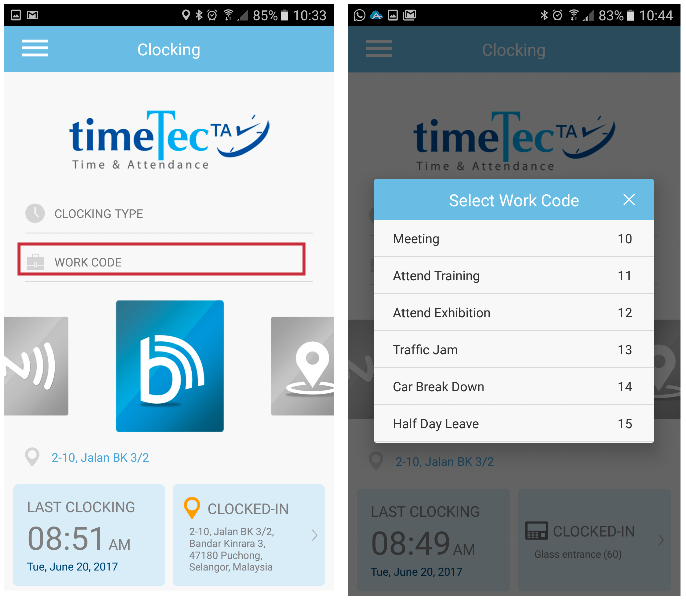
3. Select Work Code (if any)
This step is also optional, depending on your company’s policy. The work code list is only available if Admin has added the work code list in TimeTec TA.
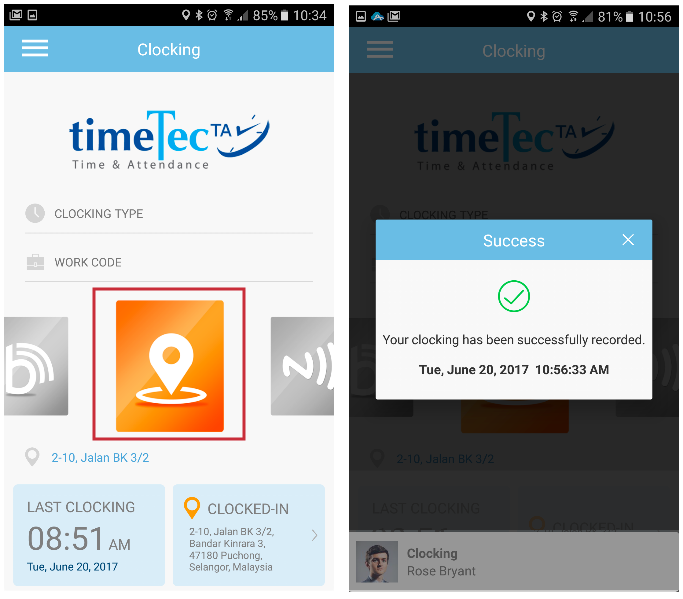
4. Choose your clocking method by swiping the clocking method options left or right; GPS Geolocation (orange color), Beacon (blue color with letter B), NFC (blue color with letter N) or Wifi Checkpoint (blue colored signal icon). Please note that NFC clocking is available for Android smartphones only. The availability of the clocking method options is based on your company’s permission. Therefore, please check with your company if any of the clocking options is not enabled.
a. Clocking via GPS Geolocation
Click at the GPS Geolocation icon and wait for the successful message. Please make sure you have enabled your phone’s Location option.
b. Clocking via Beacon
Make sure your phone is within the Beacon’s reading range; 10 metres from the Beacon device. Click at the Beacon icon and wait for the successful message. Please make sure you have enabled your phone’s Bluetooth and Location options.
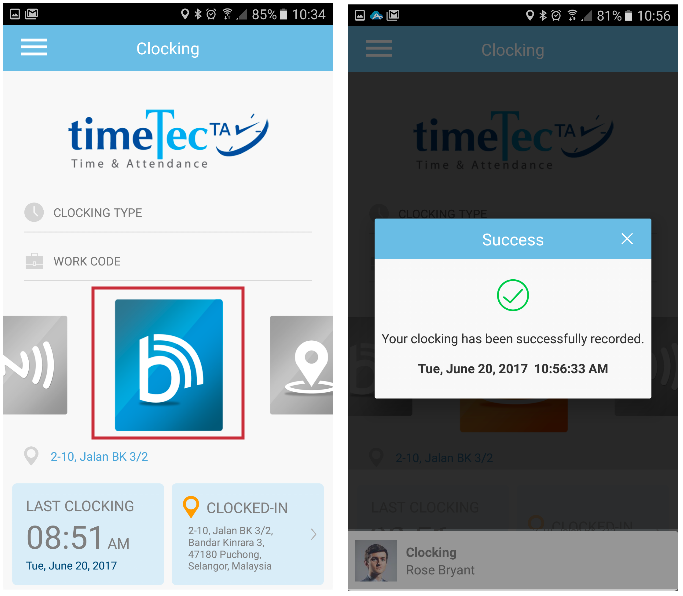
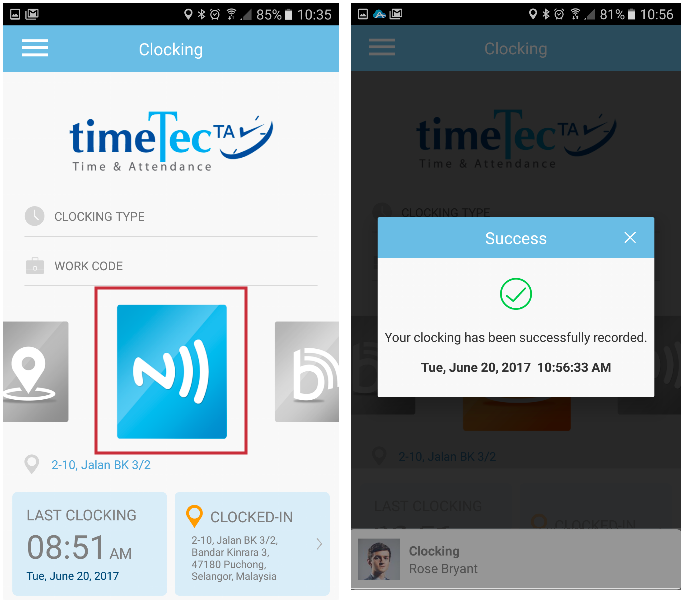
c. Clocking via NFC (for Android only)
Click at the NFC icon and tap your smartphone at the NFC tag, until you receive a successful message. Please make sure you have enabled your phone’s NFC feature.
d. Clocking via Wifi Checkpoint
Click at the Wifi Checkpoint icon and wait for the successful message. Please make sure your phone is currently connected to the wifi checkpoint to which you have been assigned.
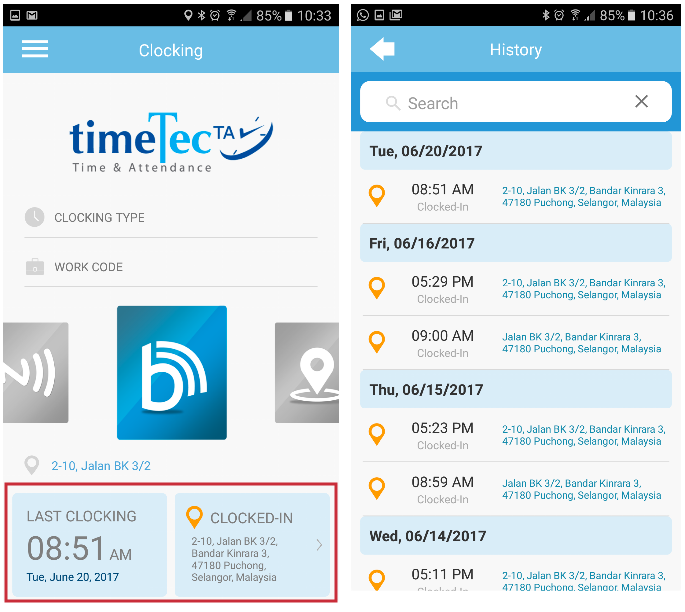
5. Check your last attendance clocking history at the bottom section labelled Last Clocking to make sure that the time has been clocked properly before you go about doing your thing.
Related Posts
Using TimeTec TA App for the First Time
TimeTec TA – Having Problem to Use Mobile Clocking with Your New Mobile Phone? Get to Know How to Reset Your Mobile ID
- GPS Geolocation
- Beacon
- NFC
- Wifi Checkpoint
Before the employees can use mobile clocking, the admins first need to make a few configurations in the TimeTec TA account, which we have covered here.
Process
1. To clock your attendance, go to Menu > Clocking > Personal

2. Select your Clocking Type; Clock-In, Clock-Out, Break Out, Resume In, OT-In or OT-Out. This step is optional, depending on your company’s policy. By default, system will determine the clocking type automatically and insert the time into the relevant clocking column based on the schedule set.

3. Select Work Code (if any)
This step is also optional, depending on your company’s policy. The work code list is only available if Admin has added the work code list in TimeTec TA.

4. Choose your clocking method by swiping the clocking method options left or right; GPS Geolocation (orange color), Beacon (blue color with letter B), NFC (blue color with letter N) or Wifi Checkpoint (blue colored signal icon). Please note that NFC clocking is available for Android smartphones only. The availability of the clocking method options is based on your company’s permission. Therefore, please check with your company if any of the clocking options is not enabled.
a. Clocking via GPS Geolocation
Click at the GPS Geolocation icon and wait for the successful message. Please make sure you have enabled your phone’s Location option.

b. Clocking via Beacon
Make sure your phone is within the Beacon’s reading range; 10 metres from the Beacon device. Click at the Beacon icon and wait for the successful message. Please make sure you have enabled your phone’s Bluetooth and Location options.

c. Clocking via NFC (for Android only)
Click at the NFC icon and tap your smartphone at the NFC tag, until you receive a successful message. Please make sure you have enabled your phone’s NFC feature.

d. Clocking via Wifi Checkpoint
Click at the Wifi Checkpoint icon and wait for the successful message. Please make sure your phone is currently connected to the wifi checkpoint to which you have been assigned.
5. Check your last attendance clocking history at the bottom section labelled Last Clocking to make sure that the time has been clocked properly before you go about doing your thing.

Related Posts
Using TimeTec TA App for the First Time
TimeTec TA – Having Problem to Use Mobile Clocking with Your New Mobile Phone? Get to Know How to Reset Your Mobile ID













16 comments:
Have any questions or inquiries about FingerTec? Drop your input here.