Companies in general, receive multiple deliveries in a day. Companies may require their receptionist to collect personal information from the delivery personnel before admitting them into the premises. For this purpose, TimeTec VMS has introduced a new module called Delivery. This article will demonstrate how to enable the Delivery module to cater for delivery personnel registration.
Process
1. Login as Master Admin to TimeTec VMS web portal. Go to Settings > Visitation Settings
2. Enable the Delivery Settings toggle button.
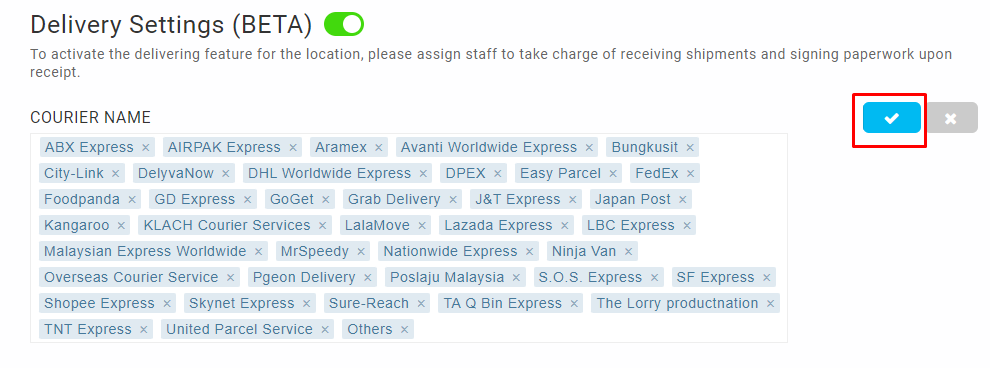
3. Click on the Edit button to edit or add in courier provider names.
4. Edit or add accordingly, then Save.
5. Scroll down to configure the Location Name. Click on the Edit button to edit or add the location and assign staff.
6. You may click on the Add (+) button to add a new location, rename the location and assign staff accordingly. Each location can be assigned with three staff members. The assigned staff will receive a notification each time the delivery is registered to their location.
7. Once the Delivery module has been enabled, when registering walk-in visitors, there will be a separate tab for visitation (normal visit for meeting, contractor, others) and delivery. Click on the Deliver tab and the +Delivery button to register a delivery visitor.
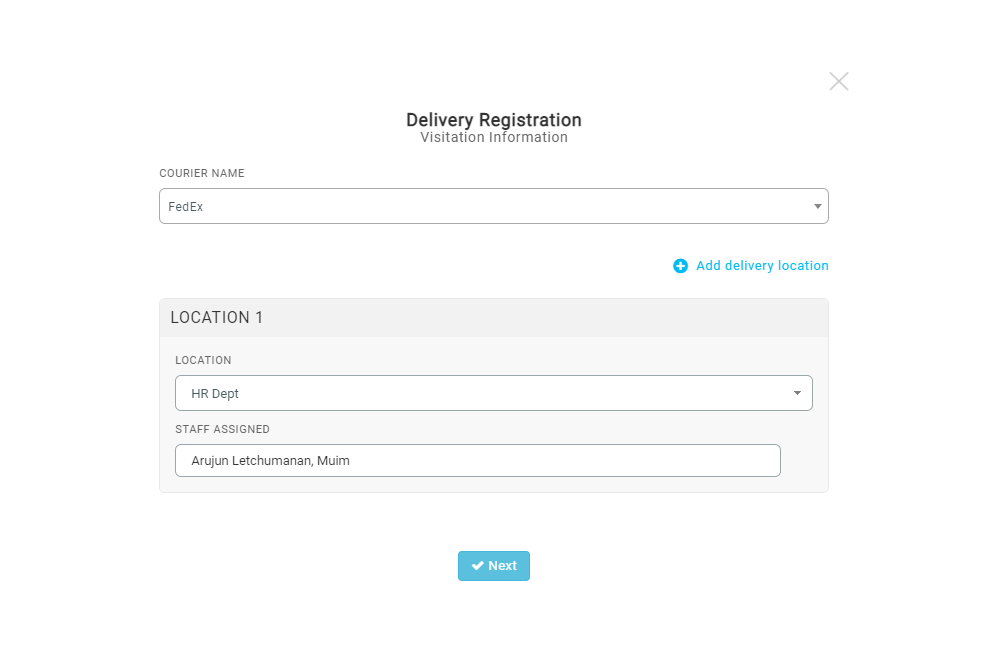
8. Select Courier name and location. Click on Add delivery location if the delivery to be made at multiple locations within the premise. Then click on Next to proceed with the registration.
9. Insert visitor information and then Next.
10. A success registration message will popup as below when the registration is completed. You may register more visitors, view and print the visitation ticket if required, or close the success message popup screen.
Note: If some of the screenshots or steps viewed here are different from the ones in the current system, this is due to our continuous effort to improve our system from time to time. Please notify us at
[email protected], we will update it as soon as possible.
IntroductionTimeTec VMS is a cloud-based Visitor Management System designed to better manage and monitor visitors in a building or an office. The system is an automated visitor management system where all visitor information is screened before the visits, providing a safe environment for the company. The TimeTec VMS also secures visitor information, available for future use and reference. In this article, we will demonstrate how the admin can manage and monitor visitors from the TimeTec VMS web portal Dashboard.
ProcessA. Admin View1. Login into the TimeTec VMS website using admin credentials. Go to Dashboard which is the homepage of the TimeTec VMS website.

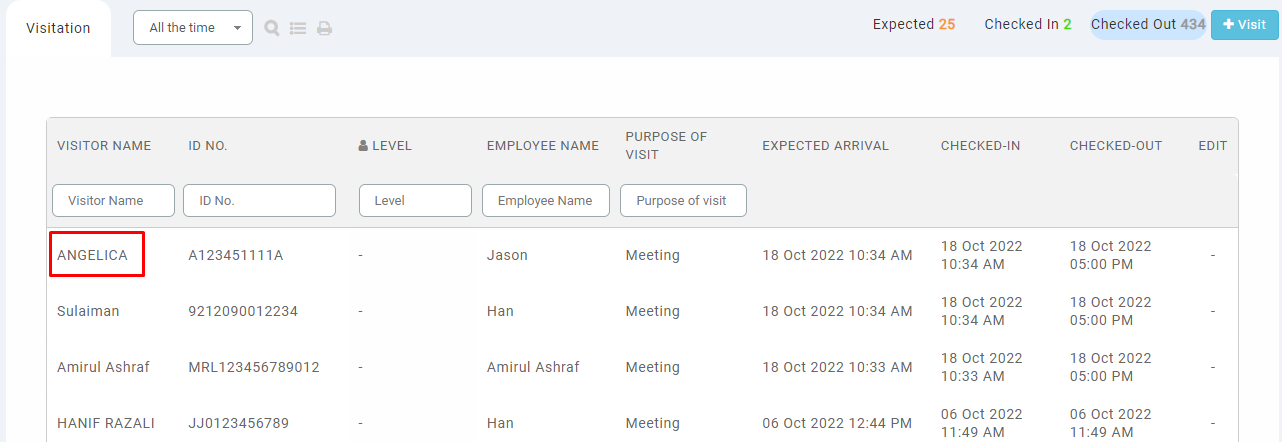
2. Visitor lists are divided into three categories based on their visitation status: Expected, Checked-In and Checked-Out.
3. The Expected category will display visitors that have been invited or pre-registered, waiting for their arrival, and are being checked in by the admin/security/front desk officer. You may view visitor information including the host they are meeting with and the expected arrival date and time. The system admin will have access to check the visitor in by clicking on the check-in button under the Edit column.
4. For the Check-In category, visitors that have been registered via the Walk-In registration method or pre-registered visitors that have been checked in will be displayed in the list. You may view their information including the checked-in date and time. For system admin, there will be a checkout button under the Edit column to check the visitors out.
5. Selecting the Checked Out category will display the visitors that have been checked out by the system. You may view visitors' information including their checked-in and checked-out time.
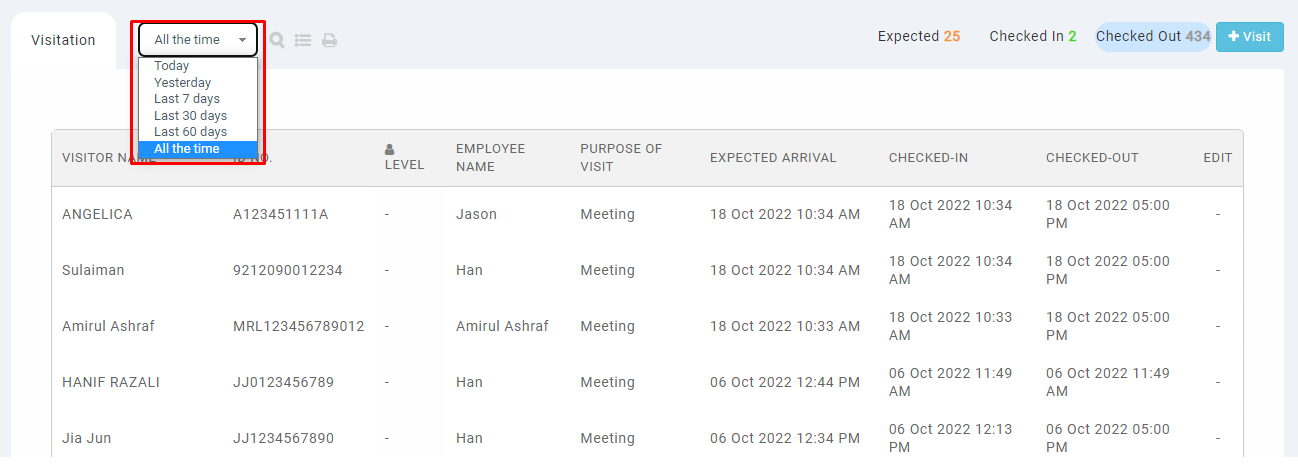
6. By default, the date for the display will be for today’s list. You may filter to view the records of yesterday, the last 7 days, the last 30 days, the last 60 days or all the time.
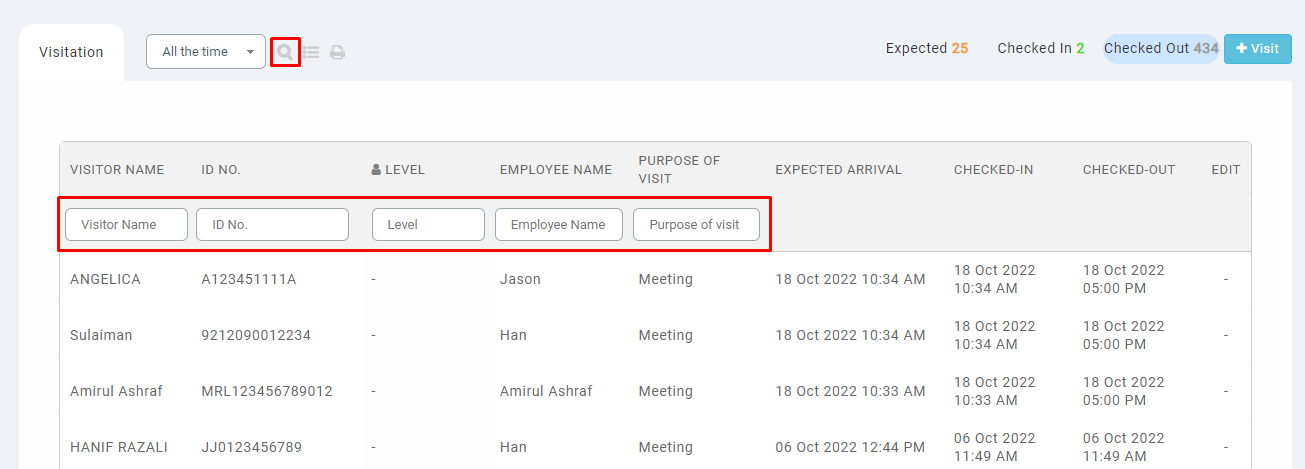
7. Clicking on the search button will enable the search box for each field where you may insert the keyword to search visitors.
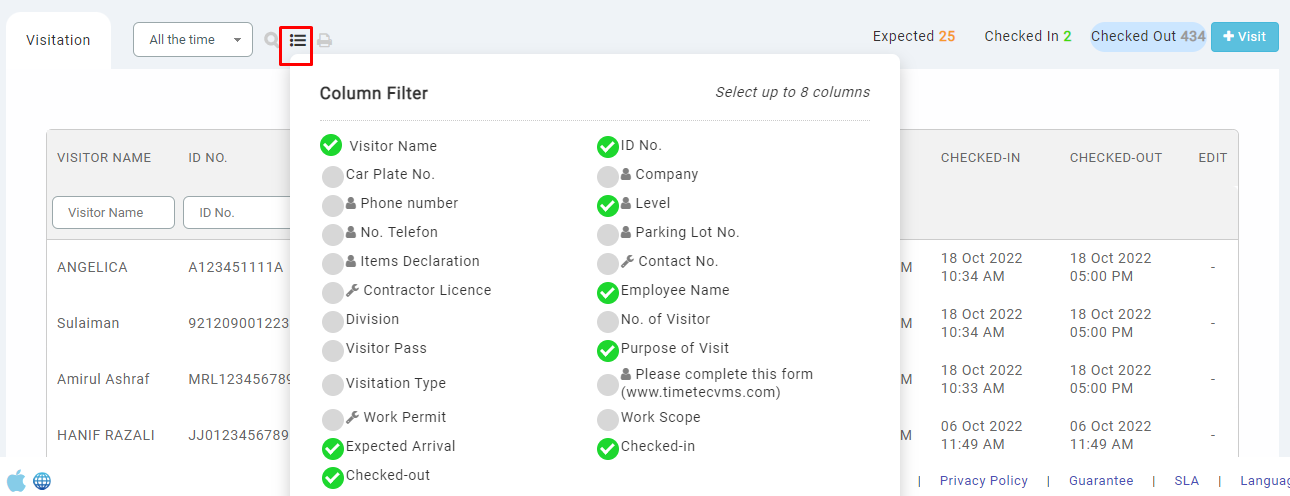
8. To filter the column, you may click on the Column Filter button and select the fields to be included in the display. Please note that you may only select up to 8 columns at a time.
9. Clicking on the visitor’s name will open the visitor's information page. You may review visitor’s details, check-in and checked-out activities and visitation details. You may also block visitors from here to restrict them from future visits. Once blacklisted, the system will pop up an error message upon inserting the visitor’s ID number for registration.
Note: If some of the screenshots or steps viewed here are different from the ones in the current system, this is due to our continuous effort to improve our system from time to time. Please notify us at
[email protected], we will update it as soon as possible.
Introduction
TimeTec VMS can ease the registration process with multiple options of registration methods. That includes Walk-In registration, Invitation by the host, Queue Relief and Pre-registration method. Upon visitors registration submission, visitors will receive a visitation ticket to confirm the visits, including all the visitation details, easy for future reference. Aside from the given information, you may customize any relevant details or instructions or even add an attachment for visitors to download before their visit. This article will demonstrate how to configure the additional information/notes to be displayed on the visitation ticket.
Process
1. Login to TimeTec VMS as an Admin role, go to Settings > Visitation Settings.
2. In Visitation Settings, click on the Visitation Rules options from the left pane section.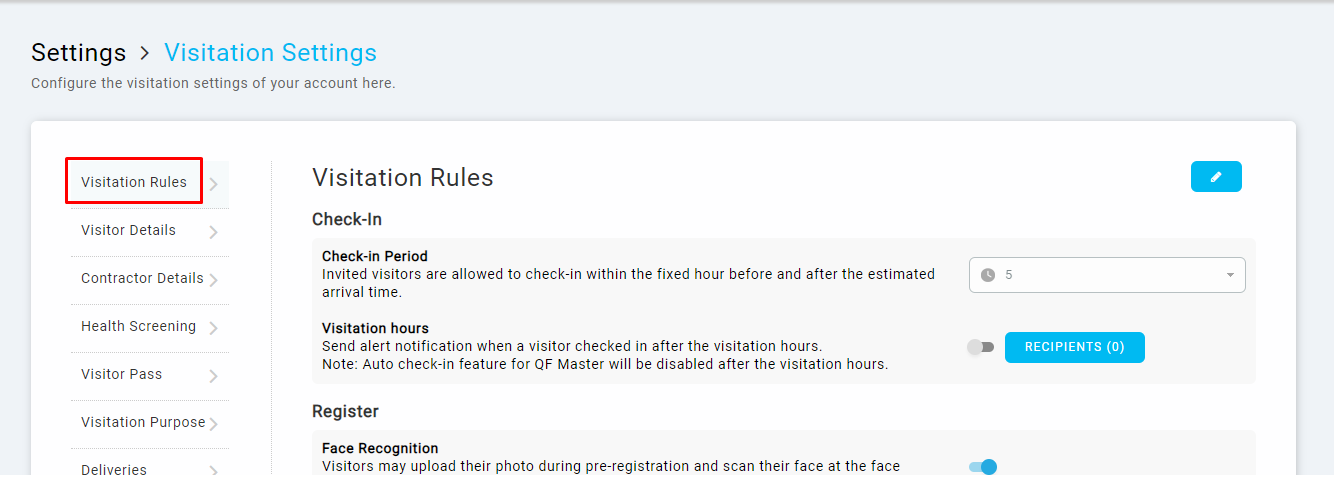
3. Click on the edit button (pencil icon) on the right of the Visitation Rules section, then locate the Additional Information setting, click on the toggle button to enable it, and then click on Edit to add the text or attachment.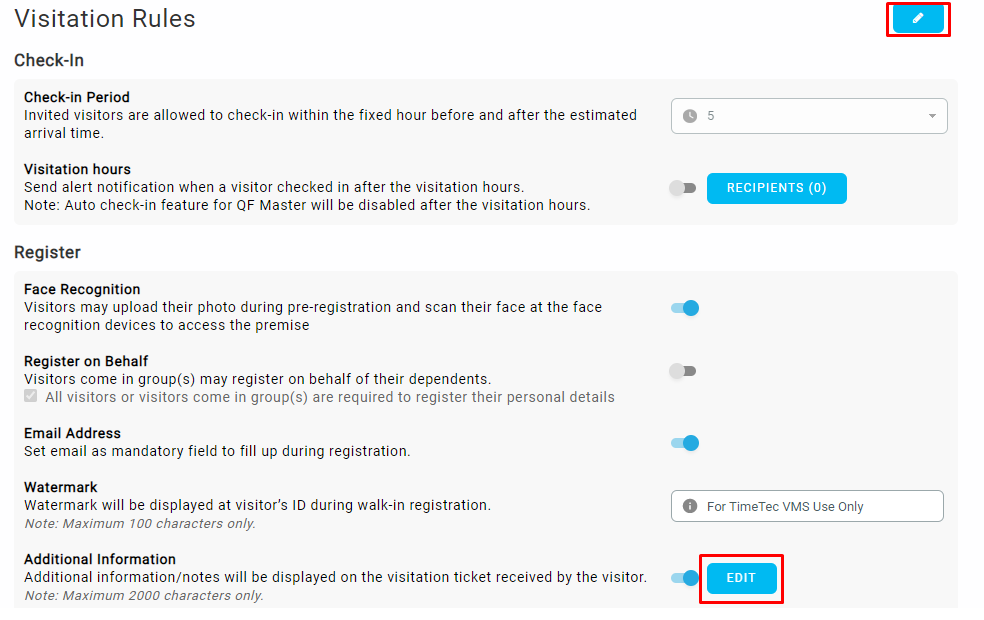
4. You may insert additional information or note on the visitation ticket for visitors’ perusal. The information could be in a standard text file, numbered or bullet list format, or you could also input a link if visitors are required to fill up any additional external form or download documents from an external source. You can also attach a document by clicking on the browse button and locating the attached file. Visitors will be able to download the file from the visitation ticket later. Click on the Save button to save.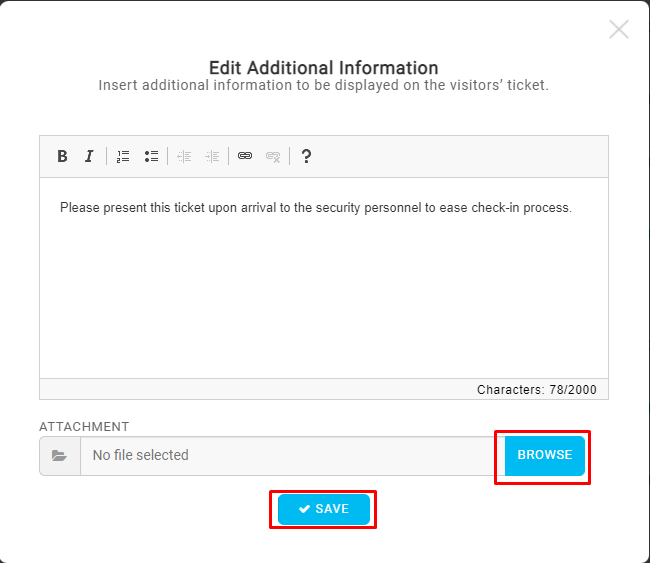
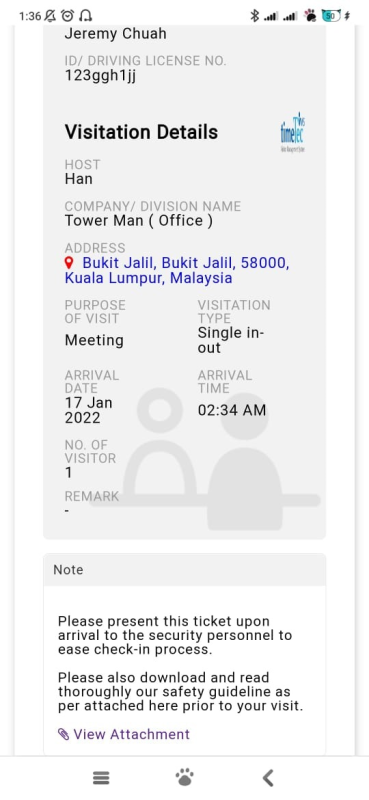
5. Once the above is configured, the visitors will get the visitation ticket with all the relevant information sent to their email. The Notes section can view the added notes, as shown below. In addition, there will be a button to view/download the attachment if there is an attachment set.
Note: If some of the screenshots or steps viewed here are different from the ones in the current system, this is due to our continuous effort to improve our system from time to time. Please notify us at
[email protected], we will update it as soon as possible.
IntroductionTimeTec VMS allows multiple roles (i.e. Admin or Staff) to be assigned to the same valid email address. If a user has been registered for both admin and staff account, they may log in as either role and switch to the other role. This article demonstrates how to log into a TimeTec VMS account and switch into another registered account or role easily.
Process
A) Switching Role in TimeTec VMS Web Portal
1. Login into the TimeTec VMS website using the registered email and password.
2. If your email has been registered with more than one role or added to more than one company, you will be able to select to login into which account upon logging in. Role and company name will be displayed as in the screenshot below. Next, click on the account/role that you wish to access.3. Once inside the TimeTec VMS account, you may locate the switch role button on the top right corner, as shown below. Click the button and then select the account you would like to switch into.

B) Switching Role in TimeTec VMS Mobile App
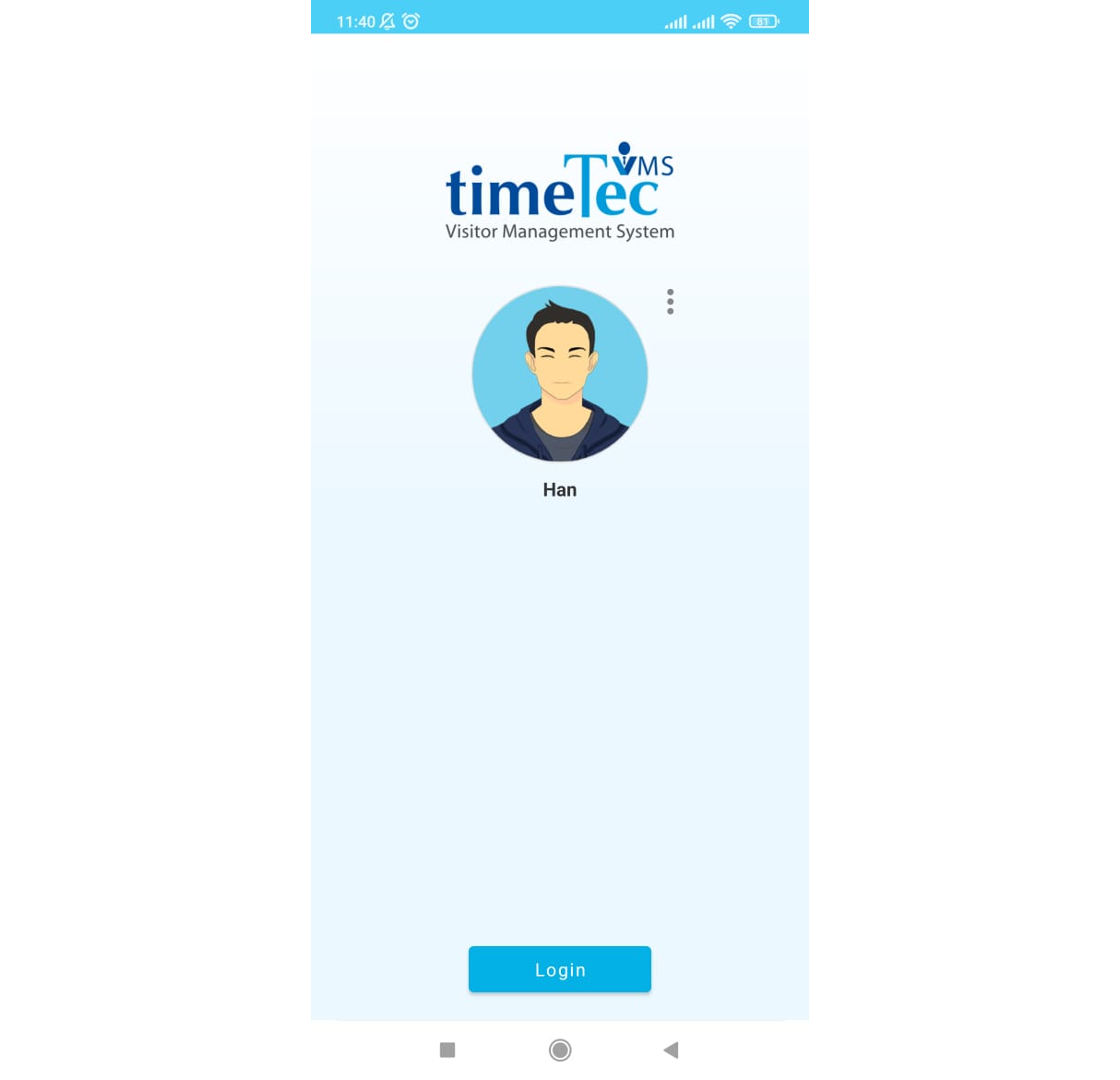
1. Login into TimeTec VMS mobile App.
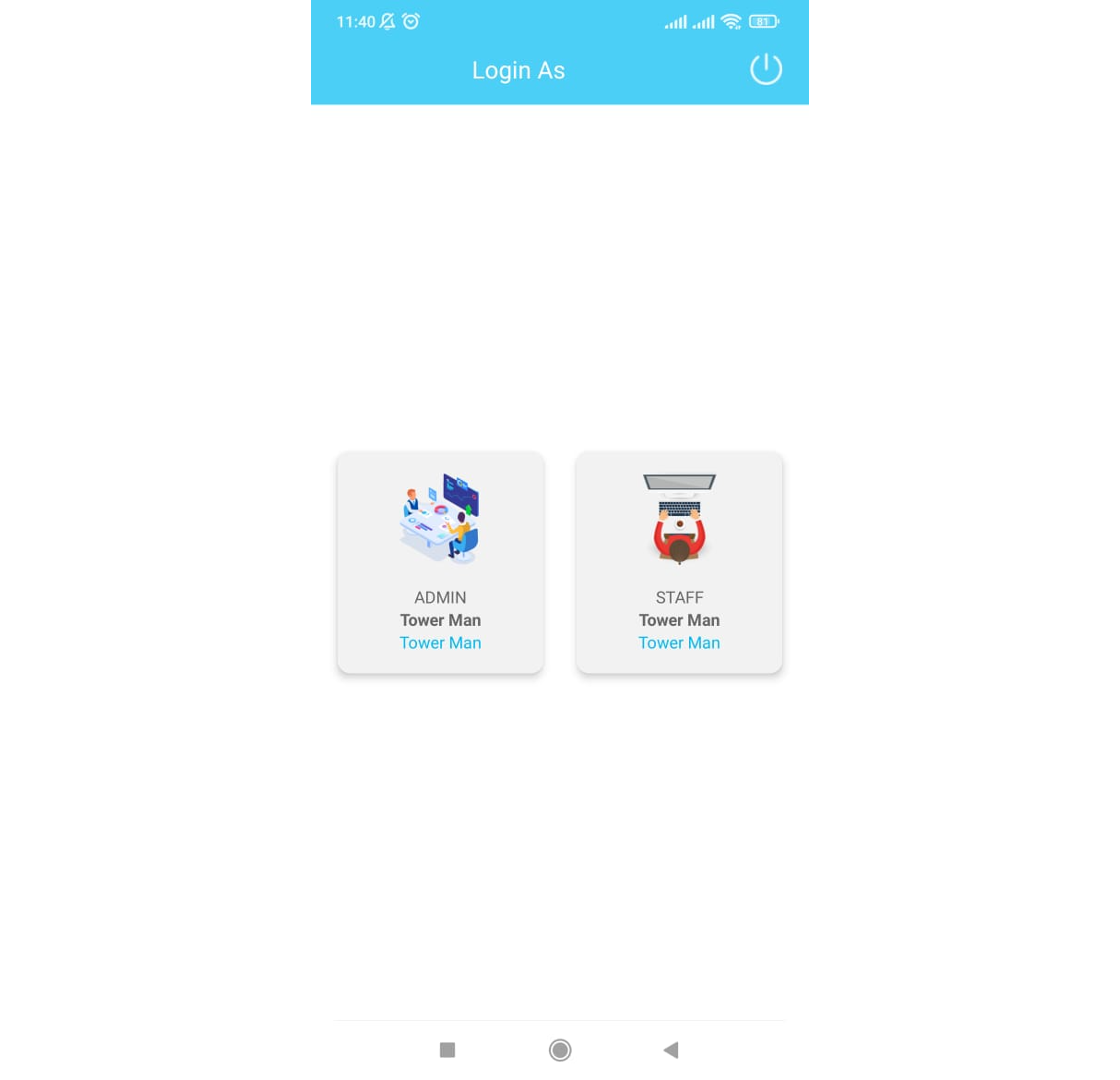
2. Select which account/role to login.
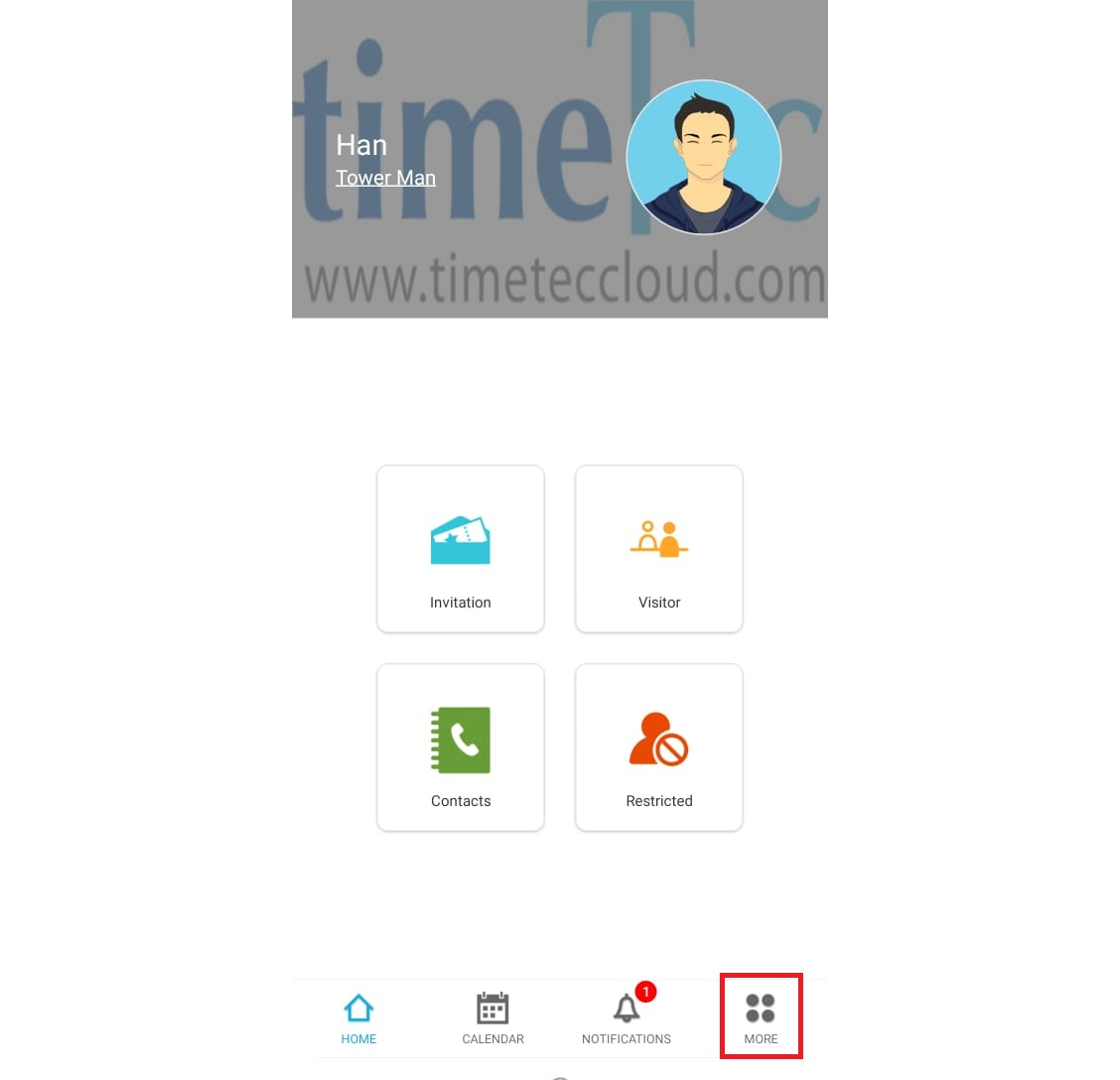
3. Tap on More button at the bottom screen.
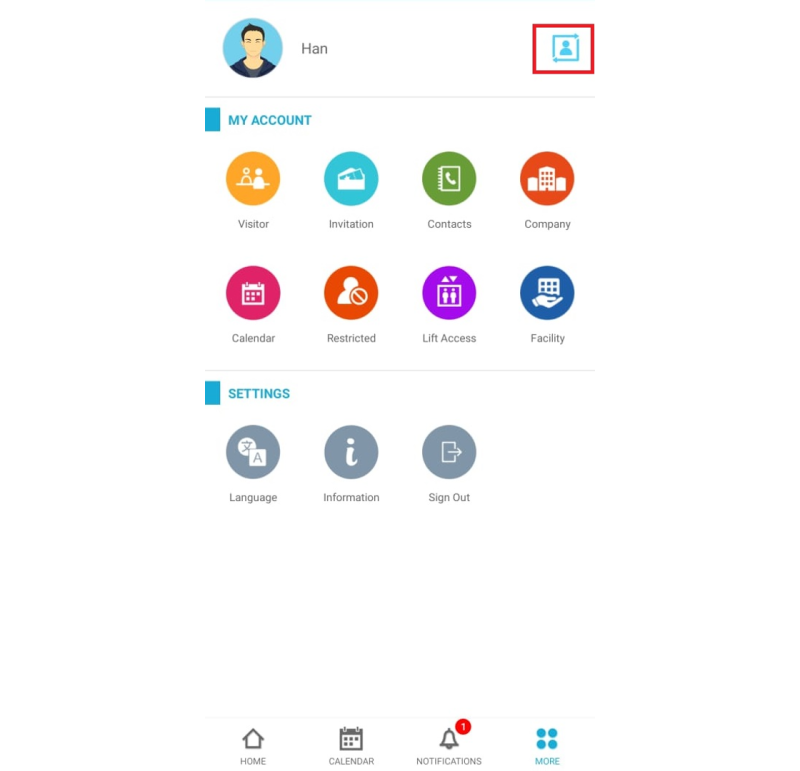
4. Tap on the switch account button at the top right corner of the screen as highlighted below.
5. Click on the other account that you wish to switch to.
Note: If some of the screenshots or steps viewed here are different from the ones in the current system, this is due to our continuous effort to improve our system from time to time. Please notify us at
[email protected], we will update it as soon as possible.
Introduction
TimeTec VMS for Corporates offers two types of account modes: a single company and multiple companies. The multiple companies mode is suitable for an office tower or commercial building, consisting of multiple different companies. Building information and management information may be different, especially if the management company is not the building owner. Therefore, as the system owner for multi-company license account types, you may include both building information and management information so tenants who use the TimeTec VMS system can easily refer to their App to get the information.
Process
1. Login as Master Admin, go to Office
2. Insert building information accordingly. To upload a building or company logo, click on the logo icon and select your logo. The recommended photo size is 150 x 150px.
3. Verify location on the map. To pin another location on the map, drag the pin and drop it to the other location. Then, click on Save & Next to proceed.
4. Insert management information accordingly.
5. Set the operating hours of the building. If the visitation hours are the same as operating hours, you may follow the operating hours. Otherwise, you may customize to set different visitation hours. Once the setting is done, click on the Save button.
3.jpg)
6. Once building and management information has been set accordingly, users can view it inside their TimeTec VMS App.
Note: If some of the screenshots or steps viewed here are different from the ones in the current system, this is due to our continuous effort to improve our system from time to time. Please notify us at
[email protected], we will update it as soon as possible.
Introduction
As an admin, monitoring is crucial to understand the visitor flow and history, especially the visitor profile, expected arrival, check-in and check-out time. In the TimeTec VMS system, the admin can do so effortlessly with a glance by just looking at the dashboard after logging in.
1. Once logged in, the system will immediately show the admin the dashboard with the visitor list.
2. To filter the previous record, the admin can select from the drop-down menu based on the desired filter date and visitation status.
9.jpg)
3. By default, the system will show the admin today’s expected visitors. Therefore, the admin will need to filter based on the desired view.
4. Admin may want to know more about the visitor. In this case, the admin can click on the visitor’s name to view the details. After clicking the name, the admin can see a card view visitor details with each category of information such as Check In-Out Activities, Visitation Details, Personal Details and Health Screening Details. Explore the categories by clicking on the left panel for selection.
Note: If some of the screenshots or steps viewed here are different from the ones in the current system, this is due to our continuous effort to improve our system from time to time. Please notify us at
[email protected], we will update it as soon as possible.


.jpg)






.png)





3.jpg)
4.jpg)
3.jpg)
7.jpg)
3.jpg)
2.jpg)
.jpg)
7.jpg)
9.jpg)
8.jpg)
11.jpg)
8.jpg)


