Logging into i-Neighbour with a different mobile device

Friday, September 18, 2020 TimeTec 0 Comments


Introduction
By signing up and later logging into the account via the i-Neighbour app, the owner will have to input the mobile ID which was first used for registration. In the event where the owner changes their phone number, the owner can request the change by inserting the login email address to get a 4-digit email from i-Neighbour for resetting purposes.

This feature is designed to protect all account intrusion. Despite it is inevitable to avoid email and password breaches, this will protect the owner’s account when a different mobile ID is detected. In fact, this is important when the owner's privacy is stored within such as invoices, family members' contact details, and IoT (internet of things) that allow them to get through barrier gates and doors via using the app.

This article will be demonstrating the steps to log in to i-Neighbour if you are using a different phone.

Process 
1. Install the i-Neighbour apps from Google Play Store / Apps Store and Login.


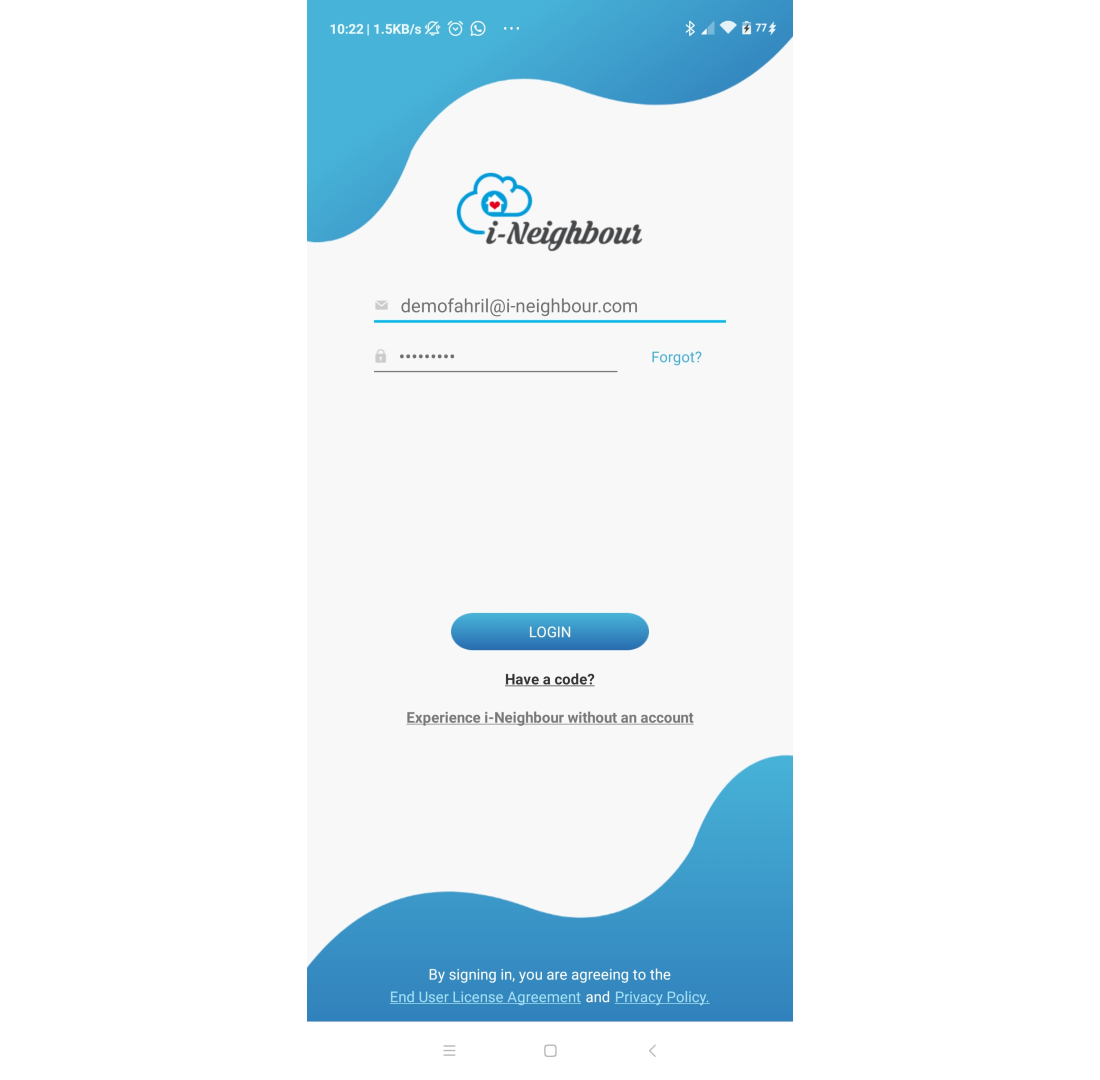
2. Enter your username and password and tap on 'Login'.


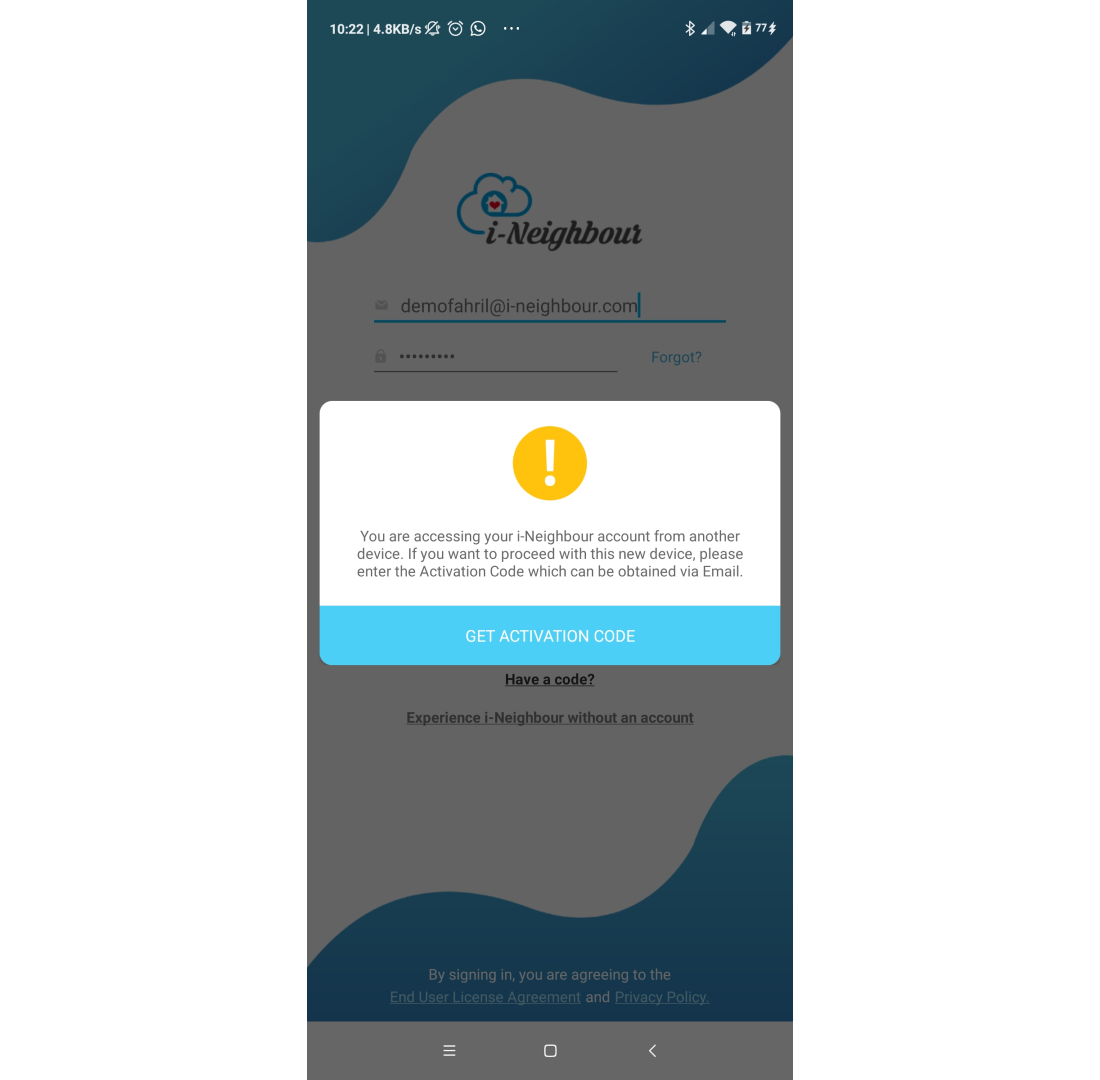
3. You will need to request an activation code from i-Neighbour to be sent via email due to the use of a different mobile ID. Click to get an activation code.


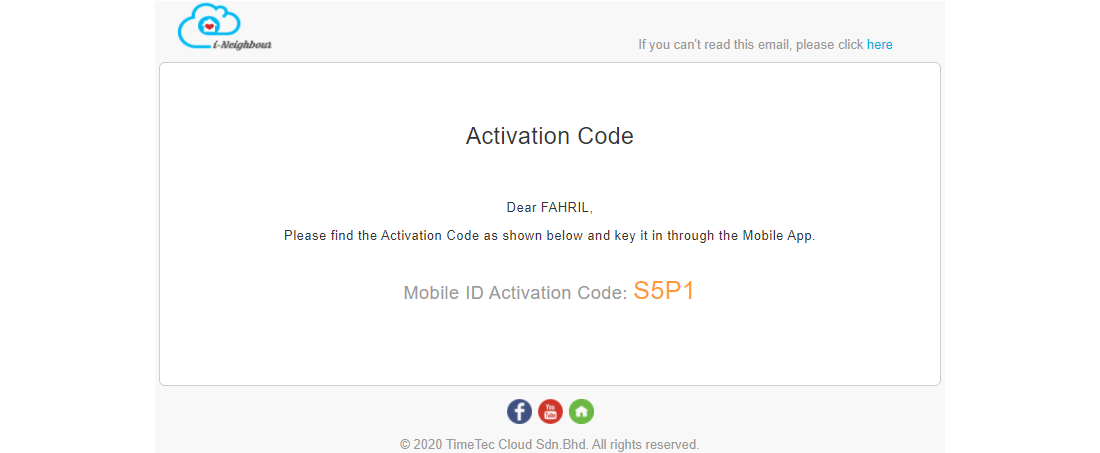
4. Check your email for the code for account activation.


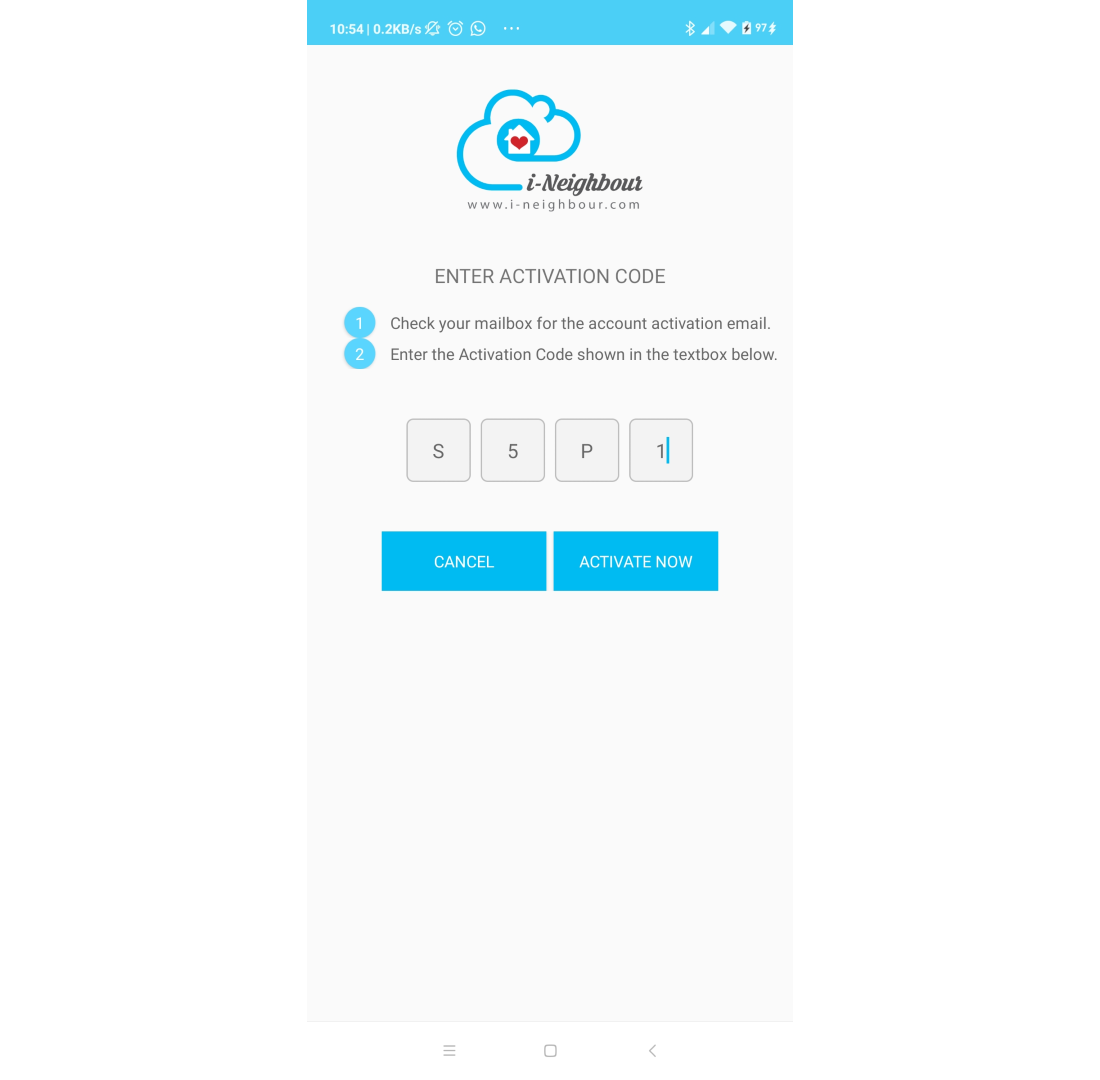
5. Insert the activation code into the empty field and click Activate Now.


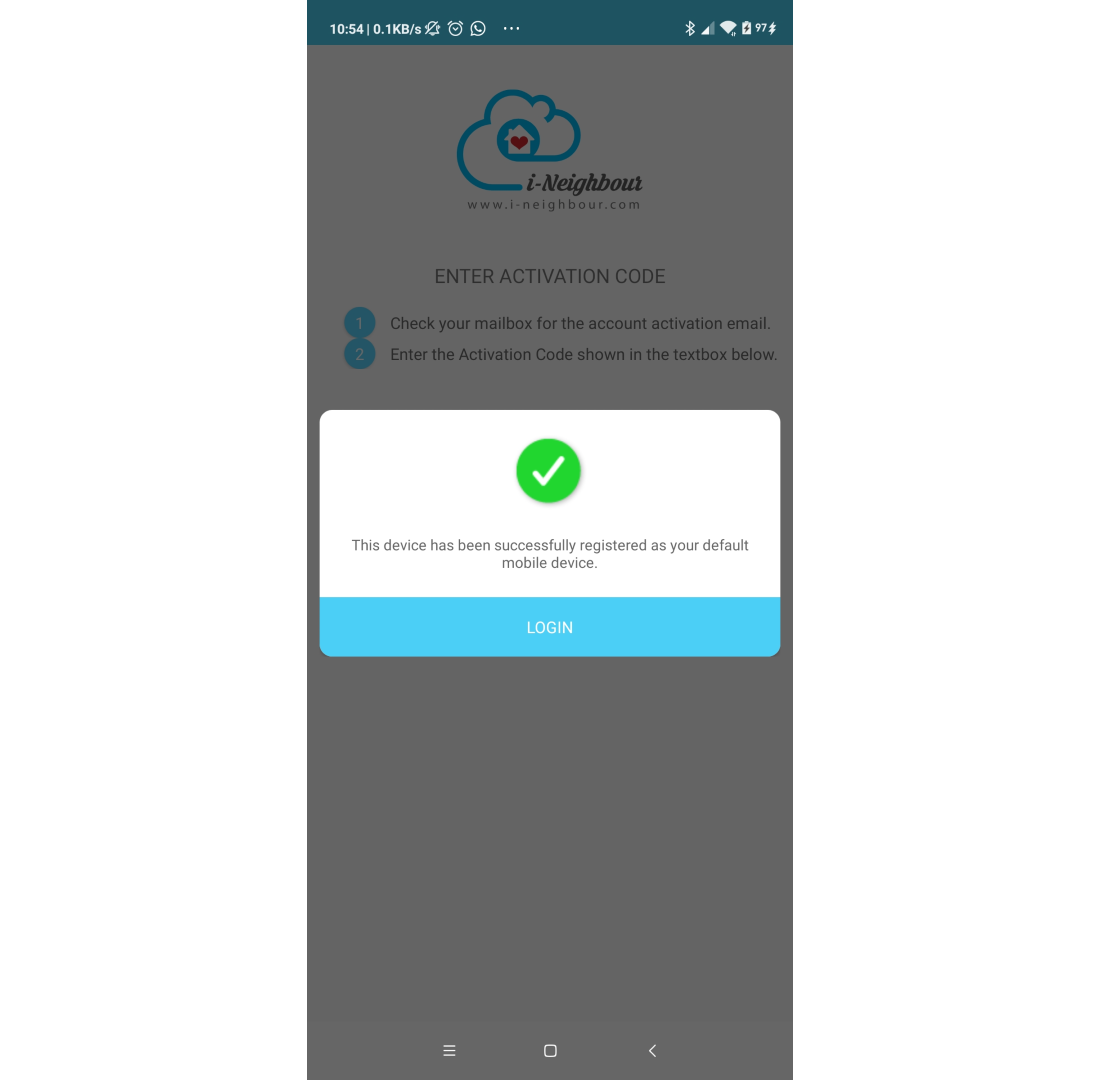
6. Click login.


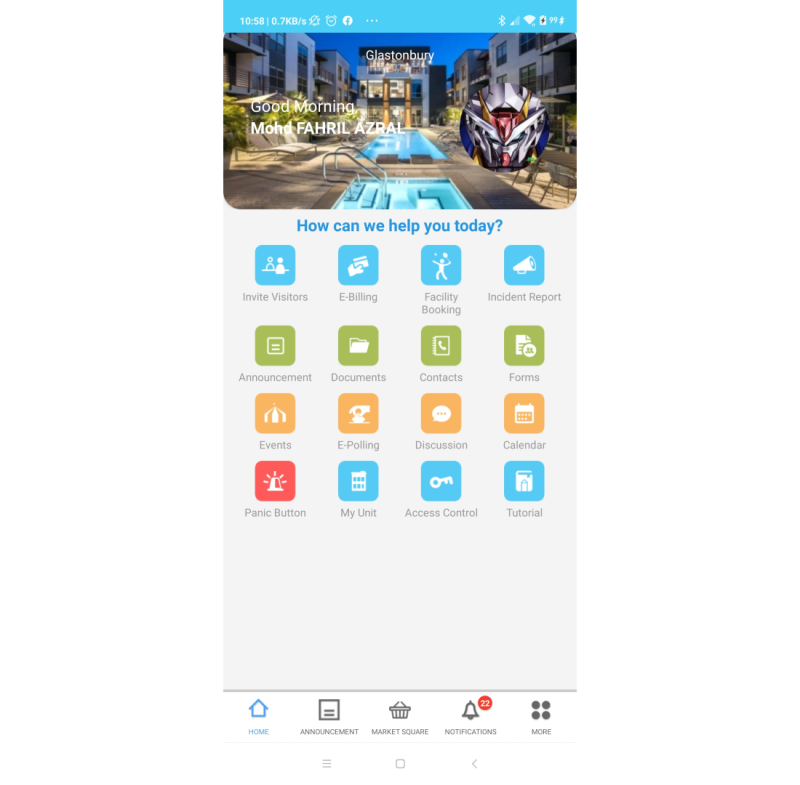
7. Now you can enjoy the features in the i-Neighbour apps.


If you are still having problems after completing all of the steps stated above, please contact us via [email protected].

Note: If some of the screenshots or steps viewed here are different from the ones in the current system, this is due to our continuous effort to improve our system from time to time. Please notify us at [email protected], we will update it as soon as possible.

0 comments:

Have any questions or inquiries about FingerTec? Drop your input here.

Scan Visitor’s ID / License Card to Register in TimeTec VMS using OCR Feature

Monday, September 14, 2020 TimeTec 0 Comments


Introduction
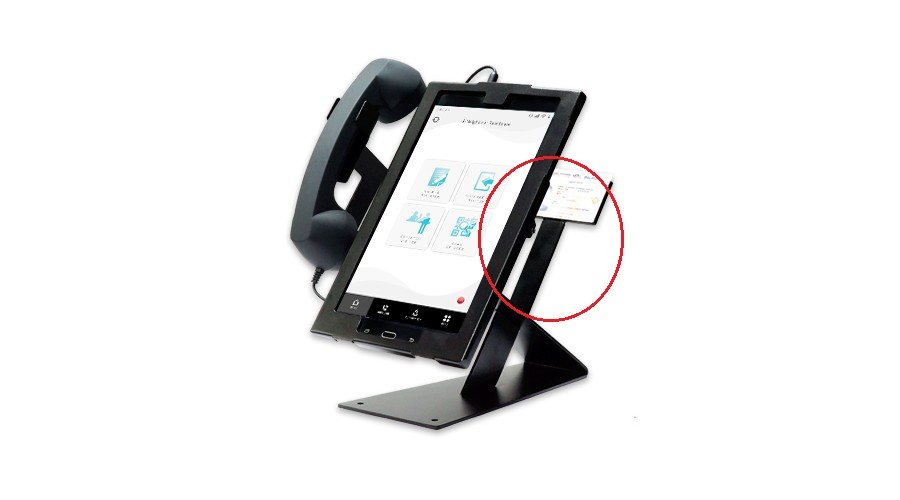
Optical Character Recognition (OCR) is a feature in i-Vizit, whereby printed texts are digitized to allow for editing, storing, and display. As such, i-Vizit OCR is capable of producing a high degree of recognition accuracy allowing it to capture information from the scanned ID, Licence, or Passport Card during the check-in registration process. To ensure a smooth and hassle-free process, it is advisable to perform the necessary settings and calibrate the OCR feature before using it. The usage of a tablet stand is highly recommended to achieve better accuracy and keeping the calibrated and actual ID placement at a constant position. Below will be the setup process for OCR features in the TimeTec VMS using the i-Vizit app.

Process
1. Please login to the i-Vizit app on your tablet using the registered Security Account in your TimeTec VMS. Kindly refer to this link /2020/03/how-to-setup-security-account-in_31.html for guideline on setting up the security account in TimeTec VMS.


2. Log in and tap on More at the bottom of the screen.
3. Then, click on Settings.

4. Click on the OCR Settings

5. Select the country and enable the OCR feature.

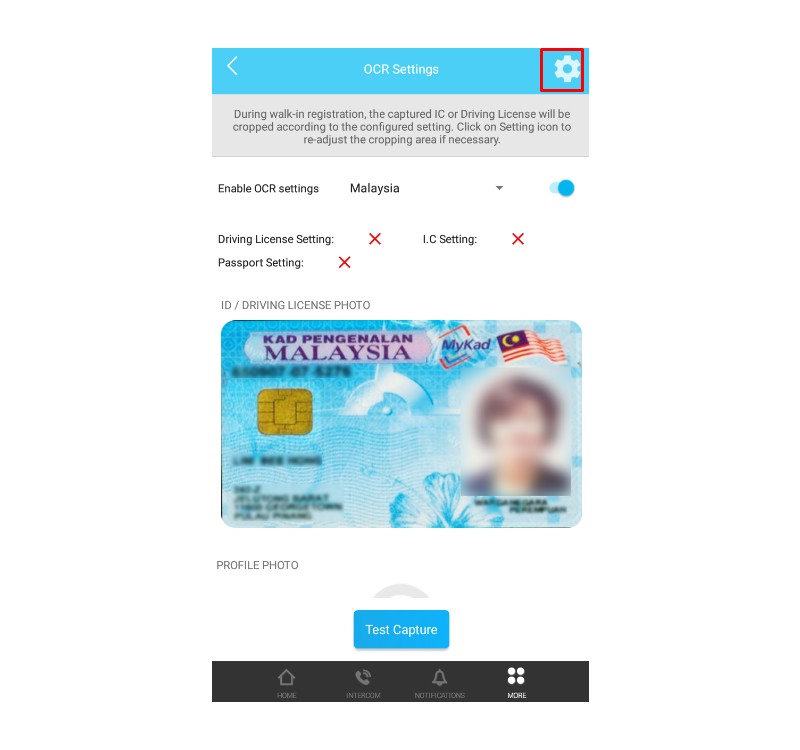
6. To calibrate the OCR feature, click on the Settings gear icon on the top right corner of the screen.

7. Select the type of card you wish to calibrate.
8. Place the card at the back of the tablet at an optimum position to ensure better accuracy. 

9. Capture the photo of the card. 

10. Drag and drop the edges to set the area of the card to be cropped. Then, click Next to proceed.

11. Drag and drop the cropping area to set for the user's image. Click on Submit once it is completed.

12. Once the calibration is completed, a success message pop-up window will be prompted.

13. The green tick indicates that the ID type has been calibrated. Please note that re-calibration might be required if the cardholder placed at the back of the tablet has been readjusted.

14. You may click on Test Capture to test and verify if the ID type has been calibrated properly. 
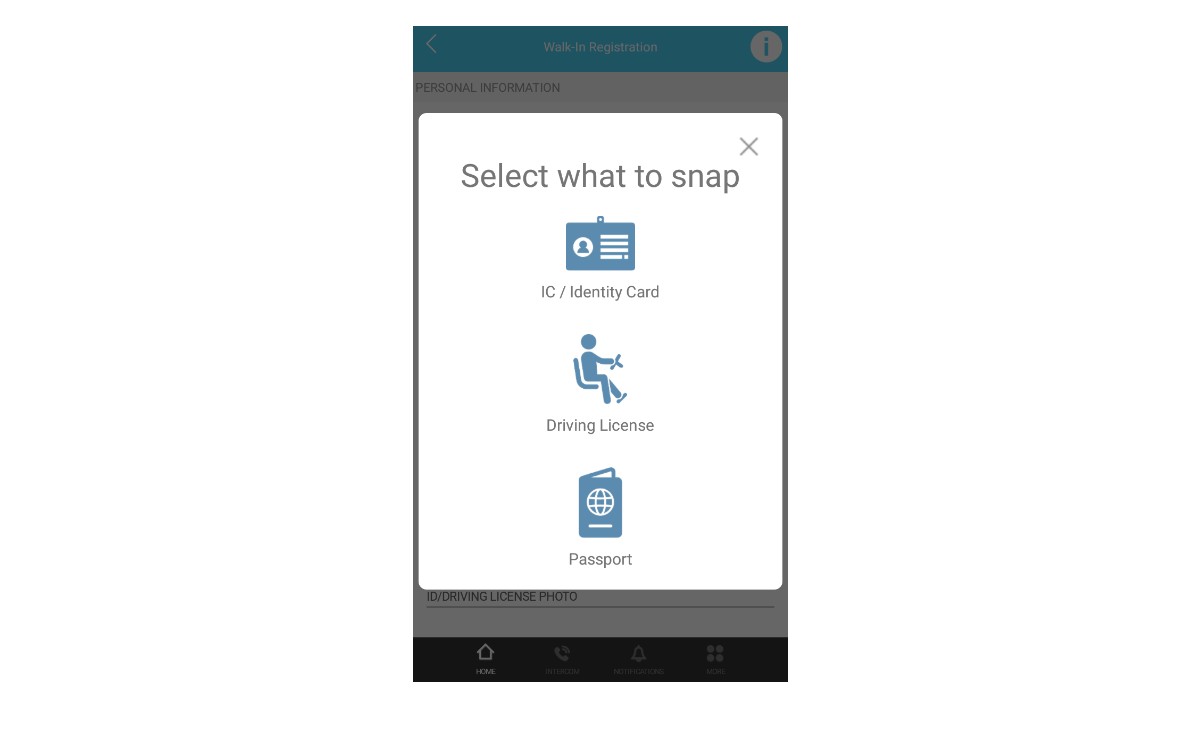
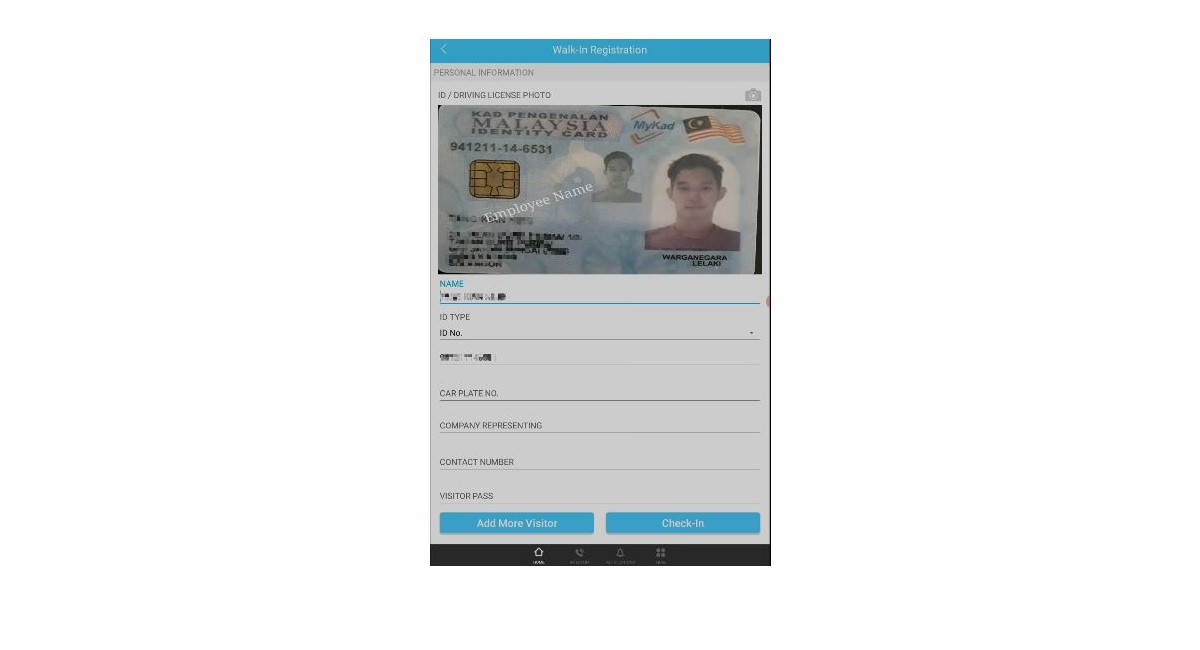
15. Once you have completed the OCR calibration, you may use this feature during the check-in registration process. Click on Snap Photo (OCR) during the Visitor Registration Process and select the type of ID to scan. The Name and ID number information will be captured from the card. Please check and ensure the extract data is correctly inputted. 


Note: If some of the screenshots or steps viewed here are different from the ones in the current system, this is due to our continuous effort to improve our system from time to time. Please notify us at [email protected], we will update it as soon as possible.

0 comments:

Have any questions or inquiries about FingerTec? Drop your input here.

R3 - R3 Master -Slave Anti-Passback 2 Doors Wiring Diagram & Setting

Monday, September 14, 2020 TimeTec 0 Comments


Some companies look for full control of their own premises. Requirements such as having just one way in and out with two doors to control the access movement within the building. This can be done by setting in our R3 device using the anti-passback feature. This setting will not have any problem with our current device and can be done easily with our Master-slave connection. Due to the distinct requirements raised by certain customers, the Master-Slave setup for door access solution using the Master-Master setup is still valid. In this tips we provide, we are using two R3 devices as an example for this Master-slave Anti-passback setting configuration and connection, please follow the instructions below:

1) Configure both R3 to change its function to support the Master slave setting by following the previous tip “Modifying Setup from Master-Master to Master-Slave”

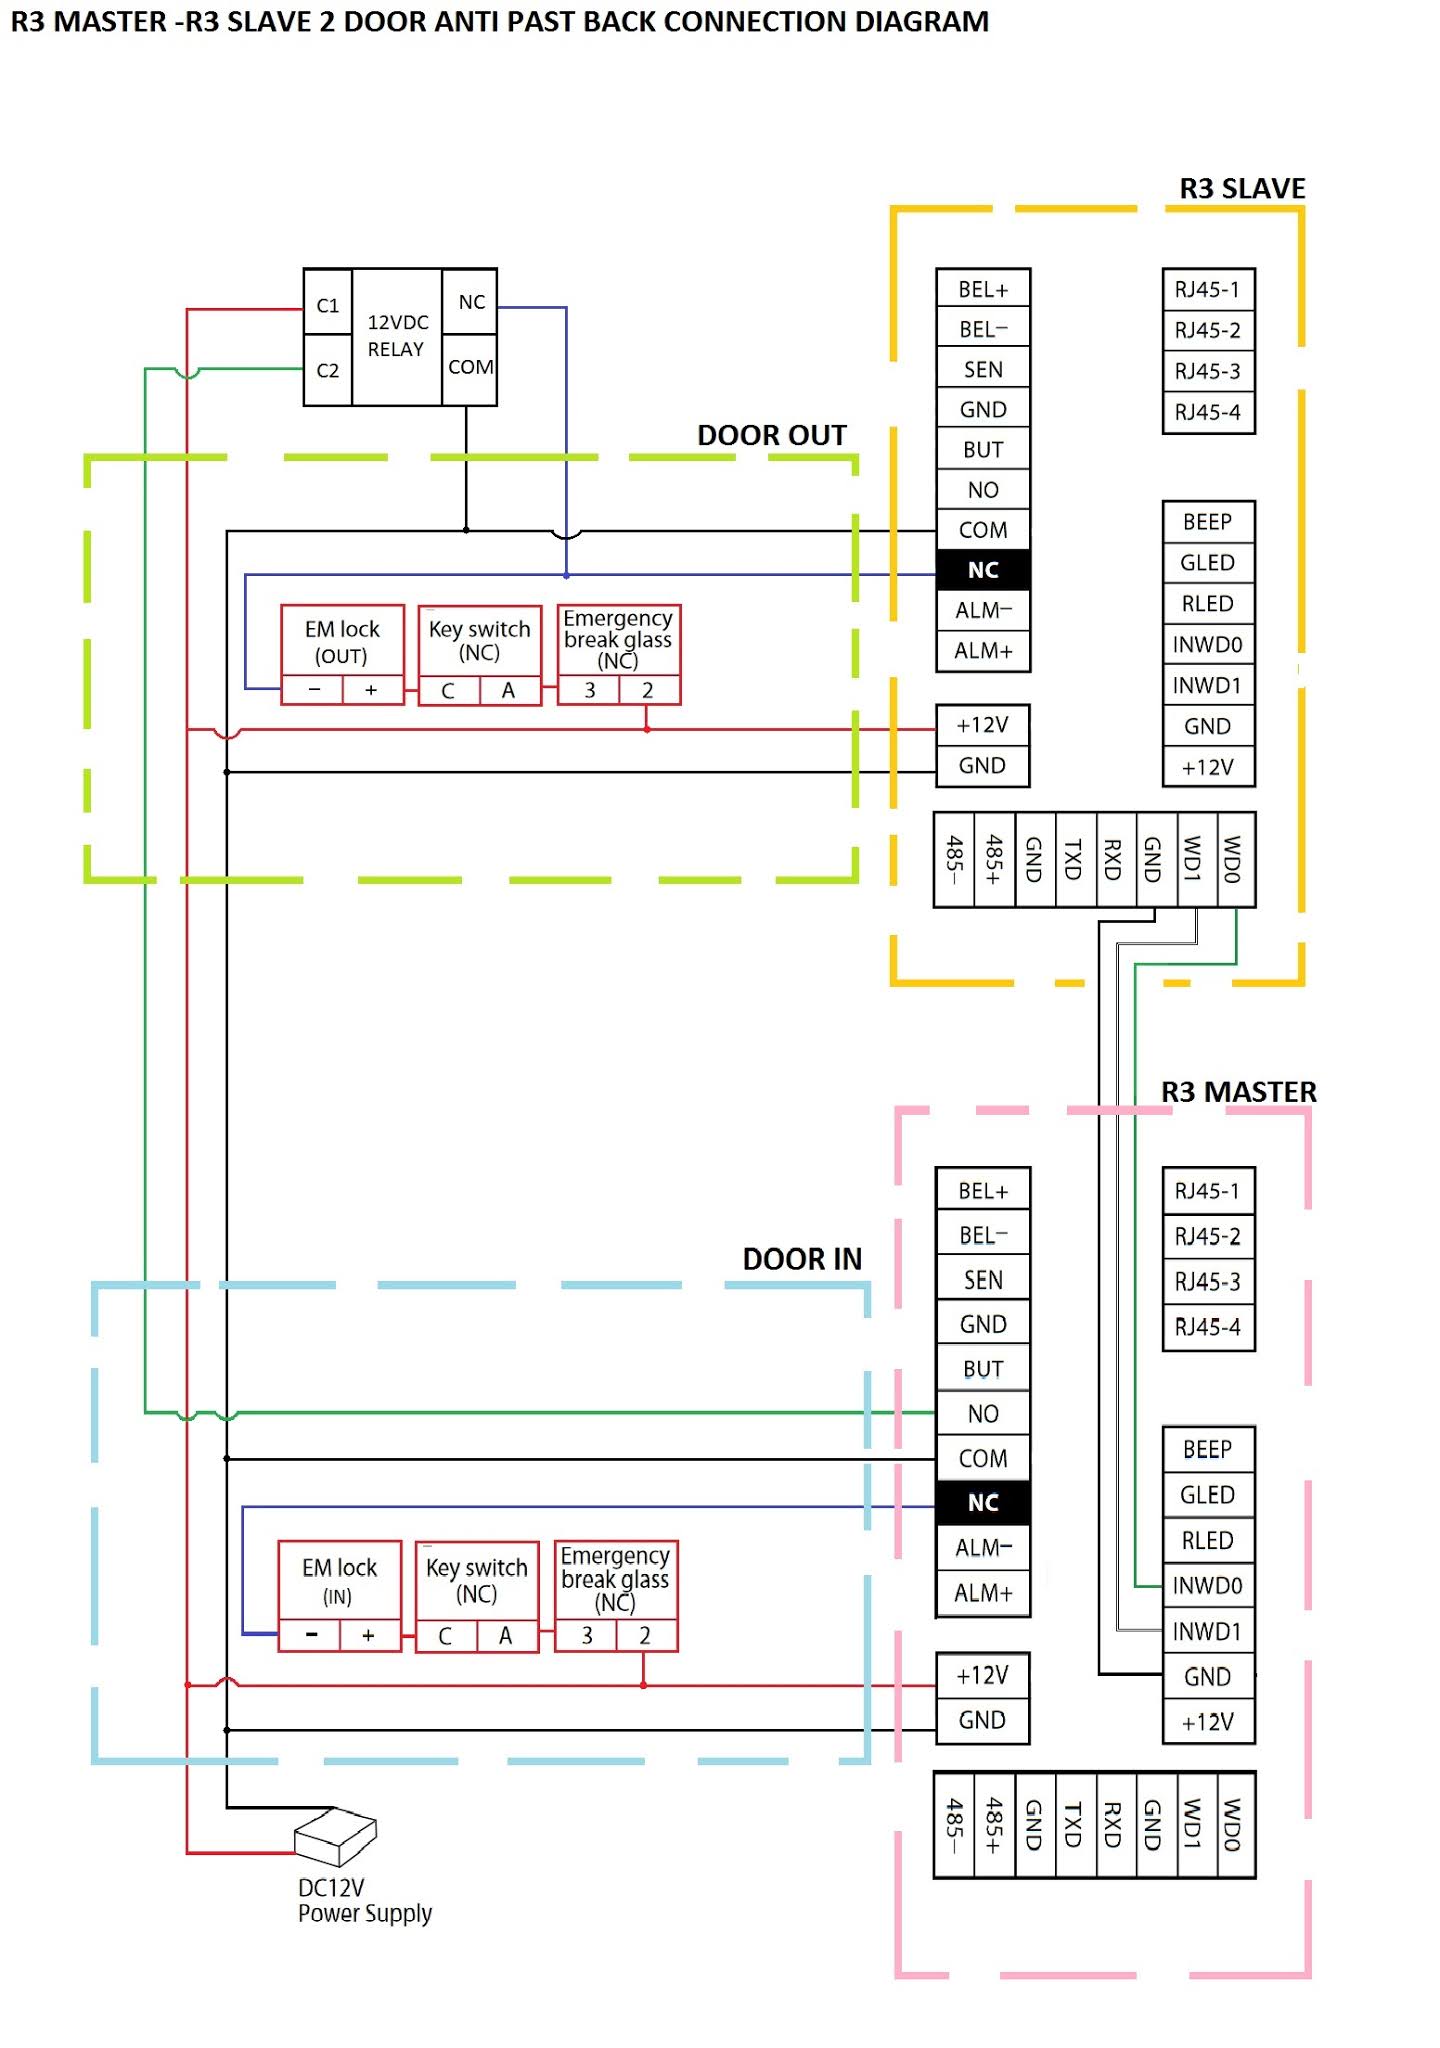
2) Connect the R3 ( MASTER) - R3 (SLAVE) follow the connection diagram below:

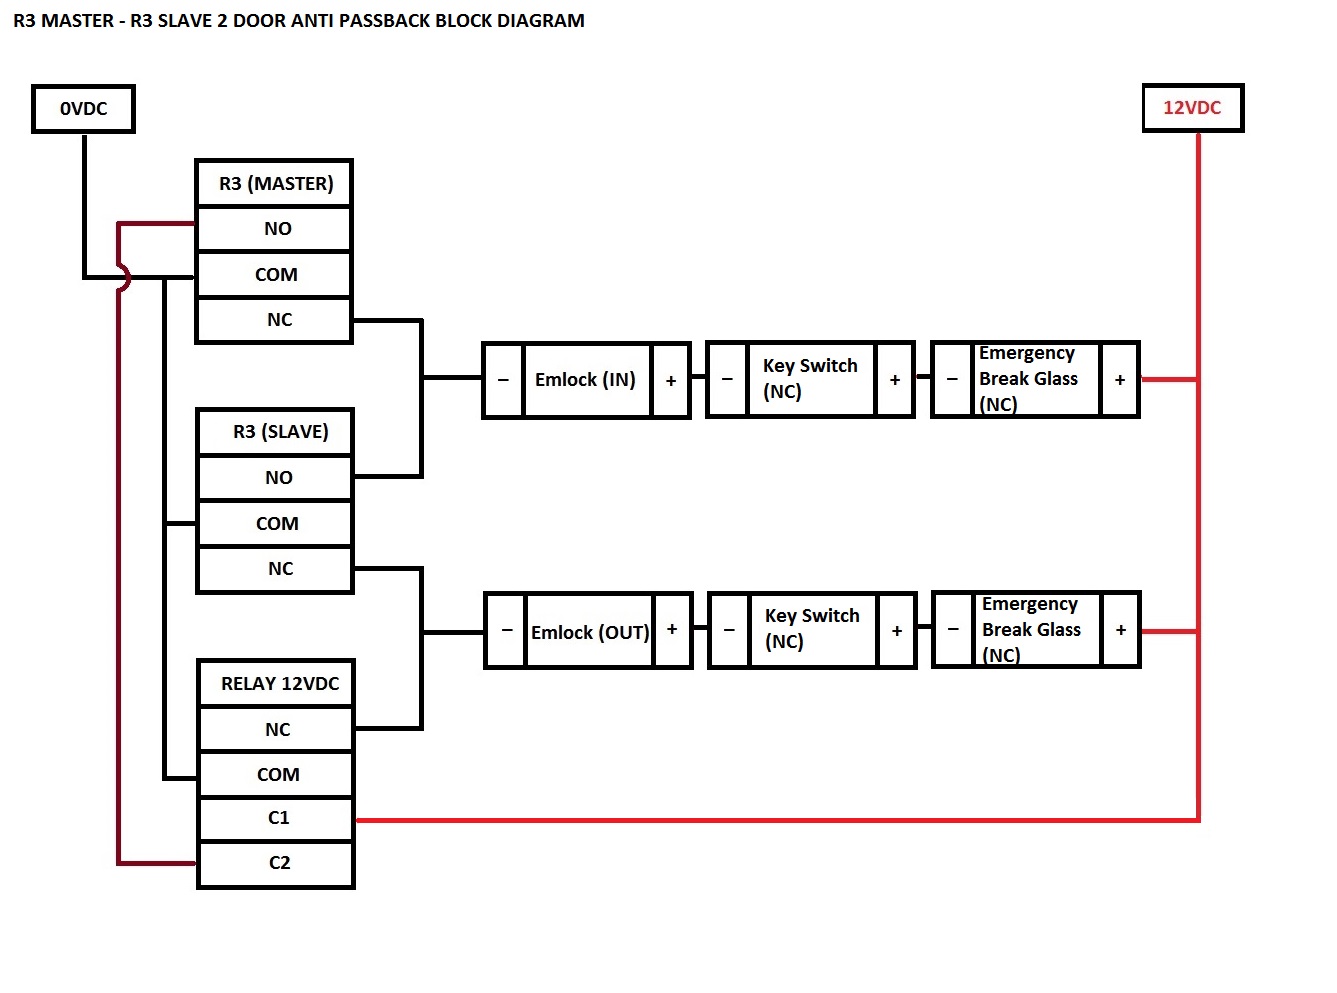
For your better understanding, here is the connection block diagram:

3) For this connection, the External Relay 12VDC required for controlling the EM lock only opens accordingly with an anti-passback setting.


Note: If some of the screenshots or steps viewed here are different from the ones in the current system, this is due to our continuous effort to improve our system from time to time. Please notify us at [email protected], we will update it as soon as possible.

0 comments:

Have any questions or inquiries about FingerTec? Drop your input here.

Organize Assign User to Device Module in TimeTec TA

Wednesday, September 09, 2020 TimeTec 0 Comments


Introduction
Assign users to different clocking devices to enable viewing or reporting of attendance using selected devices. Enable the permitted devices of each user according to the permission provided by the Company and ignore the devices which you did not assign any users.

Process
Login to TimeTec TA > Go to DEVICE > Choose Assign User to Device


Filtering User
Choose information based on your requirement and click on the search button to submit your preferences.

User access data
User access data is the user verification data used in the device to verify users for clocking or accessing. The data will be stored within the system and can be uploaded to other FingerTec Terminals.

User access data type:
- Fingerprint count
- Card ID
- Password
- Face template


User Privilege
User Privilege in Assign User to Device allows you to assign user roles accordingly to access certain settings within the devices and terminals. 

Edit User
1. Click on the edit icon to edit user information. 


2. To submit the configuration of the changes, click on the submit button.

How To Enable/Disable GPS & Web Clocking in TimeTec TA:
1. Click on the ‘Edit’ icon at the User’s tab and Set Web Clocking to ‘Yes/No’ to Enable/Disable.


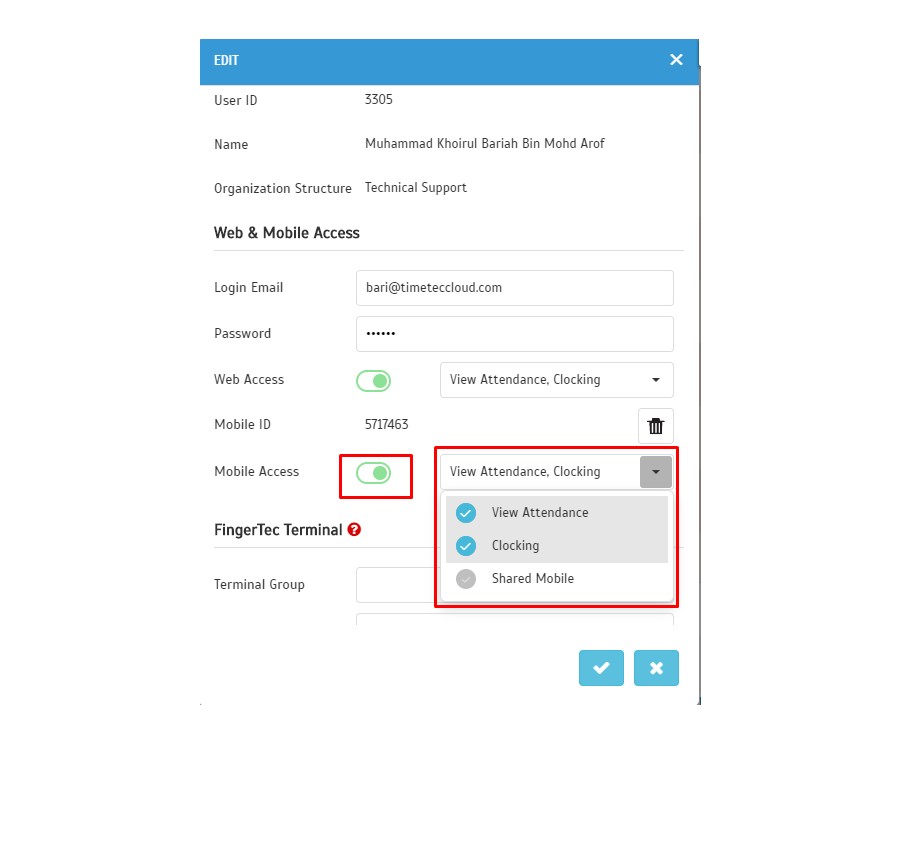
2. To Enable/Disable Mobile access, turn on the clocking. Next, click Update/Cancel to save the changes.

Batch Update
To change the Web and Mobile Clocking, as well as FingerTec Terminal permission settings for more than one user, Admins can likewise use the Batch Update option accordingly.

First, select all of the relevant users, then click ‘Batch Update’ to adjust the settings.

Next, select Web/Mobile Clocking and Enable the option to allow Web Clocking or Disable the option to prevent users from accessing the function. Please refer to the following:
To Enable


To Disable


TimeTec TA Clear Mobile ID
1. Click on the user “Edit” icon


2. Click on the icon to select > Click on submit to complete the step


Batch Update: Clear mobile ID
3. Select User > Click on “Batch Update”


4. Select “Reset Mobile ID” > Submit


Note: If some of the screenshots or steps viewed here are different from the ones in the current system, this is due to our continuous effort to improve our system from time to time. Please notify us at [email protected], we will update it as soon as possible.

0 comments:

Have any questions or inquiries about FingerTec? Drop your input here.

Common Issue on Attendance Sheet Record and How to Fix It - Ingress & TCMSv3 Software

Friday, September 04, 2020 TimeTec 0 Comments


Introduction
In some cases, even though you have correctly configured a Clocking Schedule and that transaction log was already captured in the Data Audit List, there are still certain factors and issues that might lead to the failure of generating and getting the correct or actual record in the Attendance Sheet. This article will be guiding you on the steps to troubleshoot this problem by checking on the possible causes of this issue.

Benefit
By reading and following the instructions according to these tips, we hope to successfully address your Attendance record issue before you need to even reach out to our support team for further assistance.

Problem and step to solve
1. Attendance sheet remains blank after Generate
Troubleshooting Steps:
1. Check the validation of the Issuance and Expiry date for the mentioned user at User tab > select User > Details. Please make sure the Issuance date is earlier than the date of the Attendance record that you want to generate.

** If the Attendance Sheet is still blank after this step, you can attempt with the following step 

2. Check the availability of the transaction log under the Data Audit List by going to Attendance tab > select Data Audit List > search the log by User ID, Date Range.

3. If there is no transaction log captured inside the Data Audit List, please re-download the log from the terminal by choosing the Download button (if you use TCP/IP connection) or go to the Attendance tab > select Import Transaction Log (if you use USB flash disk). 

** If the Attendance Sheet is still blank, you can attempt with the next step

4. Check the Day Type setting under System Setting > System Parameter Setting > select the Attendance tab. Please make sure the Day Type Name, Range, and Wages setting are not left in blank.

** If the Attendance Sheet is still blank. you can try to do the next step

5. Check the Clocking Schedule setting. Please make sure you have configured your clocking schedule correctly. If you already configure the Clocking Time correctly, the Attendance record with employee name and date should appear in the Attendance Sheet after you Generate the record.

6. However, if the Attendance Sheet is still blank (no name and date appear), please check under Clocking Schedule > Clocking Range > check the option Enable Attendance Record from the selected device. Please make sure you have selected all devices that you have already connected and activated on your software.

** If the Attendance Sheet is still blank, you attempt with the subsequent step.

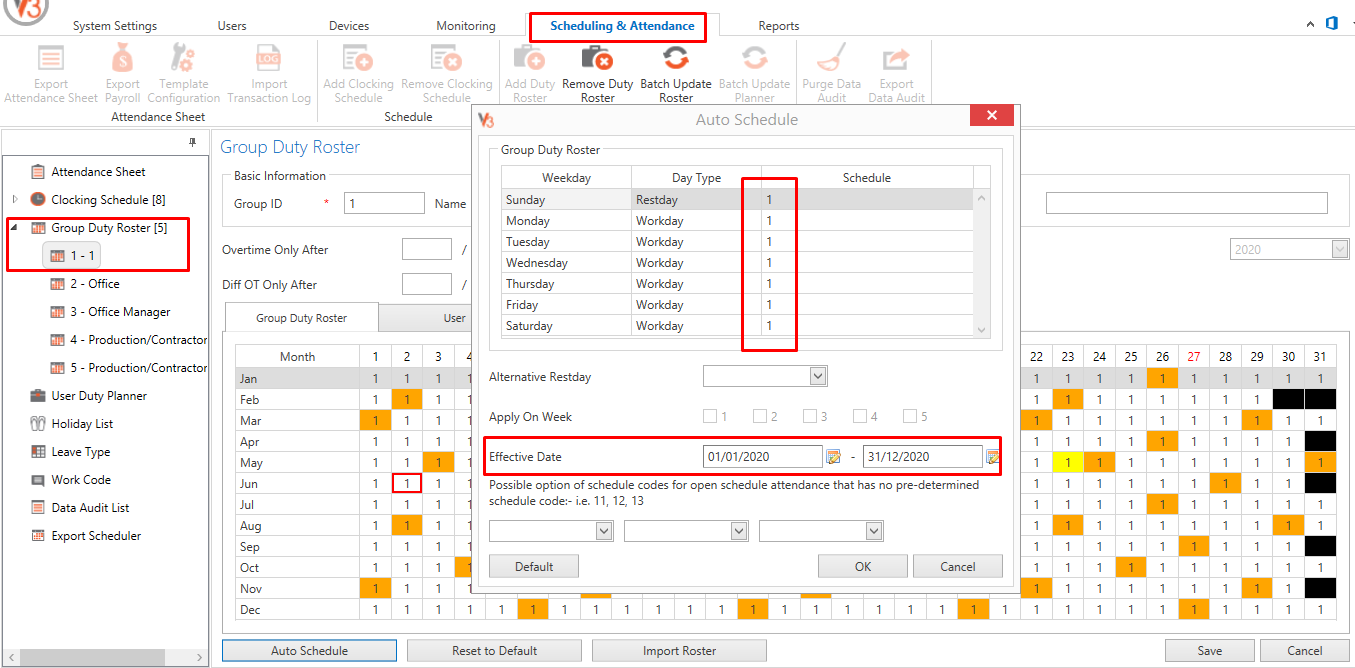
7. Finally, here is the last option and setting which you can attempt with. Please make sure the Group Duty Roster that you have used is not blank. Otherwise, you can try to reschedule your roster by selecting Group Duty Roster > select Roster > Edit > Auto Schedule > select dedicated schedule and Date range > Ok.

If you have already followed all of the above steps and still unable to resolve this matter, we recommend that you contact your local reseller or email us at [email protected] to get further assistance. 

0 comments:

Have any questions or inquiries about FingerTec? Drop your input here.