Introduction
WIFI connection is widely used these days to connect users with the most recent technology and updates. It provides users with greater mobility where the user can connect to a network or the Internet while moving freely around the space. For organizations that select the best mobile connectivity options, the choice often comes down to a WIFI connection.
At FingerTec, we offer a variety of selections of WIFI devices to meet the customer’s needs. Among the devices which FingerTec supports through the WIFI are Face ID 4 and Face ID 4D FMM220.
Basically, customers can have an option to purchase the Face ID 4 and Face ID 4D FMM220 with or without the WIFI function. For customers that have already bought the Face ID 4 or Face ID 4D FMM220 that comes without the support of the WIFI function, here are the tips you need to carry out the WIFI Modification, if necessary.
Face ID 4 and Face ID 4D FMM220 WIFI Modification requires the WIFI Module and the WIFI Antenna. If you need to perform the customization, you may send us an inquiry to www.fingetec.com or call our reseller for further assistance.
Steps
1) Unscrew the back cover and open it. Please be careful when you are disconnecting the speaker cable. The speaker is located at the back cover whereas the connector is located at the MCU. 2) Disconnect RLED cable, RFID cable, USB cable, GND and Touch panel flex cable from the MCU
3) Take out the MCU by slightly pushing forward the cover clip from MCU and pull it out from the MCU.
4) Separate the LCD Screen from the MCU by slightly pushing the LCD screen bracket clip and carefully pull up the LCD screen bracket from the MCU. There you will find a LCD Flex cable connects to the MCU and that needs to be disconnect by slightly pulling the black clip toward the Flex cable (Please do not fully pull out the clip. Ensure the cable is just about loose from the connector) and then you may pull the cable out cautiously.
5) Solder the WIFI Module on the MCU and connect the WIFI Antenna at the WIFI Module
6) Reverse step for the installation for MCU by connecting all back and peel of the WiFI Antenna sticker and stick on the front cover before closing it with the back cover
8) Configure Face ID 4 or Face ID 4D to connect it with WIFI
Menu > COMM > Wireless Network > WIFI (ON) > choose WIFI that want to be connected
Note: If some of the screenshots or steps viewed here are different from the ones in the current system, this is due to our continuous effort to improve our system from time to time. Please notify us at [email protected], we will update it as soon as possible.
Introduction
The new version of Face ID 4 has been installed with a new version of coreboard (FMM). Some of the options or settings are different from the previous version. In this version, we have improved the registration process for face enrollment.
Steps
Face Enrollment
For users who wear glasses will need to register two face templates so that the facial recognition machine will be able to recognize them as the same user. In doing so, users do not need to register two IDs for the same user.
The first pop up green box is where users are required to align their glasses to the green box.
After the green box appears for the second time, users will need to remove their glasses until the process is completed.
Complete the rest of the enrollment process and do not forget to click save. The device will be able to recognise the users with or without the glasses after the completion of face enrollment.
Limit Face
Limit Face is a setting to let the machine detect automatically the facial features when a user approaches the Face ID. Limit Face’s default is “ON” implying that the user will need to select the clocking type such as Clock In or Clock Out before the machine detects a face to verify. By disabling the Limit Face option, the camera will automatically detect the face without selecting the clocking type. Follow the steps below to set the “Limit Face” feature:
Go to
Menu > System > Face
Download photo
There are options to download attendance and blacklist photos to monitor user activities.
Plug in
USB > Go to Menu > USB Manager > Download
Note: If some of the screenshots or steps viewed here are different from the ones in the current system, this is due to our continuous effort to improve our system from time to time. Please notify us at
[email protected], we will update it as soon as possible.
Introduction
Most of the FingerTec terminals come with multiple verification
method, such as card verification, password verification, fingerprint
verification or face verification. The credentials of the users is very
important - The credentials of the users are
very important. Either verification for time attendance or door access, each user will have their own identification credentials,
where it can only be verified by the user alone. However, there are cases where
access card or password is being shared among
users, which leads to the issue of buddy- punching.
Benefits
Group verify type function will give the administrator an option
to perform verification using combination of credentials. Combination of
different credentials will give the administrator an advantage, to make sure
that users access to a door or record their attendance truthfully, without
cheating. Cases such as stolen cards or leaked passwords can be prevented if
this feature is activated, where users need to verify their different
credentials, in order for the log to be recorded, or to release the door lock.
Process:
1. To turn
on this feature for Face ID 4, kindly download the tool from HERE.
Run the tool and insert the
terminal IP address and click at the "Connect" button.
2. The
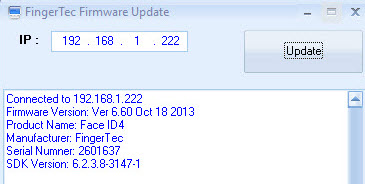
tool will list out the terminal information. Please check the terminal information
shown on the screen, and make sure that the information
belongs to the terminal
that you want to update. Click the “Update” button
if confirmed.
3. The
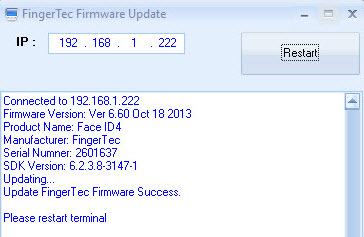
tool will prompt a message if the setting successfully updated.
4. Please
restart the terminal by clicking the “Restart” button.
5. You will see the Group Verify Type
configuration at Menu > Systems > Log Settings >
Default
Authority in the Face ID 4/Face ID 4d terminal.
A series of Face ID 4 repair
videos are now available for our resellers’ convenience! Each video is less
than five minutes long and contains thorough guides on replacing faulty parts
of the face recognition terminal with new ones. These guides include changing
the terminal’s core board, camera module, infrared LED panels, RFID antenna and
more. Any issues you may face with your Face ID 4’s parts can now be
straightened out through these comprehensive videos!
Click here to log in
to the FingerTec Technical Tips website and go to the Repairing Video Clips page
located at the side bar. Click on the By Models tab followed by Face ID 4/4d to
view each of the available repair videos. For further assistance, kindly email
our Support Team at [email protected].
FingerTec has developed a new, added safety feature for Face ID 3 and Face ID 4/4d! When a face template fails to be identified by a terminal after a certain period of time, a photo of the face will be captured and stored. Below are some sample screenshots for a failed verification:
 |
| Failed verification in Face ID 3 |
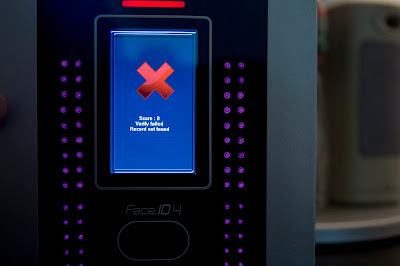 |
| Failed verification in Face ID 4 |
This is useful as administrators can trace back and determine the failure frequency of a particular individual by using FingerTec's TCMS V2 software.
The fail time period of each terminal is set to 10s by default. However, the time period is adjustable. To do so, simply follow the steps below:
Menu > System > Log Settings > Face Fail Time > Enter desired
duration
The latest firmware update for Face ID 4, R2 and m-Kadex has now been released to include bug fixes, new features and enhancements. To download them, click here. Read below for an overview of what is included in each update:
Face ID 4
Firmware version:Ver 8.0.0 (Build 359)
- Upgrade Door Event Function to support offline mode
- Integrate False Log Function
- Resolved bugs found when connected with TimeTec
R2
Firmware version: Ver 2702-04
- Resolved device transaction data's slow return time to TimeTec
- Resolved R2c's no response issue
m-Kadex
Firmware version: Ver 6.23 (build 2880-01)
- Upgrade to support usage of Period Door Open function with Adaptec Plus
Initiated & written by: Jazz
At
the moment, the Windows OS does not recognize the Face ID 4 device when you connect it
to the computer using USB/Client connection.
You will need to install the USB driver
manually if you wish to connect the Face ID 4 device to the computer using USB/Client
connection.
2- To install the USB client
driver:
i-
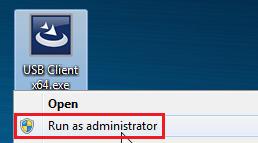
Right click at the .exe file and select Run as administrator.
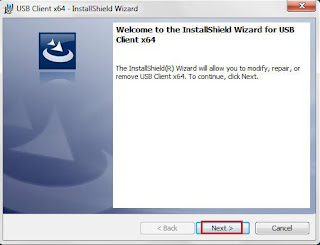
ii-
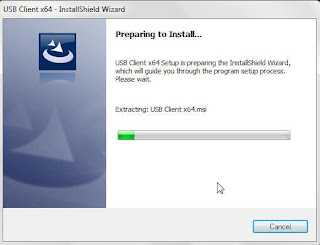
Click Next.
iii-
Click Install.
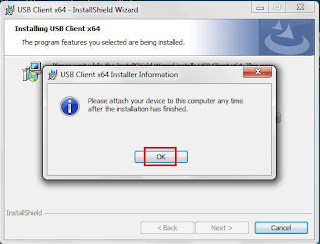
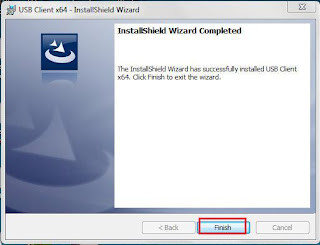
iv-
Click OK and Finish.
3- Plug in the USB client to
the PC and it will install the device driver automatically.
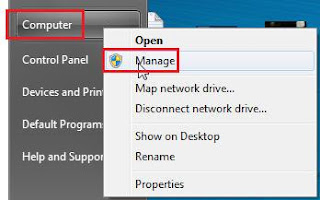
4- Right-click at Computer and select Manage.
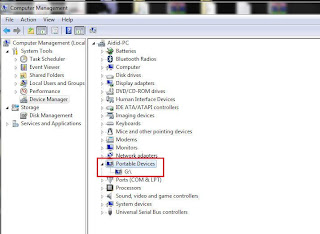
5- The Face ID 4 device is now detected under Portable Devices in Device Manager.
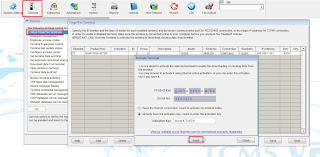
6- Finally, perform the terminal activation
in the TCMS V2 software.
Initiated and written by: Ery


1.png)
1.png)
1.png)
1.png)
1.png)
2.png)
2.png)
2.png)
3.png)
2.png)


