Introduction
A turnstile is a form of gate that provides access to an individual at a time. It can also enforce one-way traffic for the community and restrict passage to only authorized individuals. For example, this setup is suitable for the lobby of an office building. With this setting in place, it will allow access to authorized individuals only; while at the same time preventing strangers from tailgating into the premises. Following the setup, users can use TimeTec Access to view the data from any place by computers or smartphones.
TimeTec Devices
1. There are two types of devices that you can use, which are:
Fingertec Biometric Device(Door Access) - Face ID 5/TD , Q2i , or R3
2. IoT Controller - BLE-2
Process
1. Set Up and Wiring Diagram for Biometric Device
a. Wiring diagram between FingerTec Biometric device and turnstile
Connector pin at back of the device
b. Activate device on TimeTec Access
- For Face ID 5, refer to this
link - For FingerTec device, refer to this
link2. Set up and wiring diagram for IoT Controller
a. Wiring diagram between IoT Controller and Turnstile
Connector pin of BLE-2 controller
b. Activate BLE-2 controller on TimeTec Access, refer to this
link.
3. Manage User and Access group on TimeTec Access
-You may refer to this
link for further details.
4. On the TimeTec Access homepage, you can monitor all employees' access records and print the report.
Note: If some of the screenshots or steps viewed here are different from the ones in the current system, this is due to our continuous effort to improve our system from time to time. Please notify us at
[email protected], we will update it as soon as possible.
Introduction
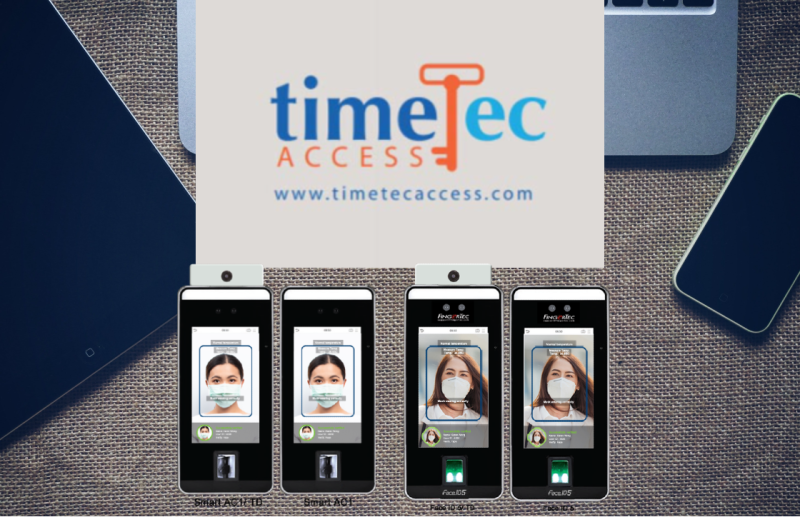
The Face ID 5 or Smart AC1/TD is a visible light facial recognition access control device for modern office access. It supports multiple verification methods, including Face, Fingerprint, Palm & Password. In addition, it is embedded with a mask reading and fever detection features that can authenticate a person’s identity with a face mask on and read the body temperature before giving access to those with healthy reading. Furthermore, the extra wide-angle recognition with up to 2 meters recognition distance made this device one of the fastest and contactless verification methods that significantly reduce the potential risk of cross-contamination in premises.
This article explains how to add the Face ID 5 and Smart AC1/TD in TimeTec Access, the cloud-based access security management solution. With the integration of face recognition device in TimeTec Access, it provides tight security with the most accurate biometrics authentication, and TimeTec Access also provides the convenience of data access and data management directly from the web browsers mobile applications.
Process
1. Adding devices to TimeTec Access
a) Configure the device Server address. Go to Menu > Comm > Cloud Server Setting and add the server address https://sg-best.zkclouds.com
1.png)
b) On Timetec Access , Click Device > Terminalc) Scroll down on Smart DBS Terminal page, click on “Add” button and fill in the device information.
2. To upload all users' information into the device, click on the "Sync Info" button. Next, you may enroll the user's face or other biometric on the device.3. After you are done with the enrollment, you can download all users' face templates into TimeTec Access, ready for transfer to another device.To download, select device > Manage terminal > download user to TimeTec TA > “Reload Data”
Note: If some of the screenshots or steps viewed here are different from the ones in the current system, this is due to our continuous effort to improve our system from time to time. Please notify us at [email protected], we will update it as soon as possible.
Introduction
TimeTec Access offers weblink face enrollment to provide a hassle-free and efficient system for all its users. This process lets users either upload their own photos or take a selfie via a weblink to enroll for facial recognition. Users will be able to use facial recognition devices such as the QF Master device given that their enrollment has been approved.
Process
Step 1 - In TimeTec Access, click on Device > Face Enrollment and QR Code.
Step 2 - Make sure to enable the Face Enrollment via the Web feature, otherwise you can only do face enrollment via the QF Master. Search User and click Enroll to send the Face Enrollment link to the User's email. Users need to verify their emails before they can receive the links.
Step 3 - Uncheck Auto Approval if you wish to check and approve the enrollment that users submitted. Otherwise, the Face enrollment will be auto-approved.
Step 4 - Users will receive an email with a link attached to guide in performing the face enrollment in TimeTec Access.
Step 5 - Users must upload/capture 3 pictures for registration. For more information about Face Enrollment via Web browser, please refer to this link . Click the Submit button after user has uploaded the photos.
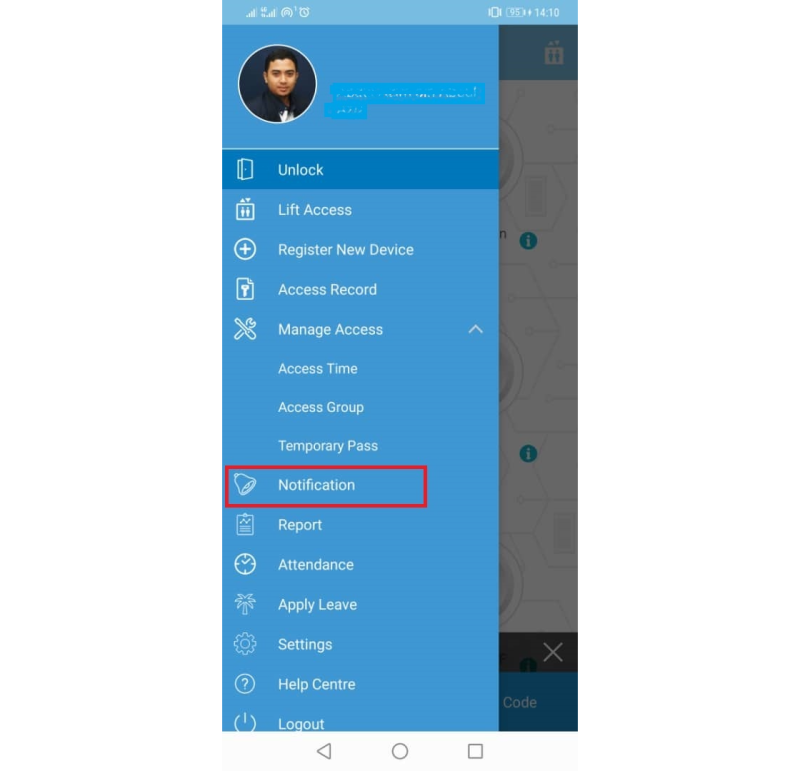
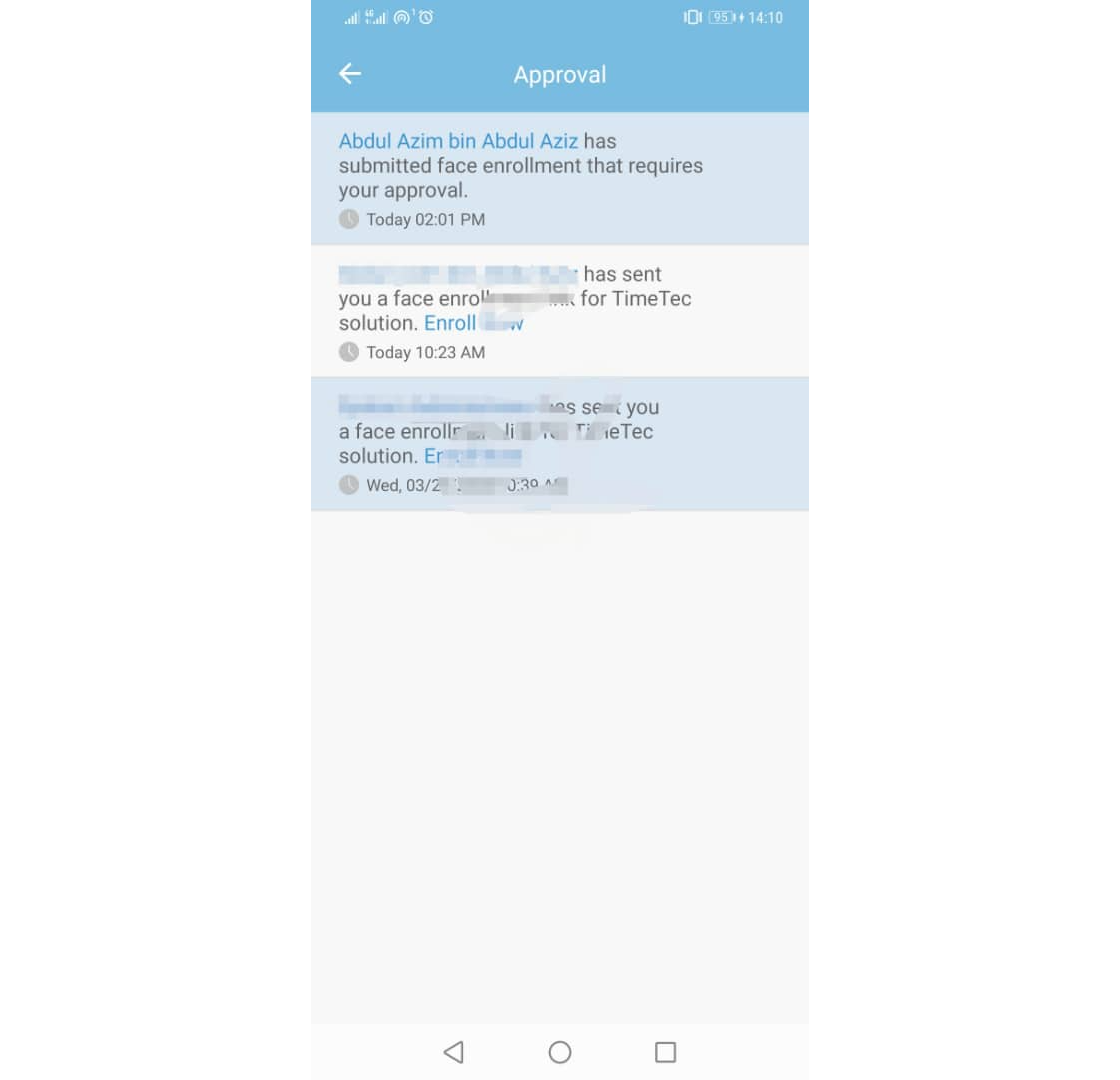
Step 6 - After user submitted the photos, the admin who sent out the Face Enrollment link will receive a notification via the mobile app or an email to approve the enrollment.
Step 7 - To approve user face enrollment, login to TimeTec Access, click User > Face Template and QR Code. Click the ‘Pending Approval’ on the User face template. Select one photo as the face template, and click on the Approve button. Subsequently, a face icon will be shown on the face template column indicating that the face template has been saved successfully.
Note: If some of the screenshots or steps viewed here are different from the ones in the current system, this is due to our continuous effort to improve our system from time to time. Please notify us at [email protected], we will update it as soon as possible.
Introduction
In view of security concerns, TimeTec Access offers the access rights control to authorize users to manage the system role within the organization. By default, there are two types of User Role:
1. Master (System Administrator) who has full access and is responsible for setting up and maintaining the TimeTec Access system.
2. Normal User - TimeTec Access allows users to create and customize the access rights. Depending on the rights given by the Admin roles, normal users will also be able to assign roles to selected employees.
We target to improve better user experience. In doing so, this article will provide some tips on managing system roles and the admin modules more efficiently and effortlessly. This is how it can be done:
Process
Step 1 - Add System Role:
Click on the System Role tab, create a new System Role with specific access rights by clicking on the Add button.
At the pop-up window, there will be an option to allow users to copy the access rights from existing System Roles or even to edit the copied role, if necessary. This is to quicker the process in creating a new yet similar system role. Fill up the System Role Name and Description.
Upon selecting the Full Division will allow the Admin to access all users’ information in the Organization Structure while Partial Division will only allow Admin to access a limited amount of users’ information.
Next, selecting Access Point will allow Admin to access and manage the access location of the devices. All depends on the preconfigured Access Point settings.
Subsequently, set the access rights for the System Role by ticking on the Full Module Rights. This will allow all modules access in the TimeTec Access while unticking it will change the accessibility of the module for the role.
Step 2 - Assigning Admins into the System Role:
After setting up the System Roles, the Admin can also be easily assigned under the System Role by clicking on the ‘+’ button.
Once the + is clicked, a pop-up window will appear and a list of Admins (excluded from the role) will be displayed for selection.
Step 3 - Configuring System Role While Adding Admins Into the System:
On the other hand, System Roles can also be arranged specifically while adding an Admin into the system. To add an Admin into the system, please click on the Add button under the Admin tab.
At the pop-up window, select the existing system user that you wish to assign as the Admin and select the relevant System Role. Note that the default System Role is Master if the users do not wish to create any System Roles within the system.
Note: If some of the screenshots or steps viewed here are different from the ones in the current system, this is due to our continuous effort to improve our system from time to time. Please notify us at
[email protected], we will update it as soon as possible.
Introduction
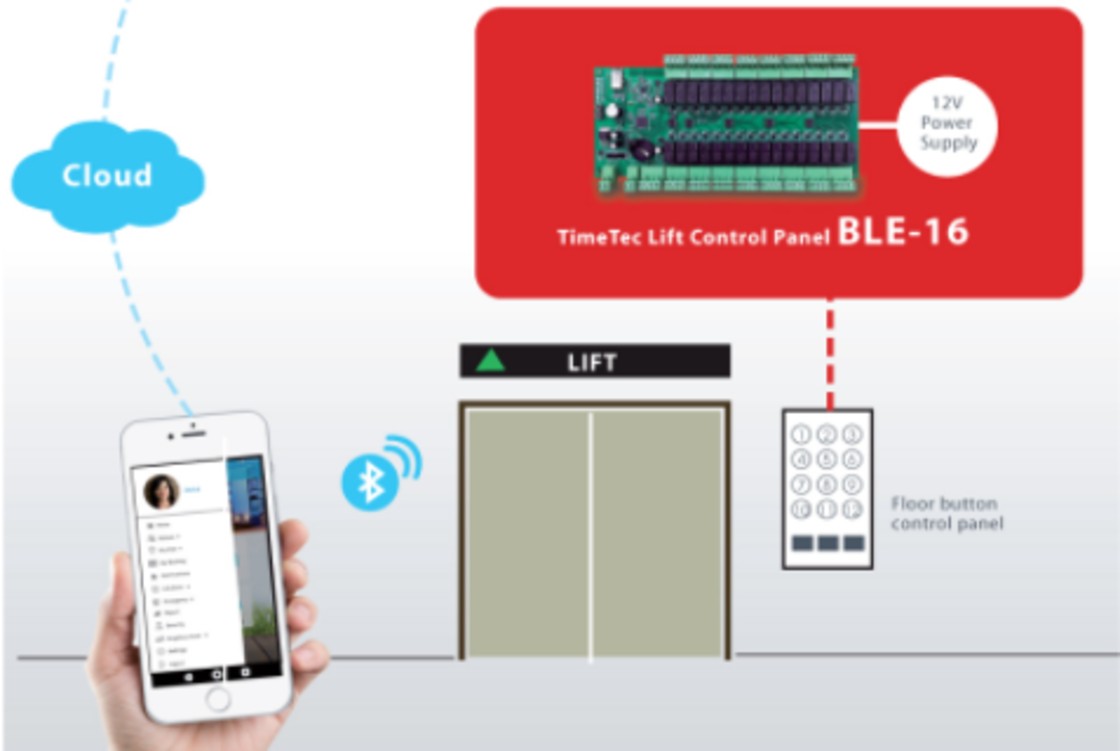
TimeTec Lift Control Panel BLE-16 is known as the TimeTec's lift controller using the Bluetooth Low Energy 4.2 technology and the power of a smartphone for lift access in high-rise buildings. Choose BLE-16 and integrate it seamlessly with TimeTec Access for cloud access control systems to achieve better security and convenience in automation simultaneously.
TimeTec BLE-16 makes elevator experience secure, convenient and centralized. All you need to do is to login to the App and tap on the pseudo-button within the App to access your floor. Refer here for more information on the TimeTec BLE-16 controller.
Process
Step 1 - Add the BLE-16 controller into TimeTec Access by going to the Access Point tab > Manage Devices > BLE Devices. Click on the Add button and insert the BLE-16’s serial number.
Step 2 - Assign the BLE-16 into Lift Access by going to Manage Lift Access > click on the Add button.
Step 3 - Label the Lift name for easier future reference. In the ‘1st Relay Board’ tab, select the added BLE-16 that is installed in that Lift.
Step 4 - Name the floor of each channel as per wiring installation in that Lift. You may skip if you are not using it.
Step 5 - If the Lift has more than 16 floors, you will need to add another BLE-16 controller for the next 16 floors. Click on the ‘2nd Relay Board’ and select the added BLE-16 controller.
Step 6 - Name the floor of each channel as per wiring installation on that Lift for the second BLE-16 controller. You may skip if you are not using it. Click on the Submit button when the settings are done. Admin may view the details for the Lift Access in the web portal.
1.jpg)
Step 7 - To assign User and Access Time into the Lift, go to the Access tab > Lift Access Group.
Step 8 - Label the Lift Access Group name for easier future reference. Select and assign users into the group. Then, click on the Next button.
Step 9 - Select the added Lift into this group and click Next button.
Step 10 - Select the Access Time for this group to access the lift and click Submit.
Step 11 - Then, you may view the details of the Lift Access Group with the total of Lifts and Users in the group stated clearly on the page.
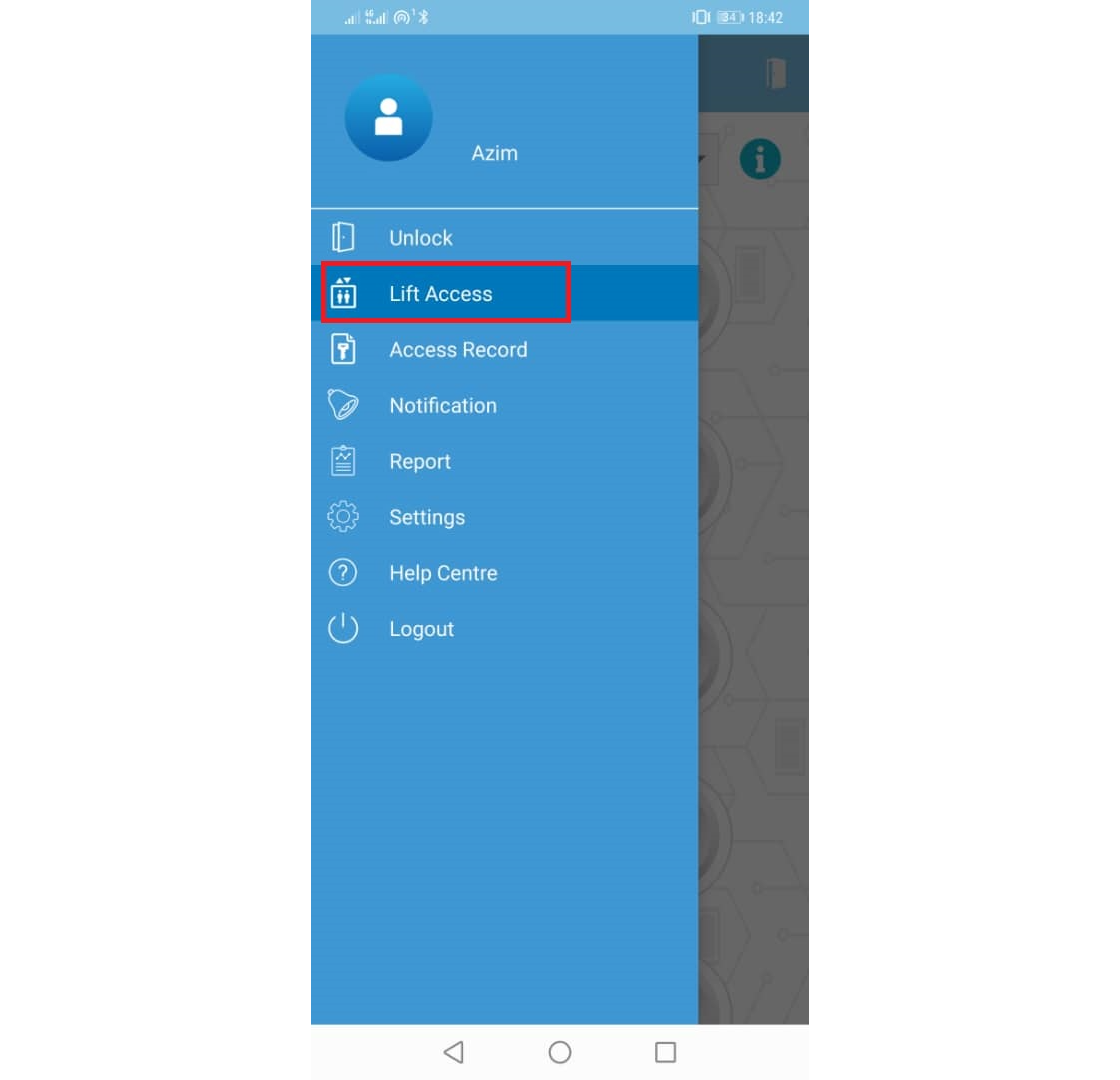
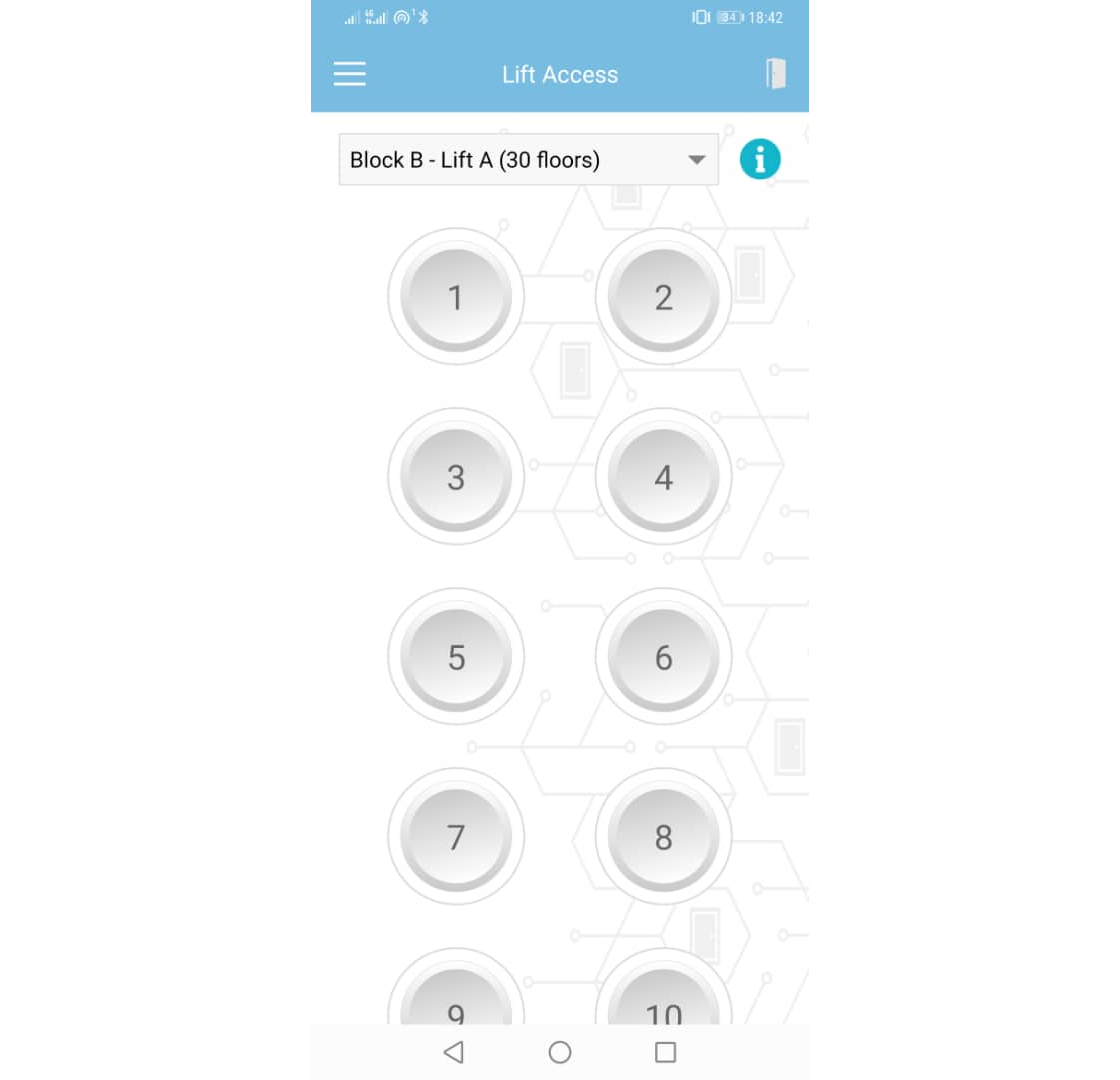
Step 12 - In TimeTec Access mobile apps, re-login to the User account in order to refresh the settings. Then, tap on the Lift tab.
Step 13 - Tap on the Info icon to view the Access Time of the assigned users.
Note: If some of the screenshots or steps viewed here are different from the ones in the current system, this is due to our continuous effort to improve our system from time to time. Please notify us at
[email protected], we will update it as soon as possible.


2.jpg)
2.jpg)
1.jpg)
1.jpg)
1.jpg)

.png)
1.png)
.jpg)
.jpg)
.jpg)
6.jpg)
3.jpg)
1.jpg)
1.jpg)
2.jpg)


.jpg)
2.jpg)
.jpg)
.jpg)
.jpg)
3.jpg)
.jpg)
.jpg)
.jpg)
3.jpg)


3.jpg)
4.jpg)
3.jpg)
3.jpg)
3.jpg)
2.jpg)
3.jpg)
5.jpg)
5.jpg)
3.jpg)

1.jpg)
1.jpg)
3.jpg)
3.jpg)
1.jpg)
1.jpg)
1.jpg)


