Introduction
Live Location Tracking in TimeTec Patrol is a feature that allows you to track the guard’s location in real-time on the Timetec Patrol website.
Steps
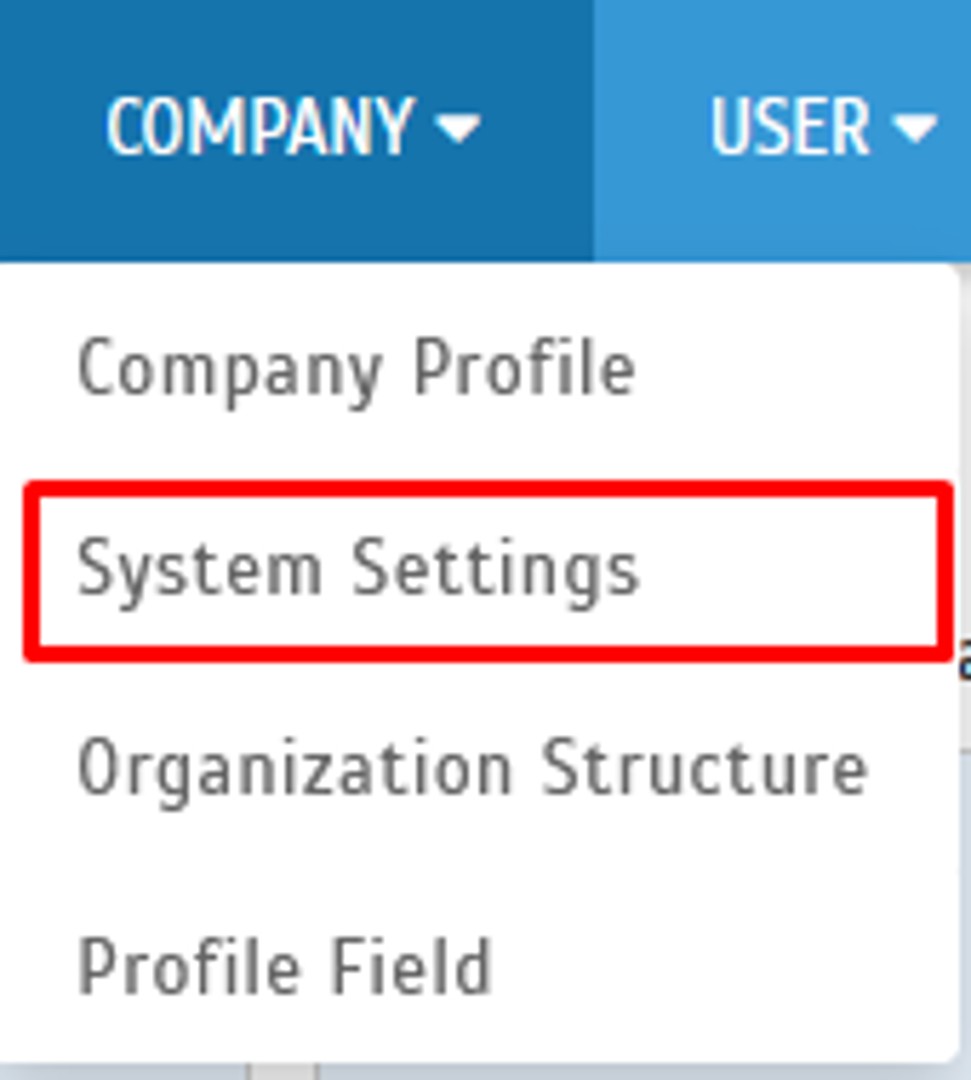
1. To enable the TimeTec Patrol Live Location Tracking, go to COMPANY > System Setting.
2. Go to Patrol Settings. There are two types of Live Location Tracking.
i) After logging in to the mobile app
ii) Start Routes only
3. Enable the Live Location Tracking by going to TimeTec Patrol > Routes > Patrol Device 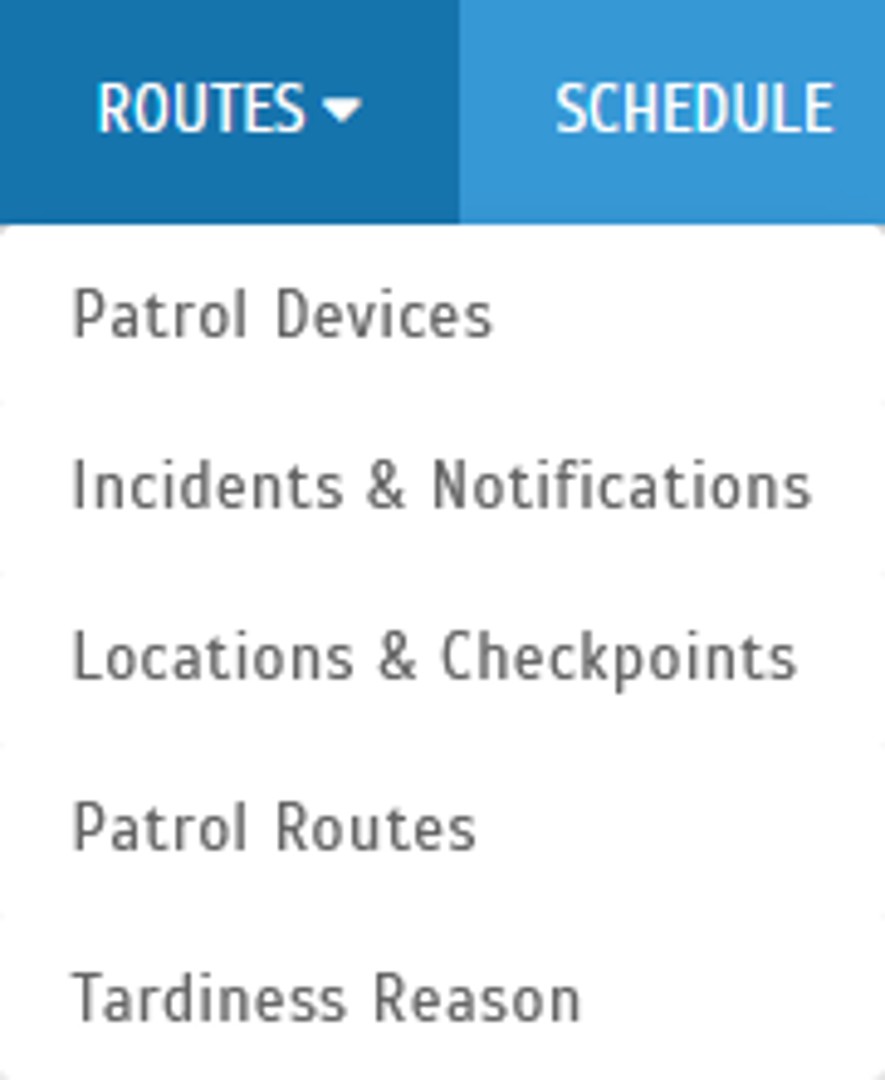
4. Go to Patrol Device List > Subscribe.5. Fill in the device details and enable the Live Location Tracking.

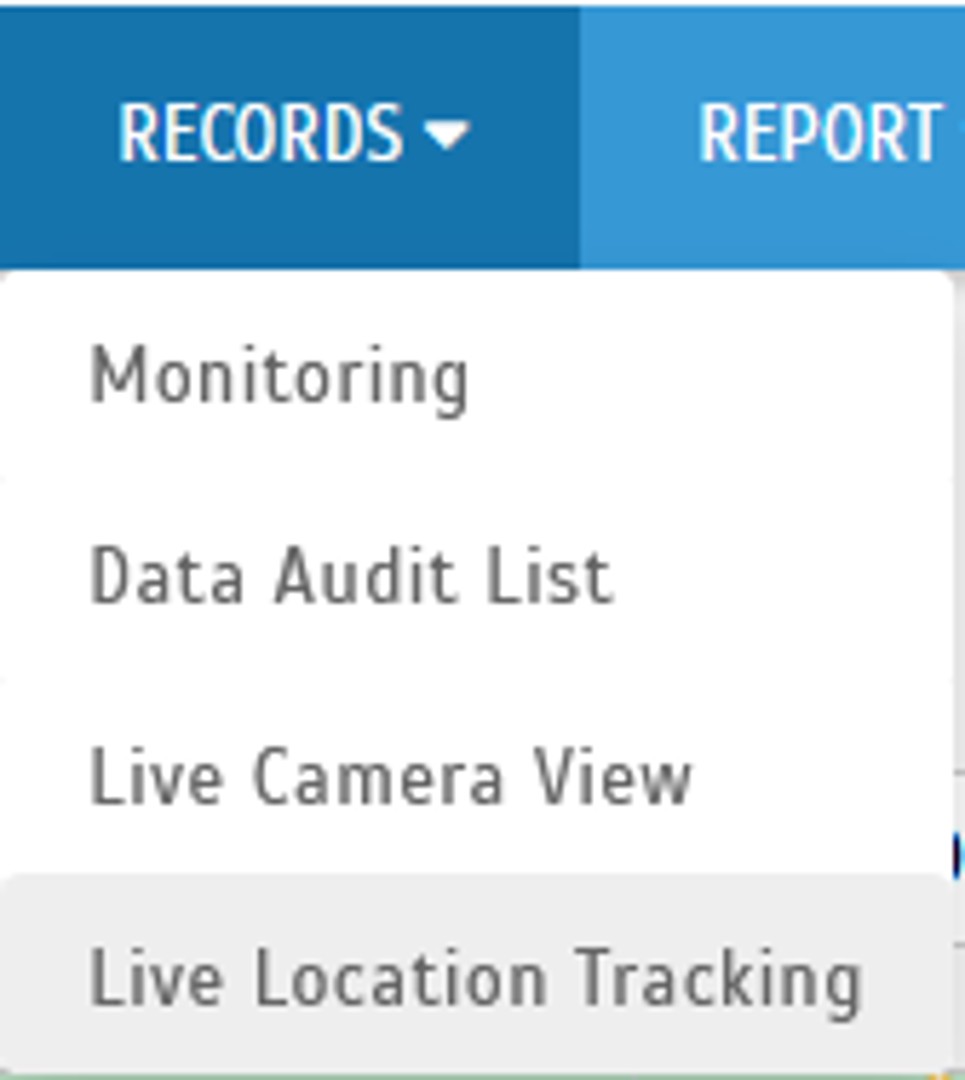
6. To view the Live Location Tracking, go to Records > Live Location Tracking.

Note: If some of the screenshots or steps viewed here are different from the ones in the current system, this is due to our continuous effort to improve our system from time to time. Please notify us at
[email protected], we will update it as soon as possible.
Introduction
TimeTec Patrol is a solution designed to manage a company’s security, it offers a mobile solution for security guards to report their patrolling duties via NFC tags or Beacons and view their patrol routes. Admins can manage the patrol devices to assign security personnel accordingly. In this article, we will demonstrate how to add a new patrol device and assign a guard to the device.
ProcessA. Adding Patrol device
1. When logging into TimeTec Patrol using an Admin account, go to Routes > Patrol Devices
2. Select the Patrol Devices List > Click the Add button to add the new device. Insert the patrol device’s name and mobile ID from the device accordingly. The pairing code will be generated automatically as you insert the mobile ID.
3. To retrieve the mobile ID, open the TimeTec Patrol app, at the Login Page of your mobile app, click on the Mobile ID button. Then, at the web application, enter the prompted mobile ID into the Mobile ID box of the newly added patrol device. The additional information you may find here is the compatibility of your device, whether it's able to use a beacon or NFC tag for clocking. 
4. For first-time login, the guard will need to insert a username and password
and enter the pairing code of the Patrol device, obtained from the step above.
Remarks: Any Android phone with OS v 4.0.0 and above that comes with NFC and/or BLE functionality.
B. Assign Security Guards
1. Go to Assign Security Guards To Device > Click on Assign
2. Select the security officer that will use the patrol device for patrolling and then click update. You may add multiple users to a single device or a single user can be assigned to multiple devices as well.
Note: If some of the screenshots or steps viewed here are different from the ones in the current system, this is due to our continuous effort to improve our system from time to time. Please notify us at
[email protected], we will update it as soon as possible.
Introduction
Scheduling guards is not an easy task because different sites may require different schedules and timings. TimeTec Patrol caters to that complexity by automating the whole scheduling process. Thus, a lot of time and money can be saved instantaneously. Furthermore, with this cloud solution, guards can view their upcoming routes easily via smartphone. This article provides a step-by-step guide on how to configure a schedule in TimeTec Patrol.
Process
1. After logging in as an Admin on the TimeTec Patrol web portal, go to Schedule.
2. Click on the + icon to add a new patrol schedule
3. Insert schedule number and schedule name, then select the schedule type whether weekly or customize. 
4. Weekly type will be the default schedule where it will automatically provide 7 days. You may key in the time slot for your patrol rounds accordingly for each day. Click the + sign to add another time slot for that day. 
5. Customize type will allow you to add the number of days according to your shift rotation pattern. For example, if the sequence will alternate every 2 days, you may set the schedules for the first 4 days while the following days will follow the sequence of the initial 4 days. Click on the + sign to add another time slot for that day while clicking on the + Add More button will add another day slot.
Note: It is recommended to use the customize schedule type and configure it for one day only, use the weekly type if the same schedule will be used every day, as the following days will repeat the same schedule as day 1.
6. Once the time slot has been set, click on the guard icon to assign patrol routes and guards. 
7. In the Edit Routes and Guards window, you may select the patrol routes and guards to assign to the time slot. Please note that only the route that does not exceed the time range will be visible for selection. Should you notice the required route is not available, you may set the time range of the schedule to be longer or amend the patrol route duration to be shorter. Submit once configuration is completed for each time slot.
8. Set the “Start schedule on” date for when the schedule begins to run. “Roll the schedule for coming” is to set the duration of the schedule to repeat the rotation. Minimum rotation can be set for 1 week while the maximum is up to 12 months. Should the schedules need to be used again after 12 months from the date the schedule starts running, you may amend the “Start schedule on” date and generate the schedule again.
For “Notify if routes didn’t start after”, you may select the recipients to be notified if guard(s) fail to start their tour. TimeTec Patrol app will send an alert message via push notifications to the personnel-in-charge.
9. Once the schedule configuration is completed, you may go to the Patrol Schedule Details tab to review the patrol schedule's detail configuration. Click edit if you want to change the guards or route assignments for a specific date.
Note: If some of the screenshots or steps viewed here are different from the ones in the current system, this is due to our continuous effort to improve our system from time to time. Please notify us at [email protected], we will update it as soon as possible.
Introduction
In TimeTec Patrol, the admin can send out job orders to the on duty security guards for them to assist. For example, if there are certain areas that suddenly need to be checked out by the guards, the admin can notify the guards using the Job Orders feature and the patrolling guards can be alerted through the mobile app. Please note that the Job Orders can only be sent out to the on duty security guards which are scheduled for patrol sessions during the time where the job orders were about to be sent.
Process
1. Login as admin into TimeTec Patrol website and go to Records > Monitoring
2. In the Monitoring module, scroll down to locate the On Duty Security Guards section.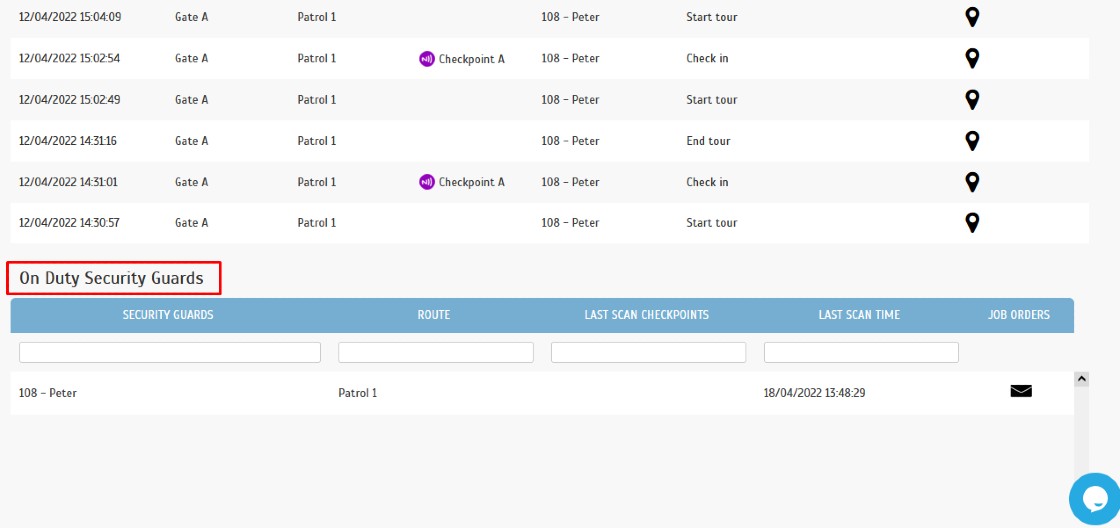
3. List of guards that are currently on patrol will be shown after they have started the patrol session. Click on the send job orders button as highlighted below to insert the message to the guard.
4. Insert your message to be sent out to the patrolling officer. You will see the last scan checkpoints of the guard as well if there are any. Once you have inserted the message, click on the submit button to send.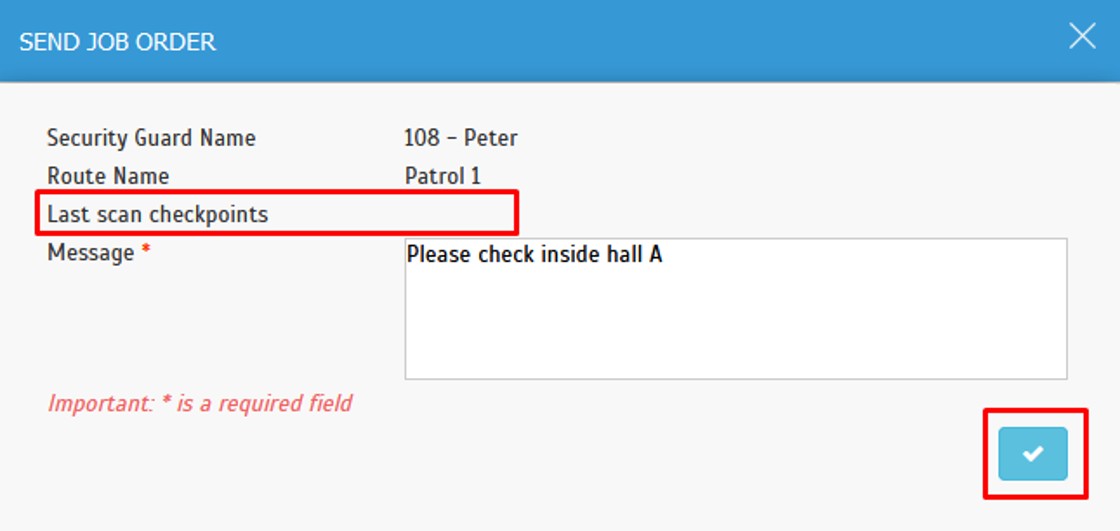
5. The guard will then receive a notification upon the admin sending out the job orders.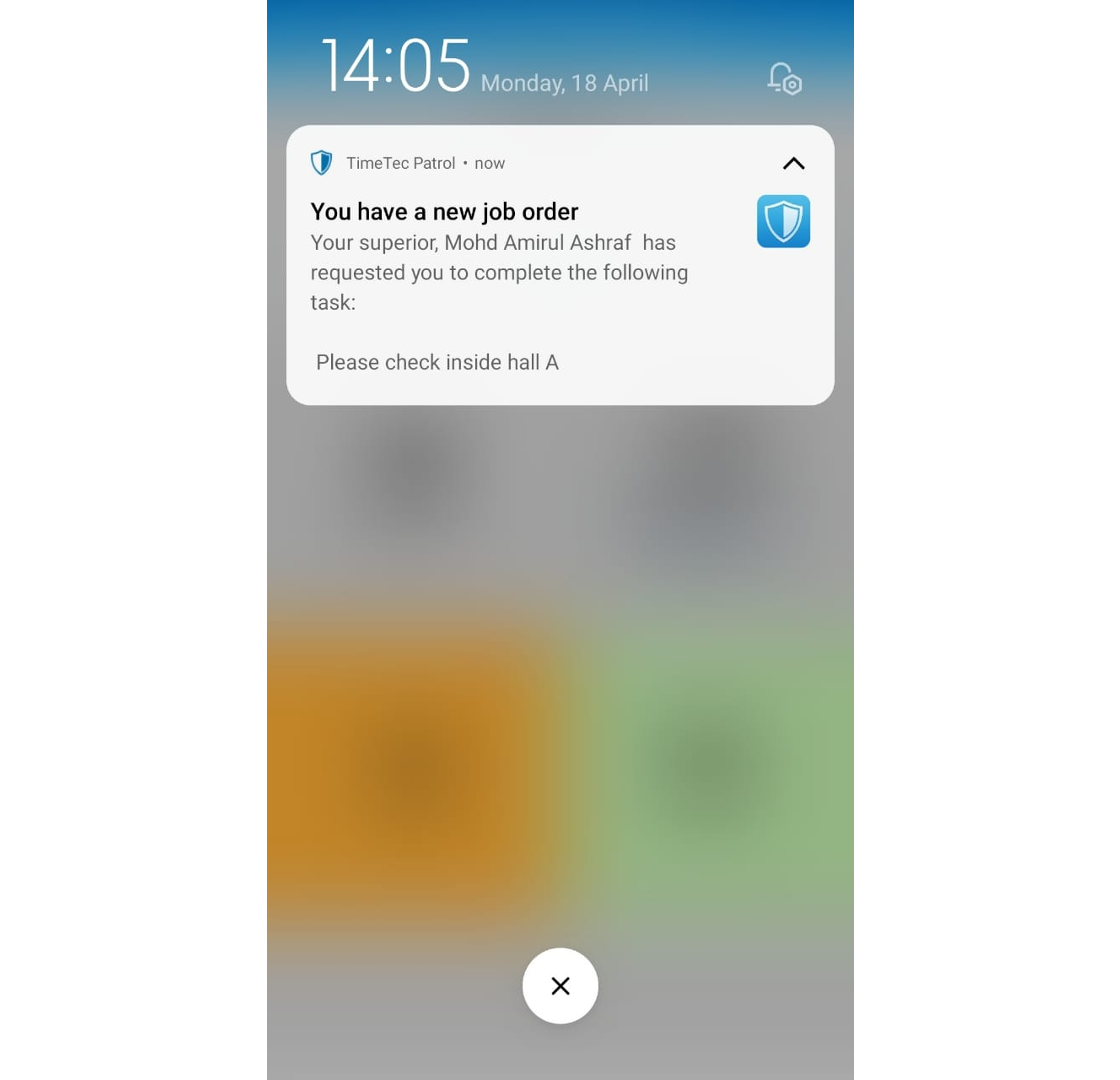
6. Aside from the pull down notification, Job Orders can also be monitored within the patrol mobile app on the Homepage. Tap on the Job Orders to view the job order list.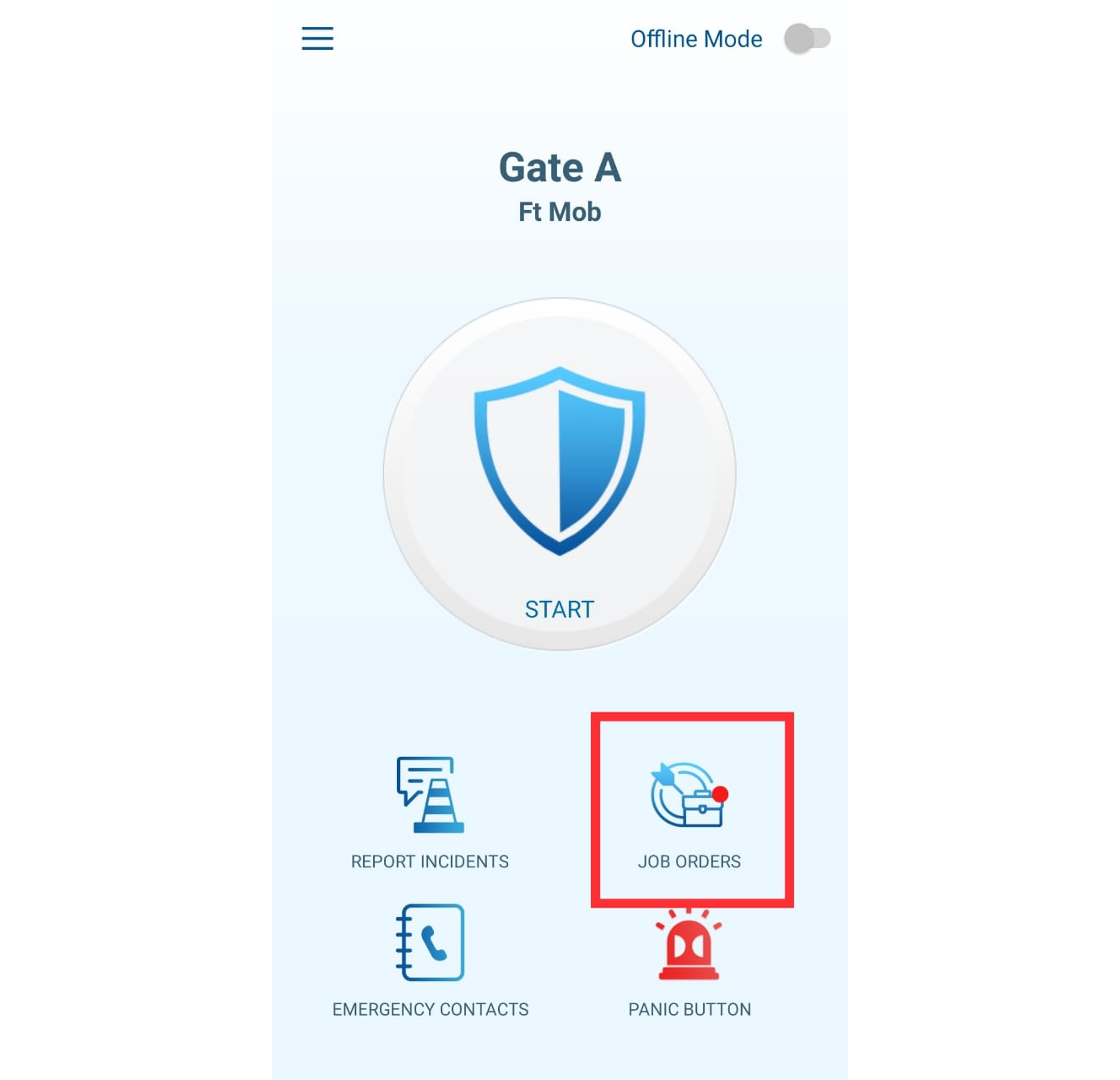
7. All of the submitted job orders by the admin will appear on the list for the guard to review.
Note: If some of the screenshots or steps viewed here are different from the ones in the current system, this is due to our continuous effort to improve our system from time to time. Please notify us at [email protected], we will update it as soon as possible.
Introduction
TimeTec Patrol App is a mobile application of TimeTec Patrol, a cloud-based patrol management system. Patrol personnel can perform duty using this App by tapping the phone on NFC tags along the assigned route. In this article, we will demonstrate how, as an admin, to set up the NFC checkpoint tag.
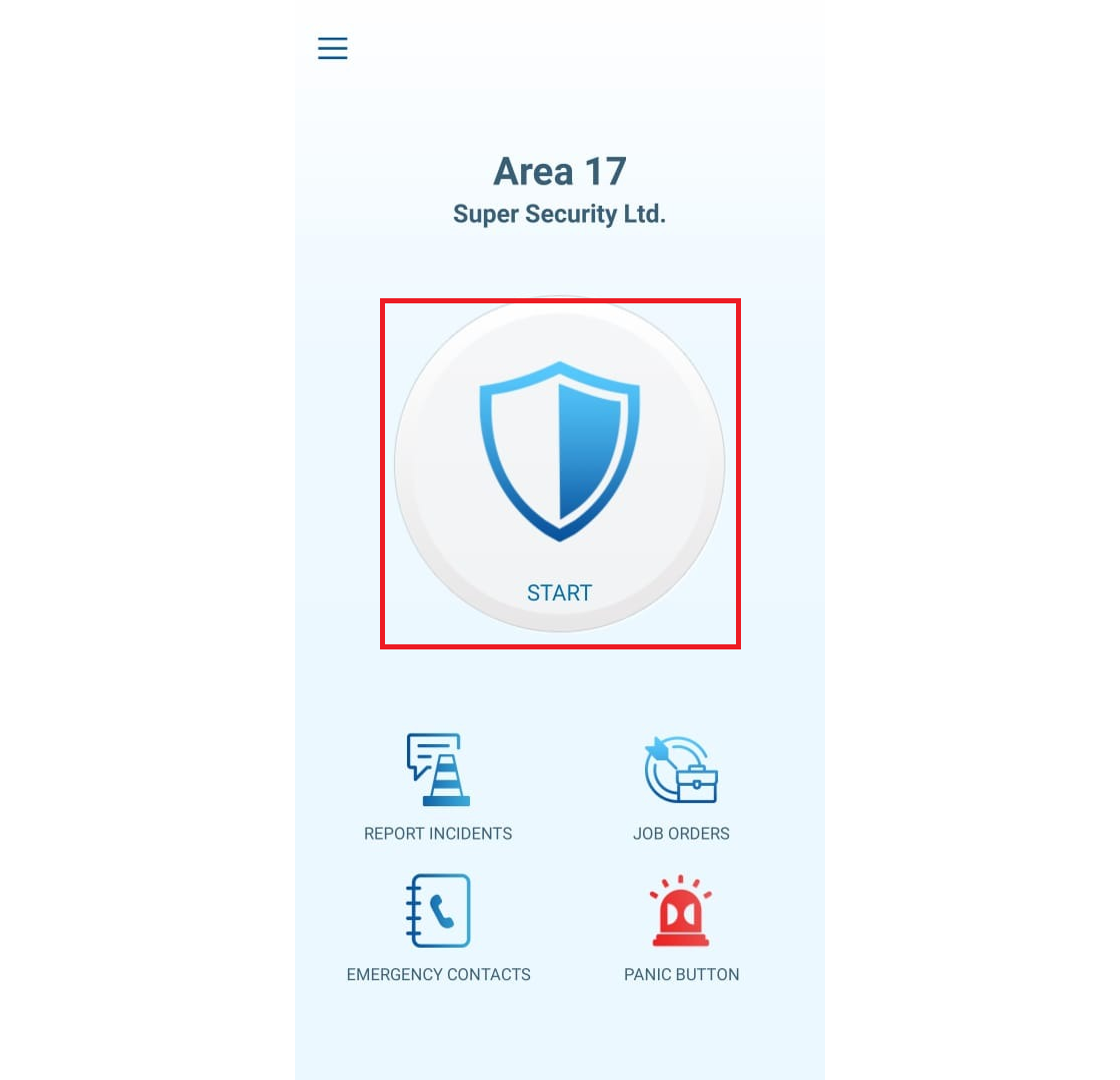
2. Once the above has been configured, login as admin in TimeTec Patrol mobile app, then tap on the Start button.
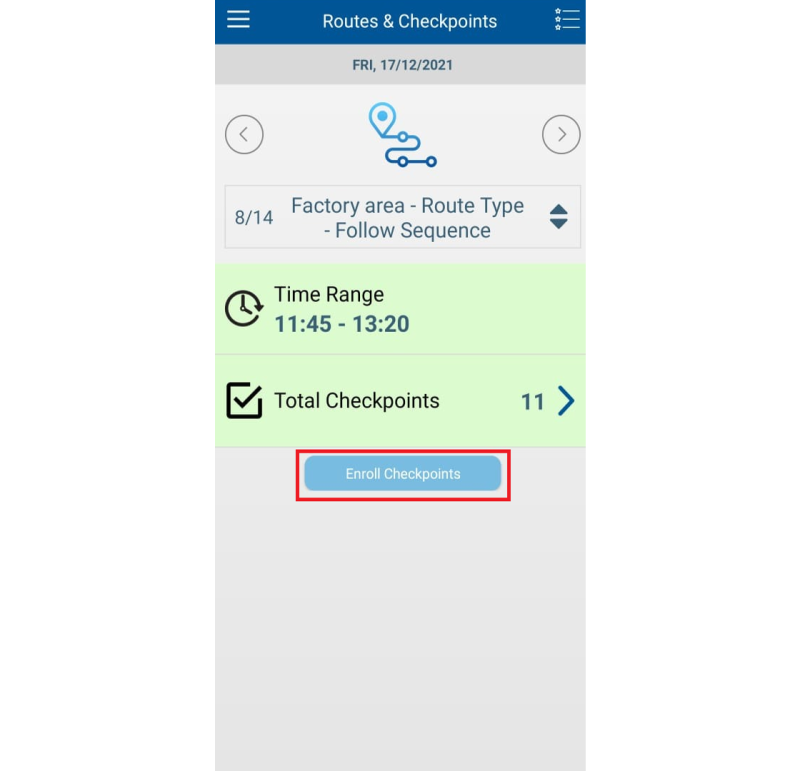
3. Tap on Enroll Checkpoints button to enrol the checkpoint tag. Please note that only system administrators who have been given access rights can see the Enroll Checkpoints button. Kindly review the system role settings if the Enroll Checkpoint button is unavailable in your login account.
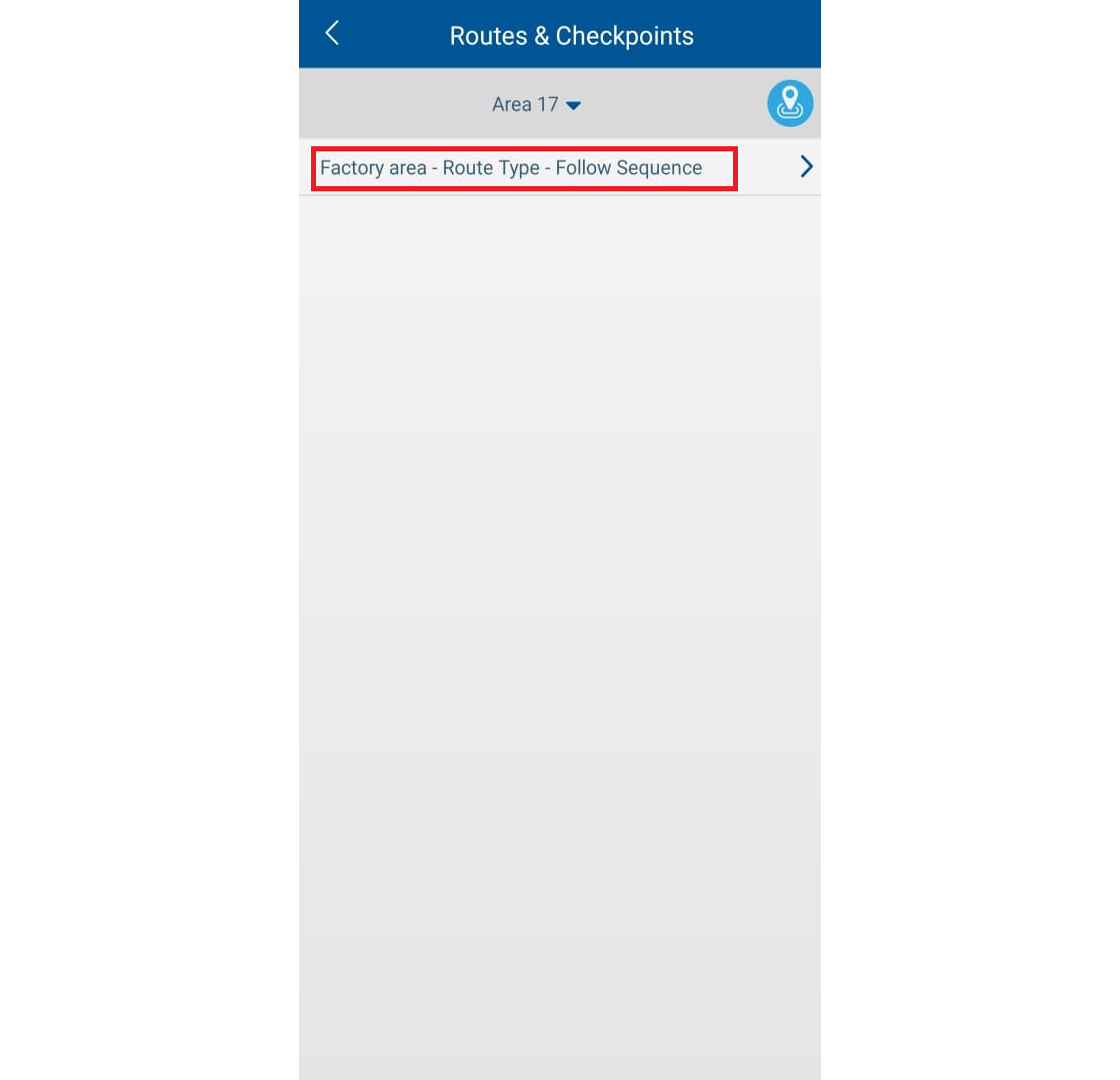
4. Tap on the Patrol Route to enroll the checkpoints within the route.
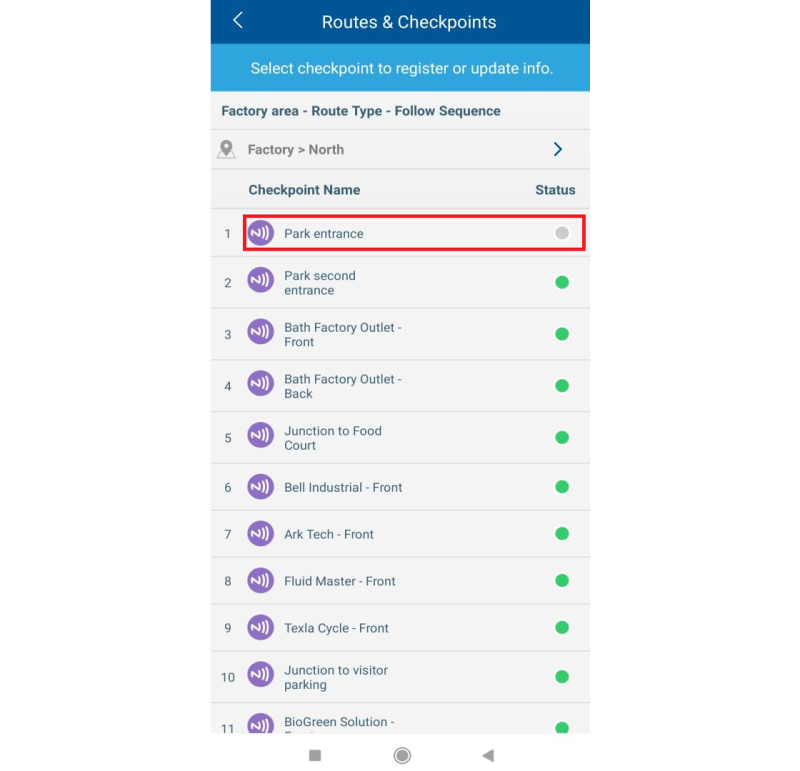
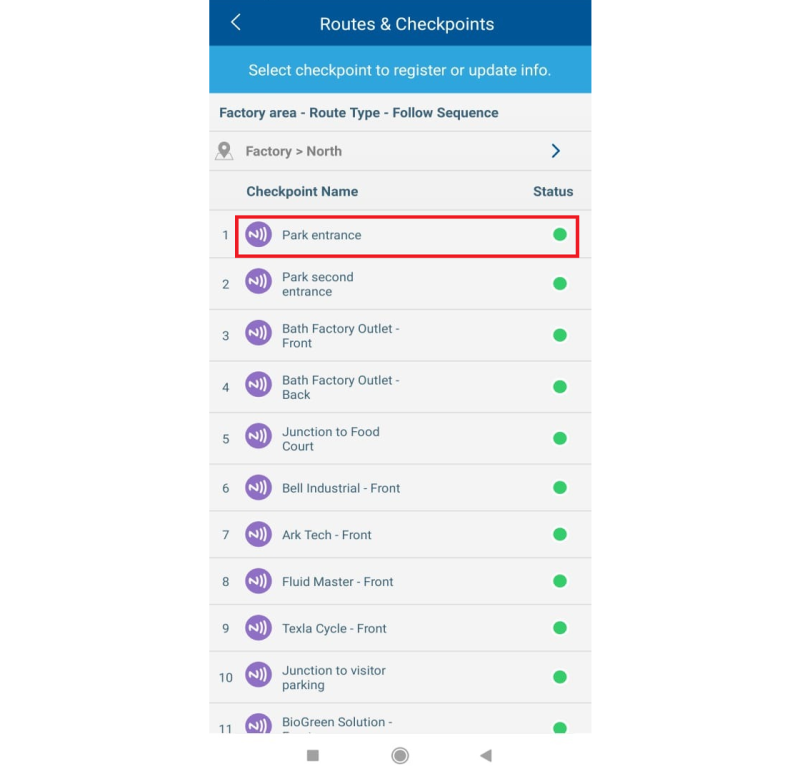
5. Disenrolled checkpoint status will be shown as grey dot, while green dot represent the enrolled checkpoint. Tap on the checkpoint location you want to enroll in on the NFC checkpoint tag.
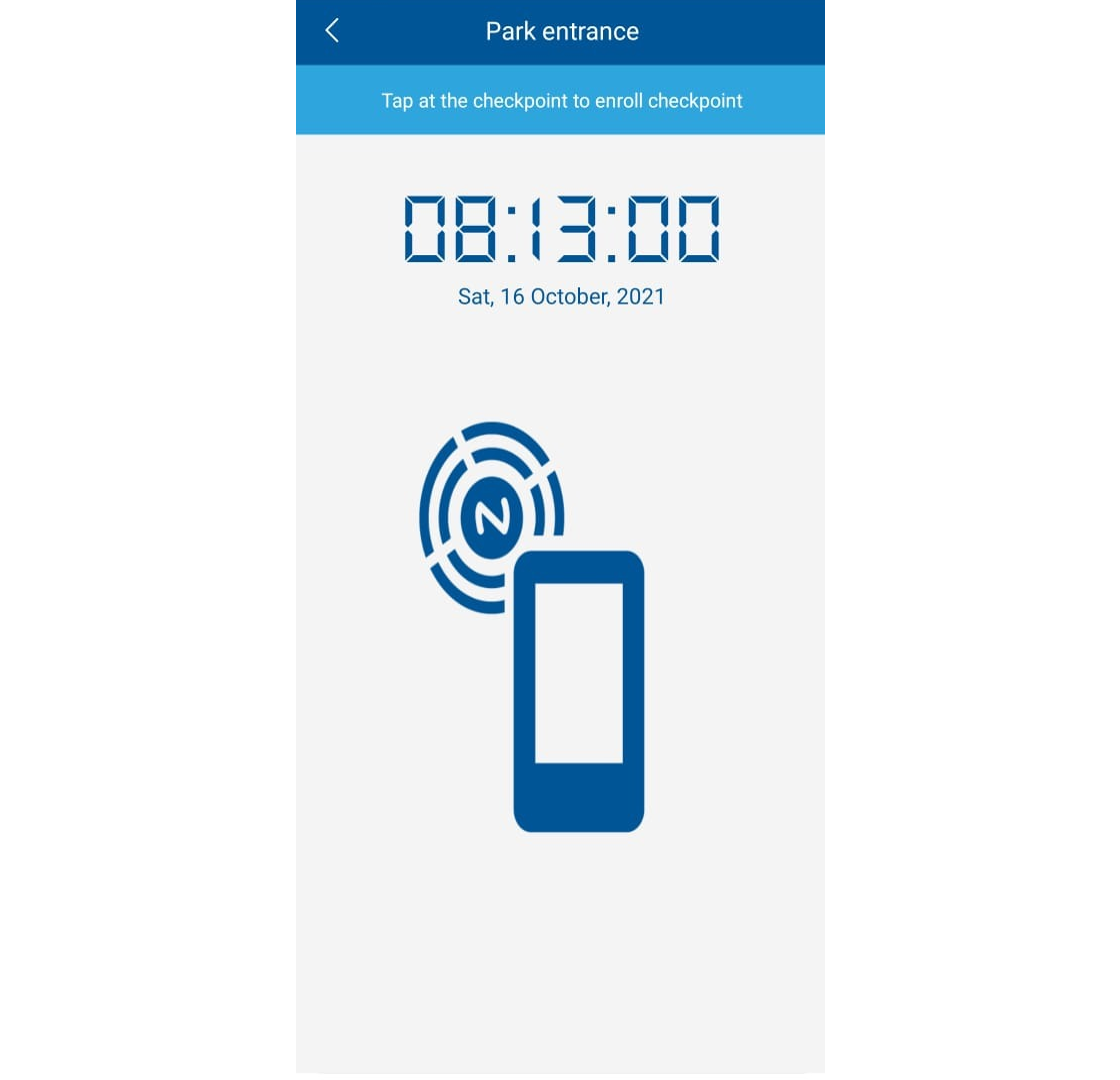
6. When the screen displays the below screenshot, tap the phone on the NFC tag to enroll the checkpoint tag.
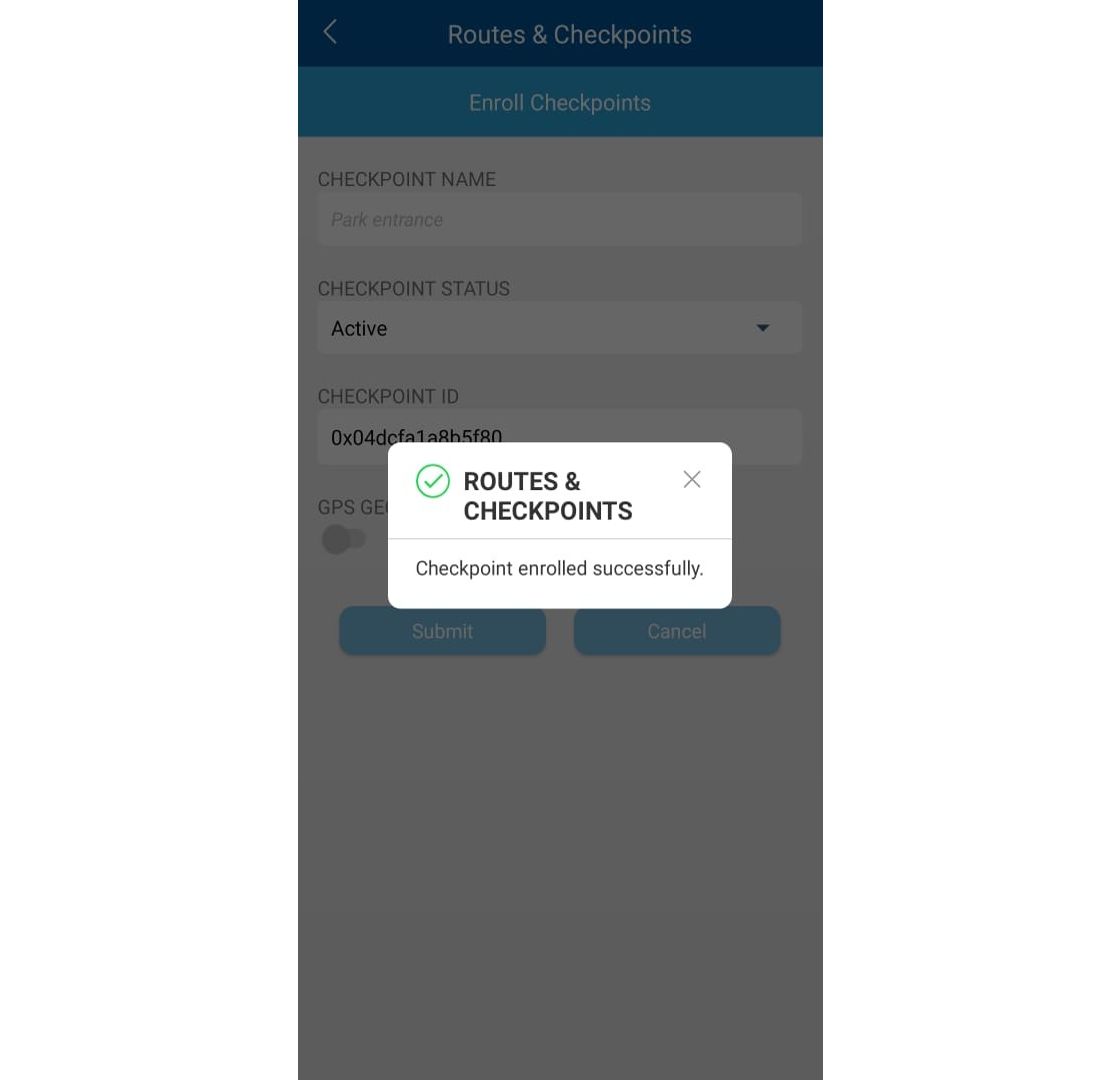
7. The below popup message will pop up when the enrollment is successful.
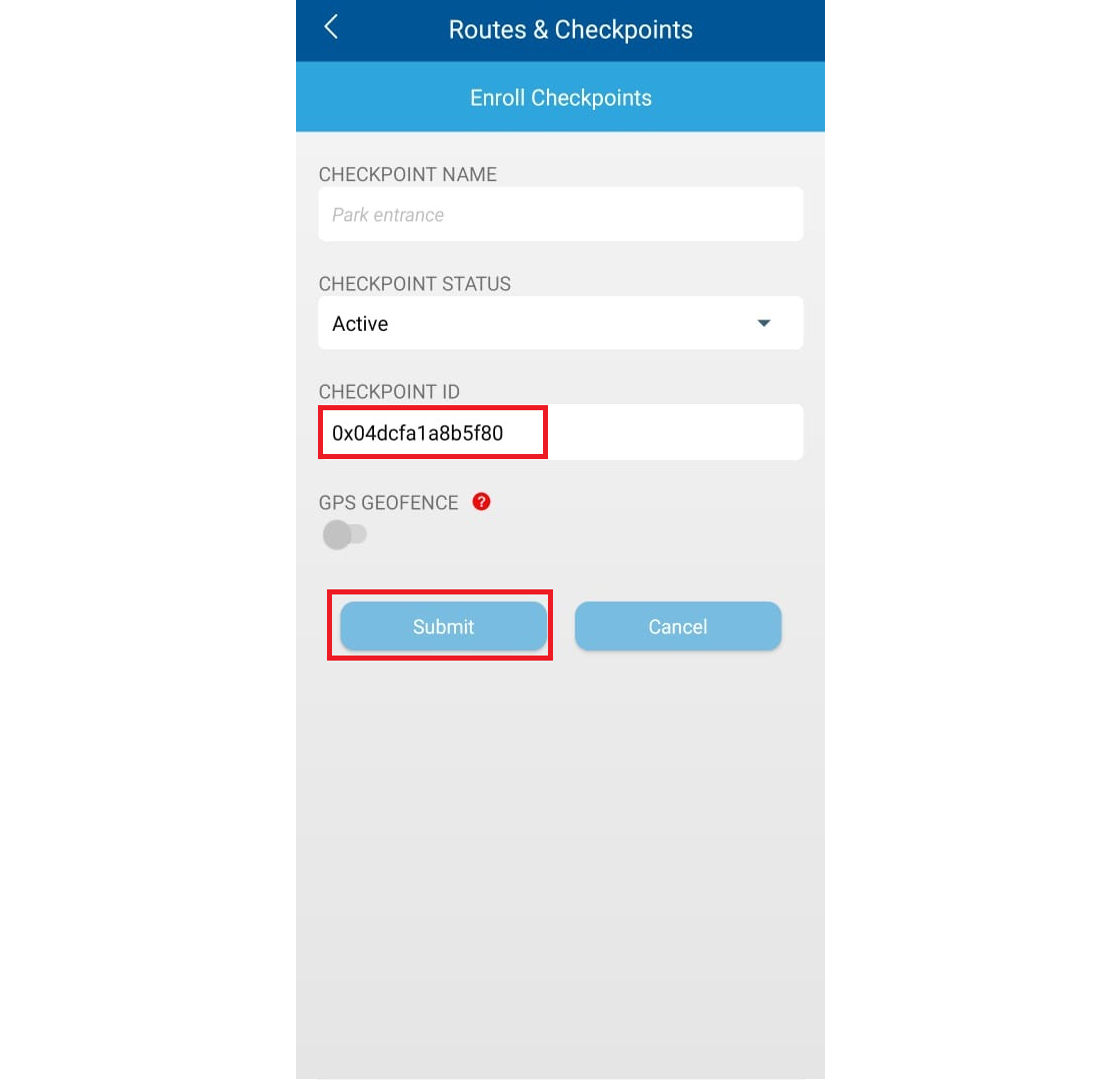
8. Upon successful enrollment, a checkpoint ID will be captured and shown here. Click on submit to proceed.
9. Checkpoint status will turn from grey to green, indicating that the checkpoint tag has been enrolled. Guards may now proceed with patrolling.Note: If some of the screenshots or steps viewed here are different from the ones in the current system, this is due to our continuous effort to improve our system from time to time. Please notify us at
[email protected], we will update it as soon as possible.





.jpg)


