Introduction
FingerTec offers an array of time attendance devices to fulfill the market's requirements. However, on top of the various selection, there are select devices customizable to the client's specific requirements such as adding a Wi-Fi. To get your device customized, please do not forget to mention to our sales team beforehand so we can prepare it right before shipping the device to you. Unfortunately, there are circumstances when you need to add Wi-Fi after you have shipped to the device to you so here is how to configure your WiFi on one of our customizable readers, TA200 Plus Wi-Fi.
Note: Not all FingerTec devices can be customized for Wi-Fi. Find out FingerTec devices that can in the following link
HERE!
A - Wi-Fi Setup
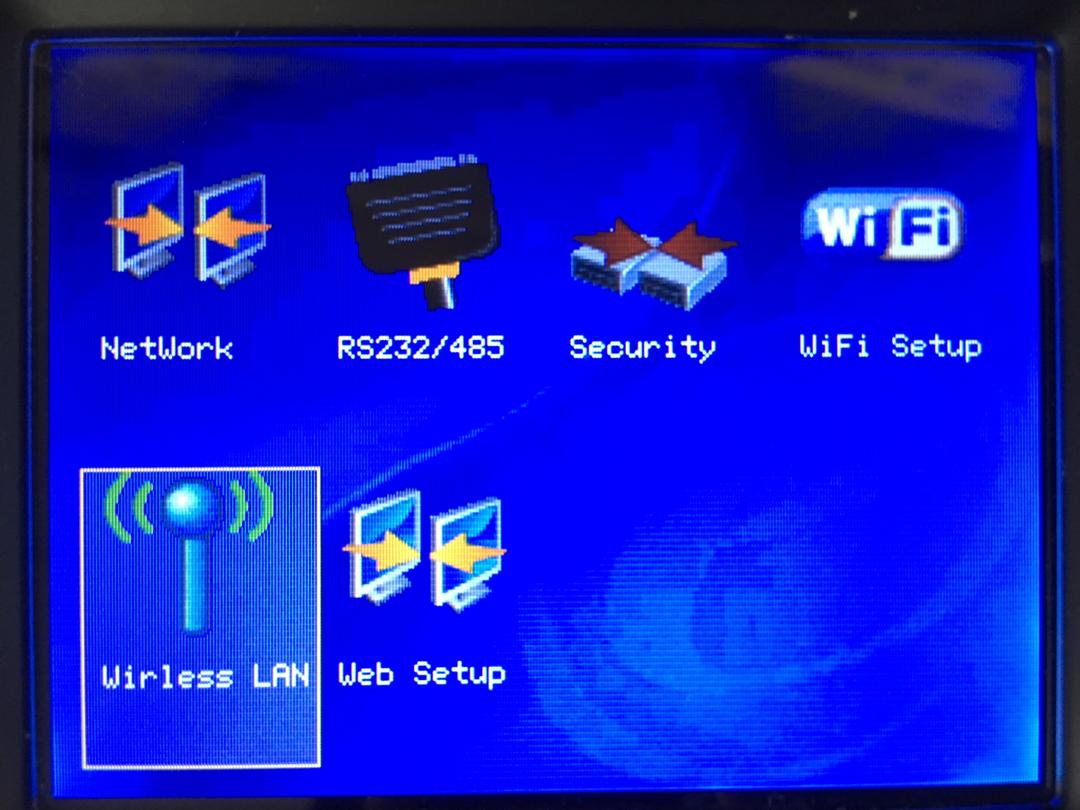
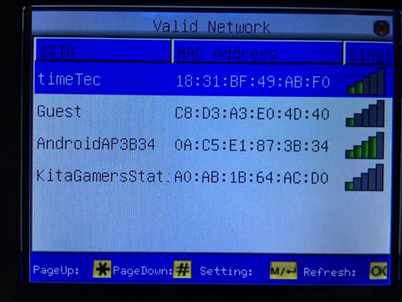
1. Check out available wireless within your network range from your device. Go to Menu> Comm. > Wireless LAN. TA200 plus Wi-Fi can only support 2.4 GHz Network band. Therefore, Wi-Fi that uses 5.0 GHz network band will not be visible or connected to the device.
2. Use the navigation key to select your Wi-Fi. Press M key to set up the Wi-Fi.
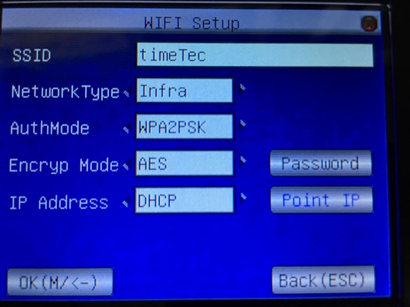
3. Refer to the table below for the security settings supported by the device. These settings have been set up on the server. Thus, it is advisable to consult an IT person for details on these settings.
Settings
|
|
|
SSID
|
Wifi name
|
|
Network type
|
Infra
|
Adhoc
|
AuthMode
|
Open
|
Open
|
|
Shared
|
SHARED
|
|
WEPAUTO
|
WEPAUTO
|
|
WPAPSK
|
WPANONE
|
|
WPA2PSK
|
|
Encrypt Mode
|
AES
|
WEP
|
|
TKIP
|
NONE
|
Password
|
Space not available
|
|
IP Address
|
Manual
|
DHCP
|
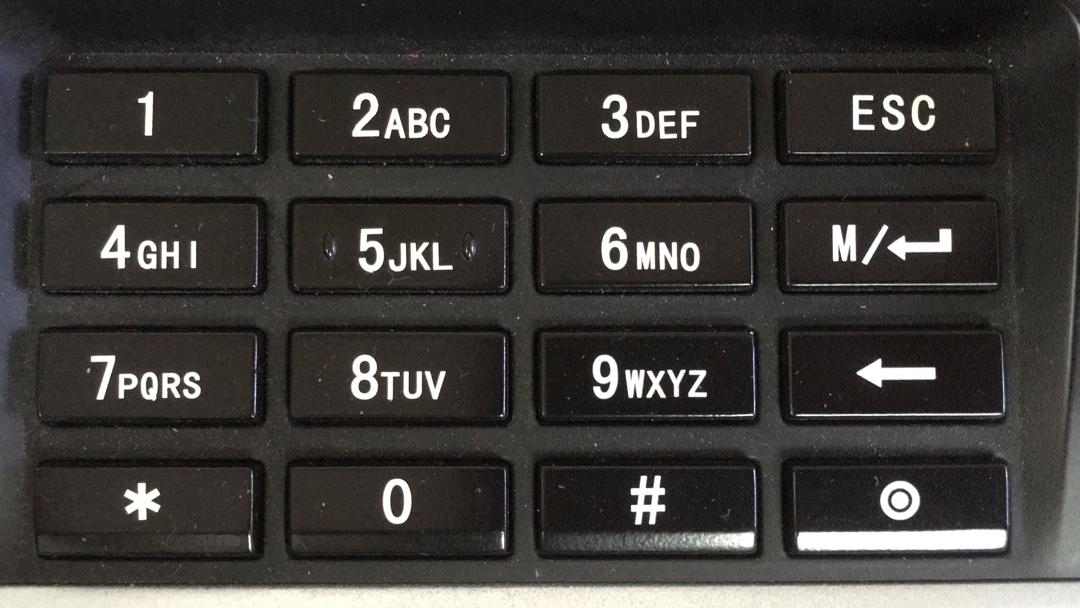
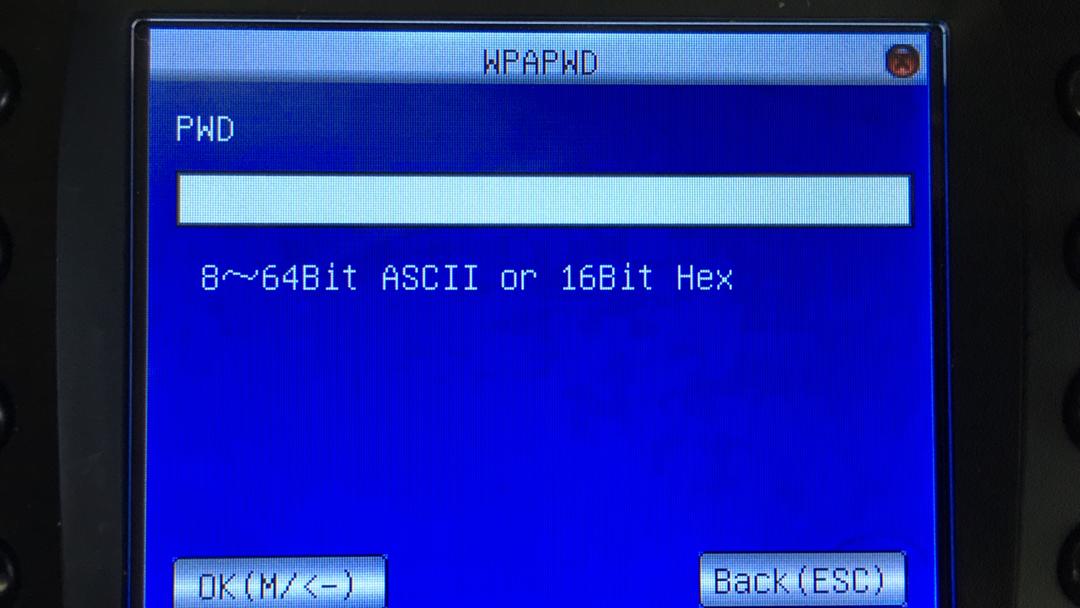
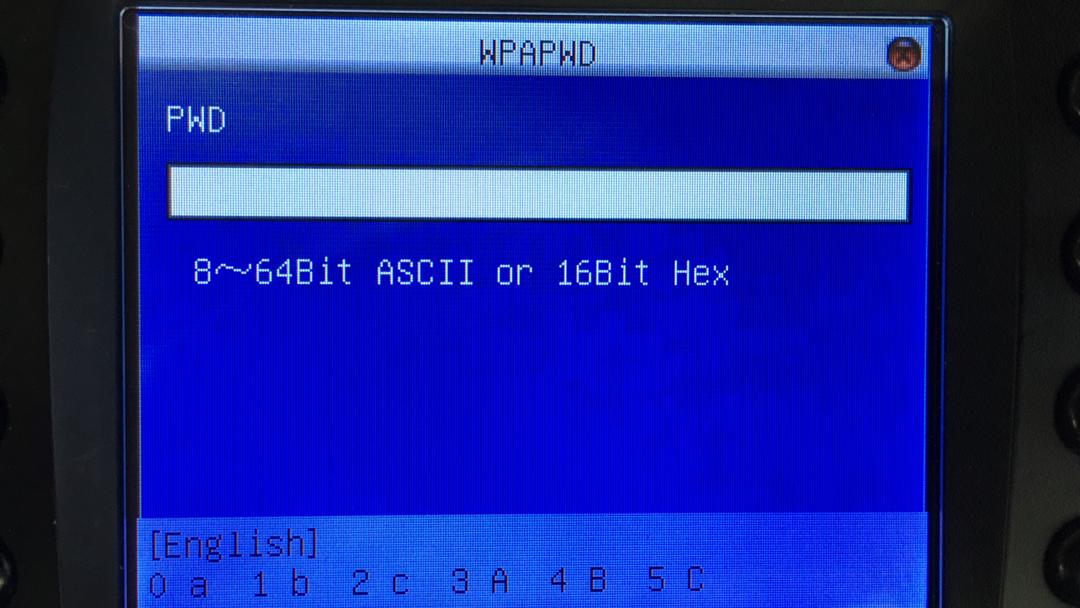
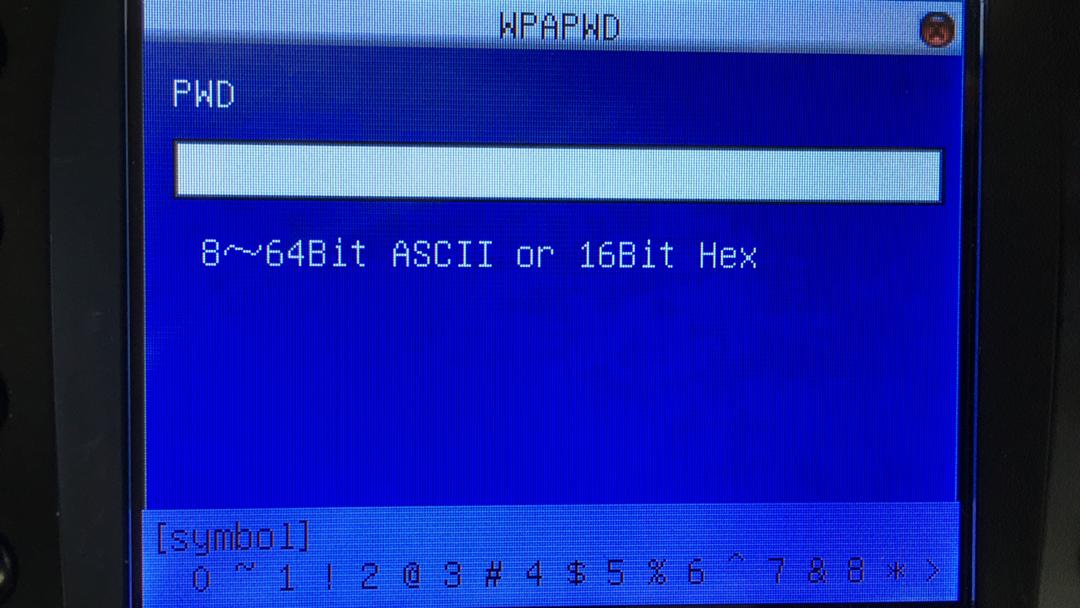
4. By default, the keypad is in numeric keypad for you to insert the password. However, you may change it to the alphabet by pressing the * button and press the number according to the alphabet that you need. If your password requires a symbol, press the * button again. If you need more symbols, click on the right button to view other selection. Please bear in mind that space is not an option for the password.
Alphabet
Symbols
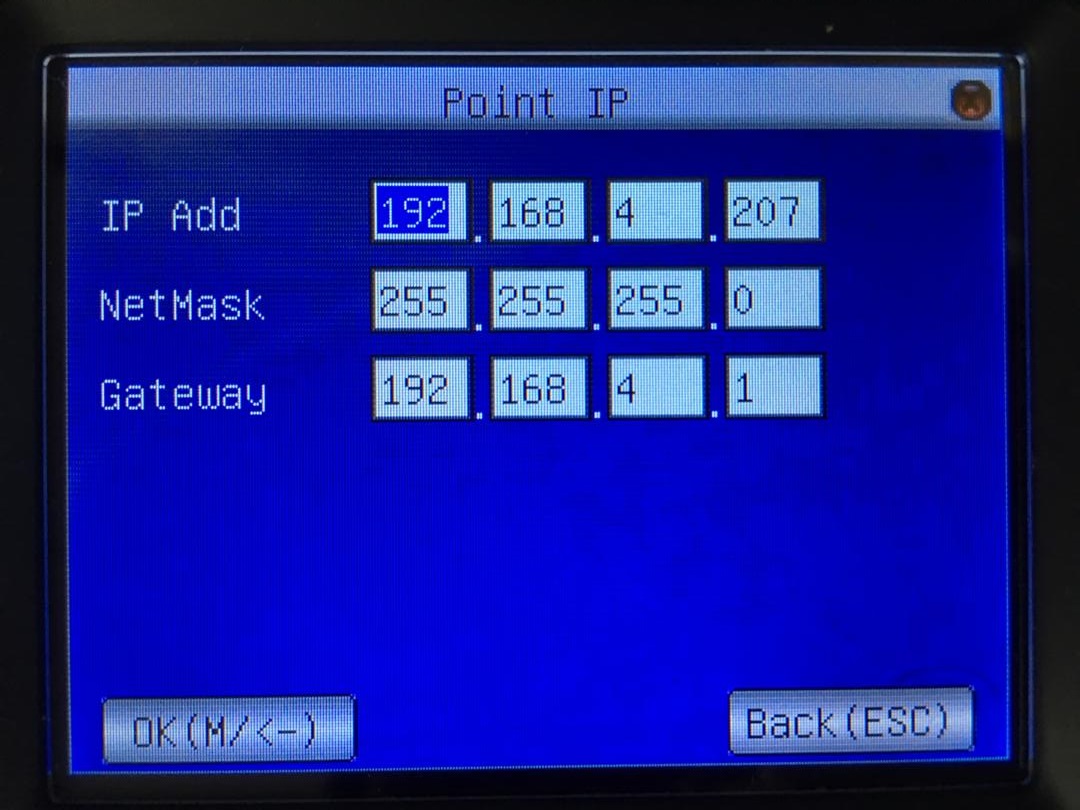
5. IP Address selection will be either in Manual or DHCP. If you select Manual, you need to fill up all the details as shown below. For DHCP, you are not required to manually assign an IP address.
6. When you have completed the settings, restart the device to ensure that the changes take effect on the device.
7. In the DHCP setting, the device will take a few minutes to boot up. For Manual setting, the device will boot as usual.
B - Test connection
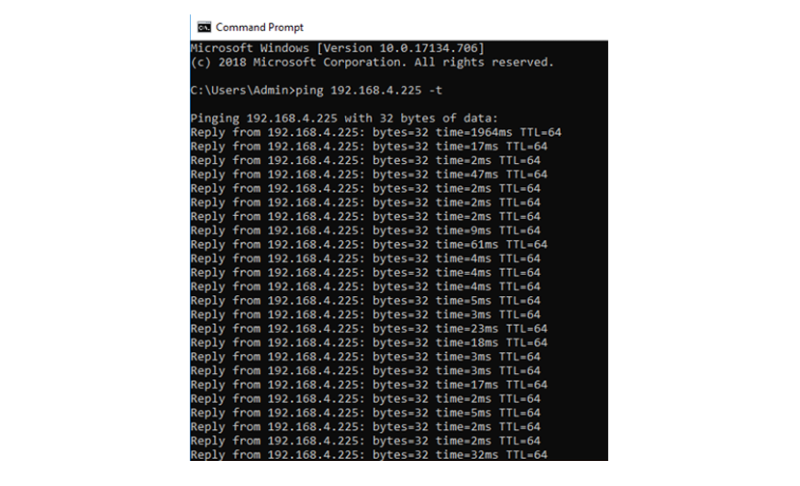
TA200 plus Wi-Fi does not show any signal bar on the desktop. To test your Wi-Fi, you need to follow the following steps:
1. Connect your PC to the same Wi-Fi network that your device is connected to.
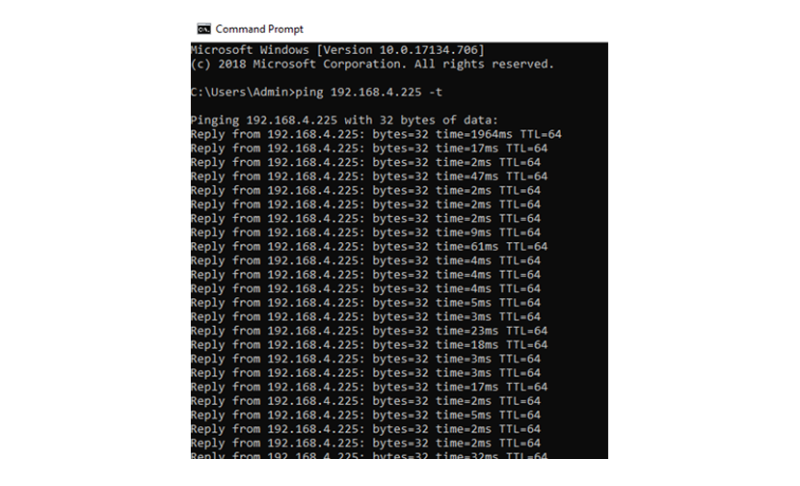
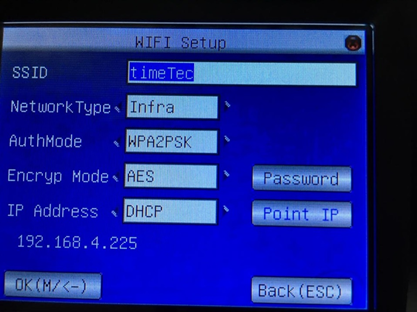
2. Use command prompt to ping device IP address. If the DHCP is set, go to Menu> Comm> Wi-Fi setup. You will see a new IP address for that, already assigned by DHCP. If it shows the IP address not available, please check your Settings.
Here is an example, if you are confused about the Wi-Fi security settings.
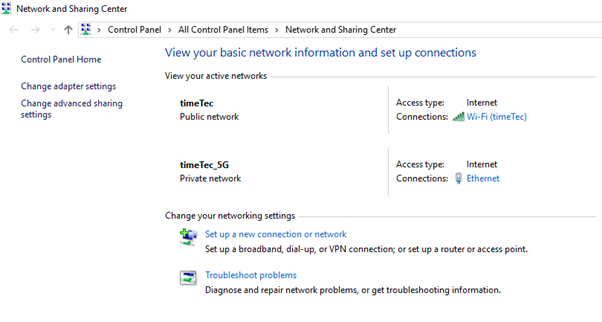
1. By using the Pc that is already connected to the targeted Wi-Fi, go to Control Panel> All Control Panel Items> Network and Sharing Center> click connection of connected Wi-Fi network> WIFI status> Wireless Property> security.
2. Follow the security setting based on the steps above.
Setting
|
|
|
SSID
|
Timetec
|
|
Network type
|
Infra
|
|
AuthMode
|
WPA2PSK
|
|
Encrypt Mode
|
AES
|
|
Password
|
Abcdf123
|
|
IP Address
|
Manual
|
DHCP
|
Table 2
3. Go to menu> comm. > Wireless LAN
4. Select target Wifi SSID (TimeTec)> set security settings by referring to table 2. Press (M / <-) button, save and restart the device.
5. After the device boots up, go to Menu> Comm. > Wi-Fi Setup. You can see the device Ip Address that is already assigned by the server. (192.168.4.225)
6. You can check the device connectivity by pinging device Ip Address.
Note: If any of the screenshots or steps in this manual are different from the current system, it is due to our continuous effort to improve our system from time to time. Please notify us at
[email protected]. We will update it as soon as possible.
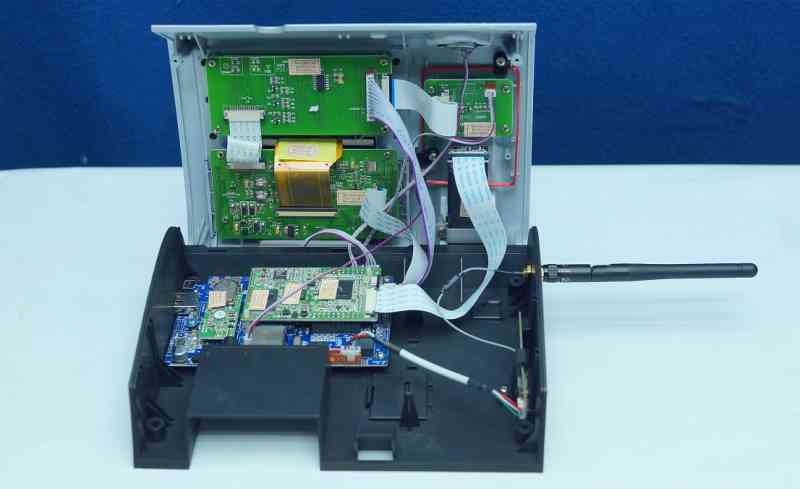
You can now customize TA200Plus with WiFi components
and install our firmware for WiFi support.
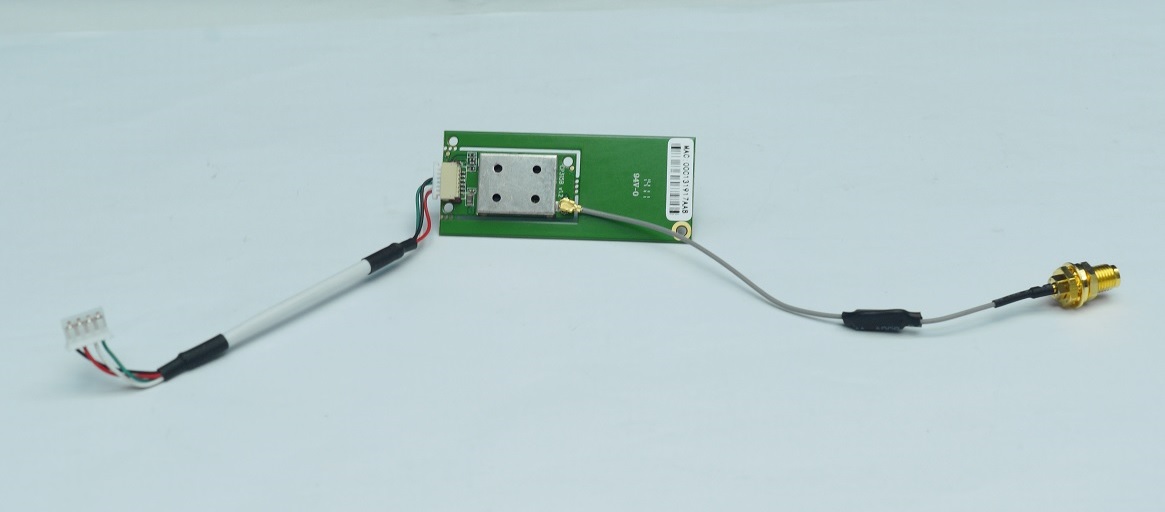
WiFi Component
1) WiFi Module
2) WiFi
Antenna
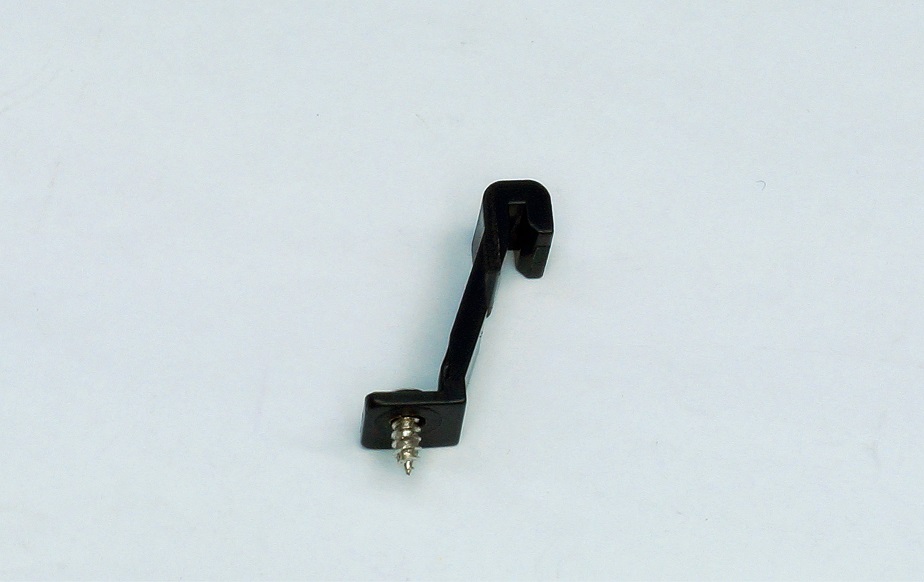
3) WiFi Module
Holder
4) Instruction
of WiFi Module
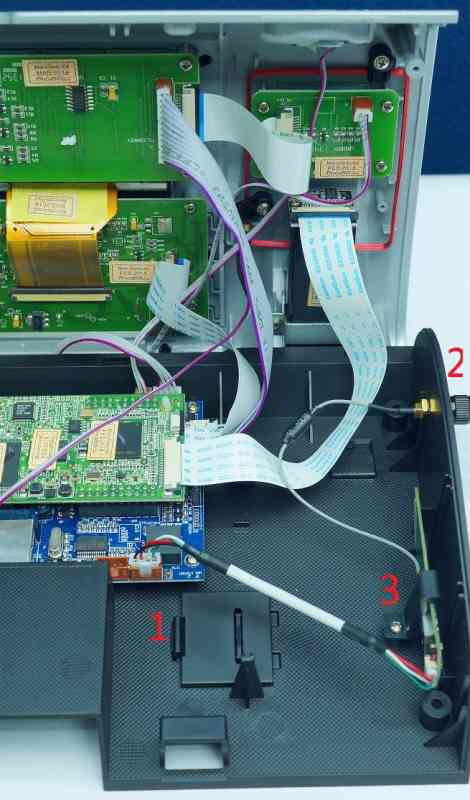
Please provide your terminal information using device
info tools so that we can provide the WiFi firmware.
You may refer to /2014/01/how-to-use-fingertec-device-info-tool.html for more
details regarding the device info tools.
Please take note that only resellers are able to
perform this customization and the WiFi components must be purchased directly from
FingerTec. You may contact our sales person at [email protected] to purchase our components.
The FingerTec 3G module is
ready to be used in models with FEM 800, which are TA200Plus (normal 12V
model), Q2i and Face ID 2. Refer to the below table for technical
specifications of the 3G module.
Technical Specifications
|
Frequencies
|
2G/2.5G –
GSM/GPRS/EDGE:
Frequency -
850/900/1800/1900 MHz
3G – UMTS/HSPA
Frequency –
850/1900/2100 MHz
3G – CDMA 2000
Frequency -
1900/2100 MHz
|
Communication
|
Full duplex
|
Automatic Startup
|
Yes
|
Antenna Impedance
|
50 Ohms
|
SIM Card
|
3 Volts (varies with SIM card)
|
SIM Card PIN
|
Only reads the SIM card PIN, but cannot amend
|
Receiver Parameters
|
GSM850 Reference Sensitivity
|
-104 dBm Static and TUHigh
|
E-GSM900 Reference Sensitivity
|
-104 dBm Static and TUHigh
|
DCS1800 Reference Sensitivity
|
-102 dBm Static and TUHigh
|
PCS1900 Reference Sensitivity
|
-102 dBm Static and TUHigh
|
Selectivity @ 200 kHz
|
> +9 dBc
|
Selectivity @ 400 kHz
|
> +41 dBc
|
Linear Dynamic Range
|
63 dB
|
Co-channel Rejection
|
>= 9 dBc
|
Test Results
In our test, the 3G module works almost 40% faster than its predecessor (GPRS module) and, more importantly, is more stable.
Read more for instructions on how to install the 3G modules.
With the launch of the Ingress software
just around the corner, FingerTec has released the Ingress Trial Version for
our resellers as well as end-users to test out the software before actually making a
purchase. The trial version is strictly accessible only to FingerTec’s
Authorized Resellers & Distributors and End-Users of FingerTec only.
The instructions below are intended to
help you understand the workflow, types of testing environment, and what you
need to prepare before you start the test.
Supported Models:
Multimedia Models:
AC100C, TA100C, TA100TC, TA200 Plus.
Access Control
& Time Attendance Models: Ingressus, Q2i, i-Kiosk 100 Plus, AC900, R2, H2i,
R2c.
Face Recognition
Models: Face ID 2, Face ID 3, Face ID 4, Face ID 4d.
Card Reader
Models: TimeLine 100, Kadex, m-Kadex, k-Kadex, i-Kadex.
Please make sure that the FingerTec
terminal you use for testing is listed above. Any terminals excluded from the list will not work with the Ingress Software. Next up, go to Ingress’s trial
version page to fill in the request form and submit it back to us. You are
required to insert your FingerTec terminal’s serial number for us to generate
the trial product key.
If you are not using a FingerTec terminal for testing,
you are still required to insert the testing terminal’s serial number,
and we will process it accordingly. If you do not have a terminal to test the
Ingress software, just leave the serial number text box empty and we will
provide you with an 8-digit device serial number and the trial product key. We
will email you once your Ingress trial application has been approved.
You can
access Ingress’s trial version page by clicking this link.
Once your application has been approved,
you may download the Ingress Trial Version software installer here.
Unzip the file, right click the
installation file and select Run as administrator to prompt the installation.
Follow the onscreen instructions to complete the installation.
Upon the Ingress installation, it is
mandatory to activate the device before you can use it to perform testing. There
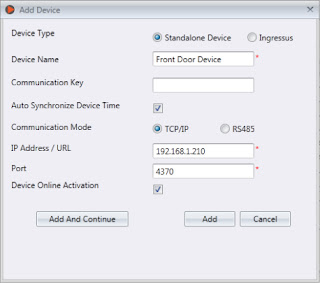
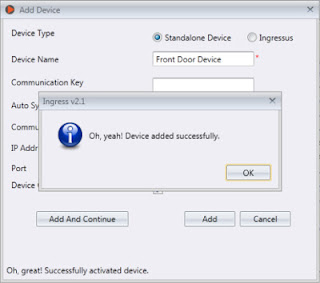
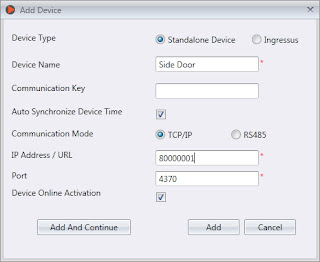
are 2 ways to activate the device. While adding new devices to the software, tick
the checkbox for Device Online Activation.
Once the activation is completed, you
can see a “Successful Activation” message at the bottom left corner of the
window.
As mentioned above, if you do not have any
terminals to perform testing, please insert the given serial number at the IP
Address / URL text box and tick the checkbox for Device Online Activation. Click Add to
activate the serial number and then you may start to use the Ingress software
for testing.
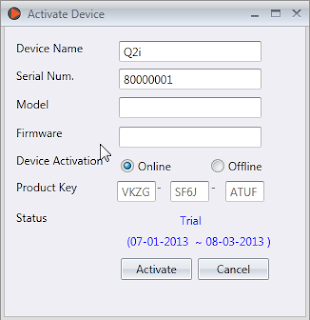
Another way to activate the terminal is in Devices.
Click on the device that you want to activate and click Activate Device.
At the Activate Device window, there are 2
methods to activate the device; either Online or Offline. If you choose
to activate the device online, select Online and click Activate. The Ingress Software
will connect to our database server to verify and activate the device
accordingly. You will see the device’s activation status as well as the expiry
date.
If you choose to activate the device offline, kindly
contact us at [email protected] to request for the trial product key. Then insert
the given product key into the text box. Select Offline and click Activate to
proceed with the activation.
Written by Vincent



.jpg)
.png)

