Introduction
For the latest version of AWDMS and Ingress Software (version 4.2.3.2), you can use TimeTec device model TC10 or TC20 with Ingress Software and AWDMS to capture the transaction log data as attendance in Ingress and AWDMS.
Process
1) If you use LAN connection, configure the IP Address, Subnet Mask and Gateway on your device
Go to Menu > COMM. > Ethernet.
2) Configure the Server Address and Server Port on your device. Go to Menu > COMM. > Cloud Server Setting.

Note: Server Address is your computer IP address where the Ingress and AWDMS are installed. You can check it using Command Prompt and type in ‘ipconfig’.

Server Port is the default port which is 8088 or you can check it in AWDMS. Go to the Attendance module in AWDMS > Device > Search Device.
3) Before you can activate your device in Ingress, you need to make sure that you are able to search it in AWDMS (Attendance). Go to Attendance module > Device > Search Device > Search.
Note: Once the device is found, DO NOT add it via AWDMS. You only need to add it in Ingress.
4) Add the device in Ingress. Go to Devices > Add Device > Set the Device Name > Select AWDMS ATT as Communication Mode > Key in Serial Number and device IP address > Click Add.
Note: If some of the screenshots or steps viewed here are different from the ones in the current system, this is due to our continuous effort to improve our system from time to time. Please notify us at [email protected], we will update it as soon as possible.
IntroductionWhen managing an attendance system, sometimes you might bump into several issues or problems like a corrupted database or table, which can cause the admin unable to view or generate the Attendance record correctly.
In this article we will guide you on how to fix the duplicate record when you generate the Attendance Sheet on Ingress MySQL database.
Problem & Issue
1. When generating the Attendance Sheet, Ingress system shows a duplicate user with same date and clocking time.
Solution
1. Please go to the User tab and check the list whether you can find a duplicate user with the same User ID or Name. If you find a duplicate user, please remove this user from the system, then download back from the terminal. After that, re-generate the Attendance Sheet and check the result.
2. If the problem persists, please go to the next step by closing the program and open the MySQL manager tools program.
3. If you do not have this MySQL manager tools program, you can download from the link below.
4. Open the SQLyog program and reconnect to the Ingress database. Under Ingress database you need to open Attendance table > right click > select More Table Operation > select Truncate table > Yes.
5. By truncating the Attendance table, you have removed all generated Attendance records from the Ingress system.
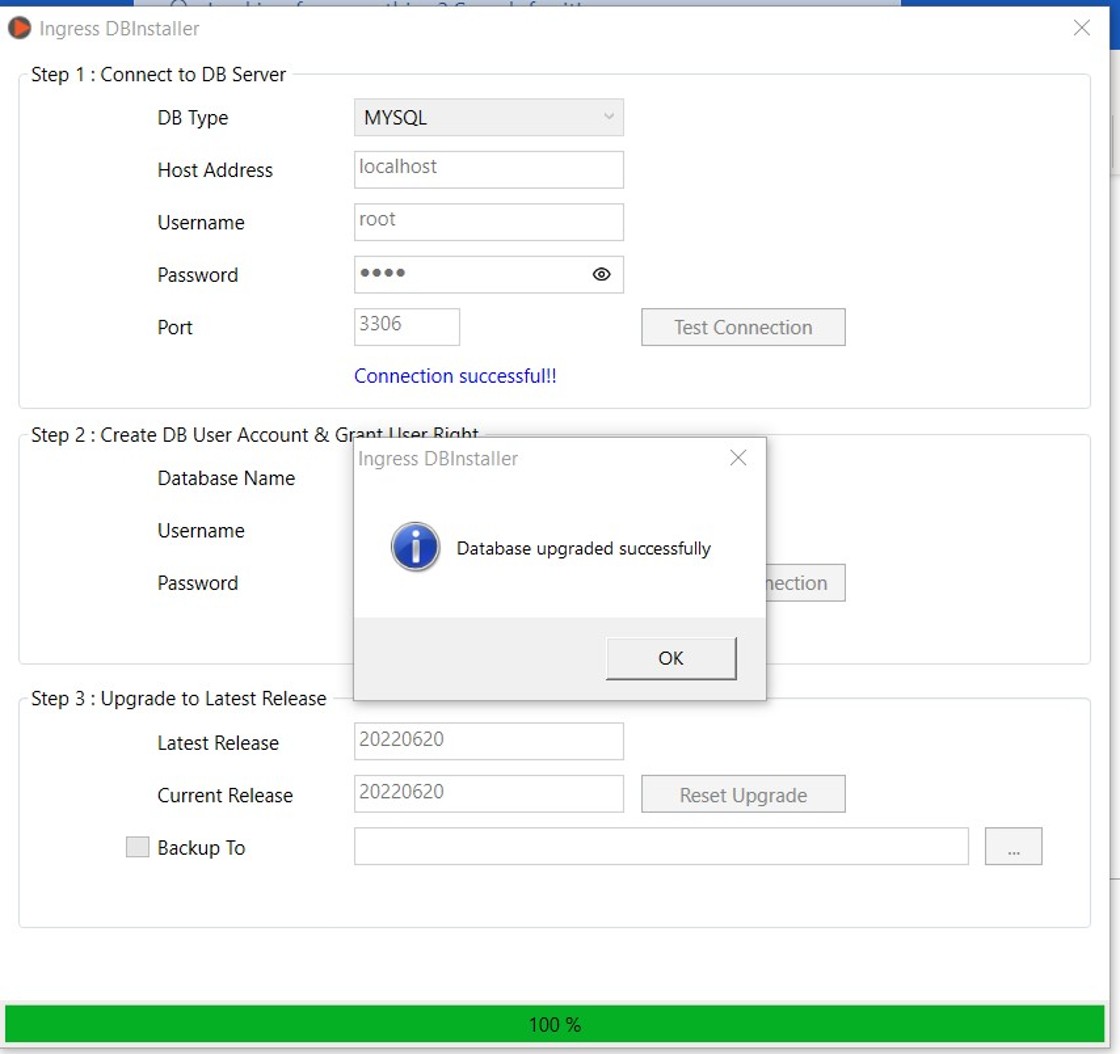
6. Close SQLyog manager tools, then run Ingress DB Installer. Run all 3 steps (Test Connection, Update Connection and Upgrade Database)
7. Close Ingress DB Installer, then run Ingress program. Open Attendance tab > select Attendance Sheet > select Generate > select All User and Date Range > Generate.
8. Once completed, check the Attendance records. You can see the duplicate problem has been resolved.
Note: If some of the screenshots or steps viewed here are different from the ones in the current system, this is due to our continuous effort to improve our system from time to time. Please notify us at
[email protected], we will update it as soon as possible.
Introduction
Whenever a user is unable to launch Ingress software, it will require you to run Ingress DB Installer to connect the software with the database again and complete the steps Test Connection > Update Connection > Upgrade Database.
Sometimes, when it comes to Upgrade Database, an error message “Failed to Upgrade Database” will appear. This error message occurs due to some of the tables in the Ingress database having crashed or being corrupted. The following tips provide you with a solution to resolve this problem quickly.

3. Upon connecting to the localhost database, you should see on the left panel of the window a list of the Ingress database. Next, click on Tools > Table Diagnostic.
4. Next, select ingress database > Tick Use_Frm, Local and Extended checkbox > Click on Repair.

5. Please wait until the Repair process is completed and Table Diagnostic Information will prompt out. Then, you can click OK to close the windows.
6. Next, tick the Local checkbox and click Optimization. Once completed, it will prompt out Table Diagnostic Information.
7. Once the Repair and Optimization are completed, please run Ingress DB Installer. Complete all the steps Test Connection > Update Connection > Upgrade Database. When you click Upgrade Database, you will not face the ‘’Failed to Upgrade Database error’’ anymore.
Note: If some of the screenshots or steps viewed here are different from the ones in the current system, this is due to our continuous effort to improve our system from time to time. Please notify us at [email protected], we will update it as soon as possible.
Introduction
Ingress software offers 2 preferred database options which are Microsoft Access (MDB) and MySQL. Most of the users with large corporations prefer Ingress with the MySQL database as it can accommodate many users compared to Ingress with the MDB database (which can store up to 2GB database).
However, some users face difficulties during the installation process especially when installing MySQL. Below is the proper guide on how to install Ingress and MySQL accordingly.
Process
A: MySQL Installation (Steps 4 - 19)
B: Ingress software installation (Steps 20 - 26)
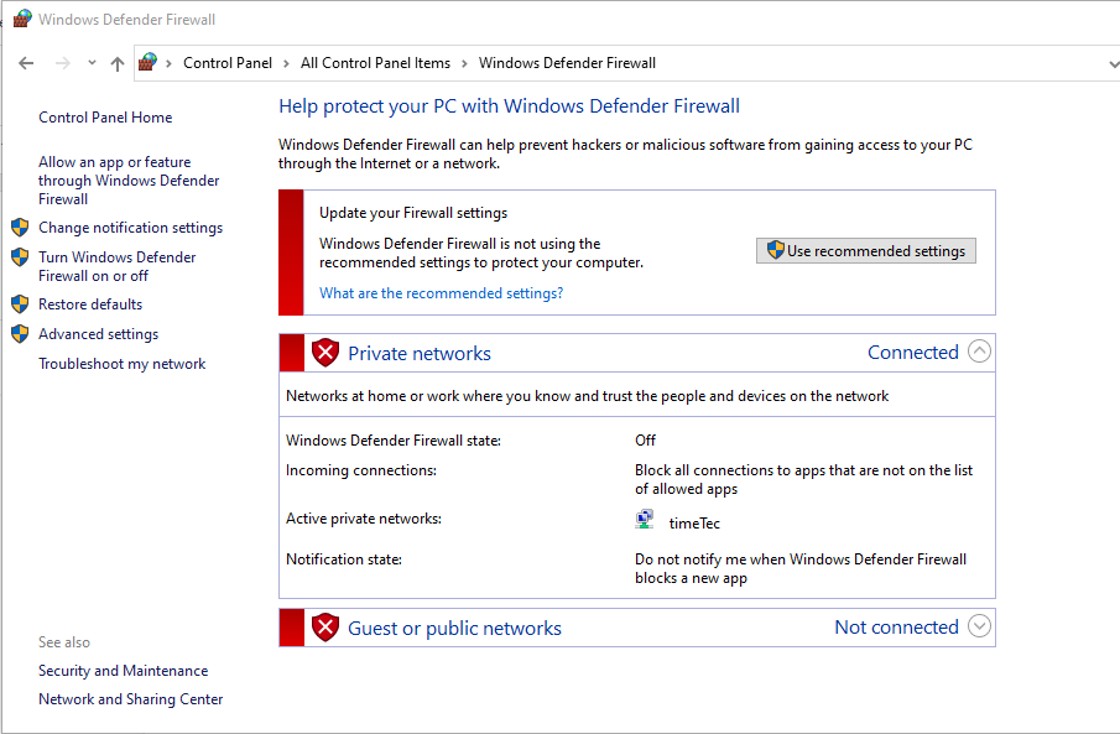
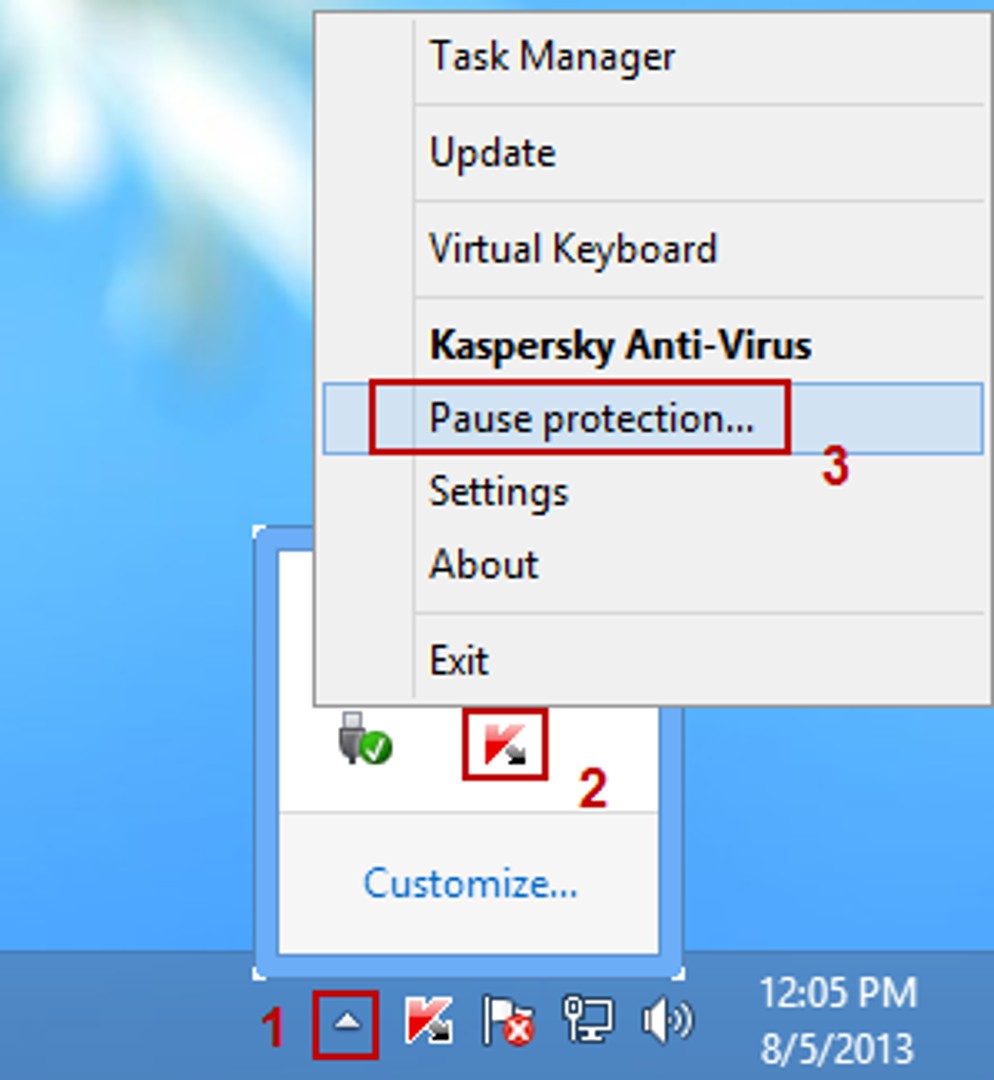
1. Disable antivirus and firewall on your pc.
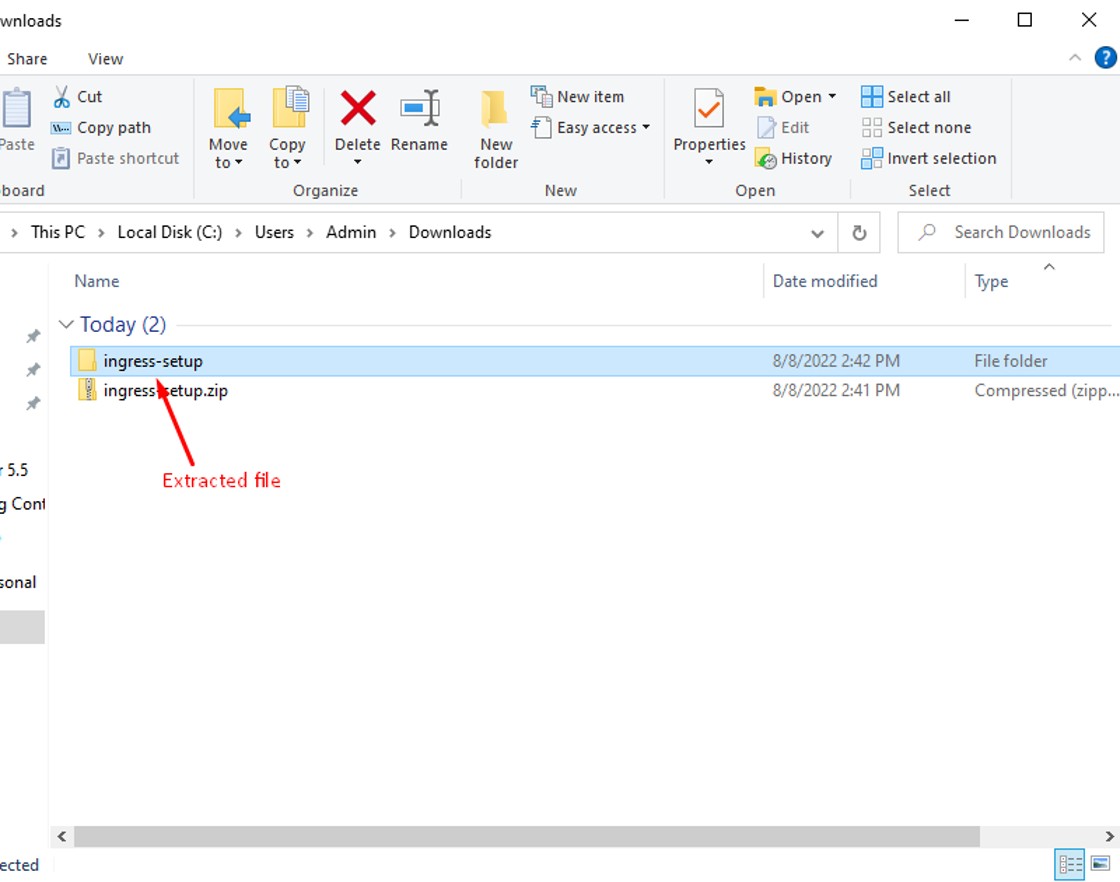
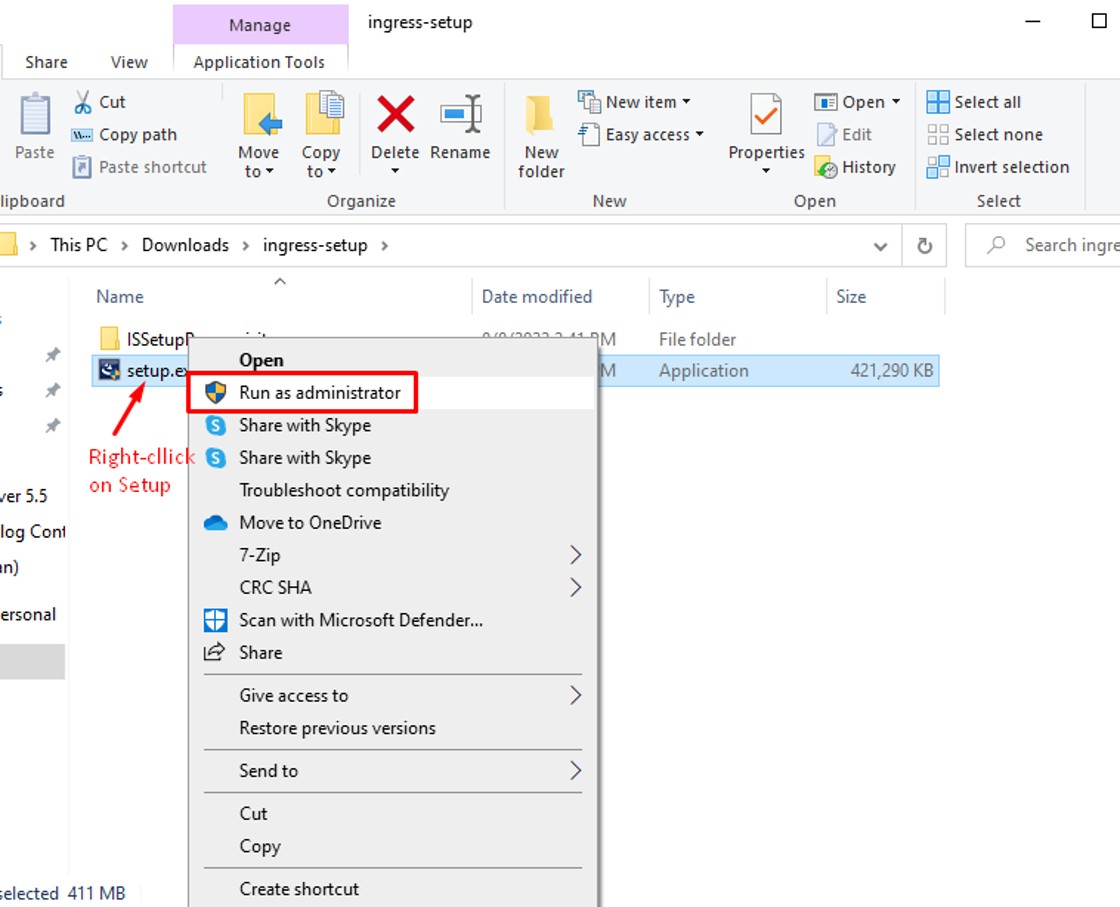
2. Open a web browser and download Ingress software (with MySQL) from this link. 3. IMPORTANT: Please make sure to extract the installer file and run the Setup file as an administrator.
A: MySQL Installation (Steps 4 - 19)
4. Upon initialising the setup, you will be prompted with a screen to install the MySQL database. Click Install to begin the installation process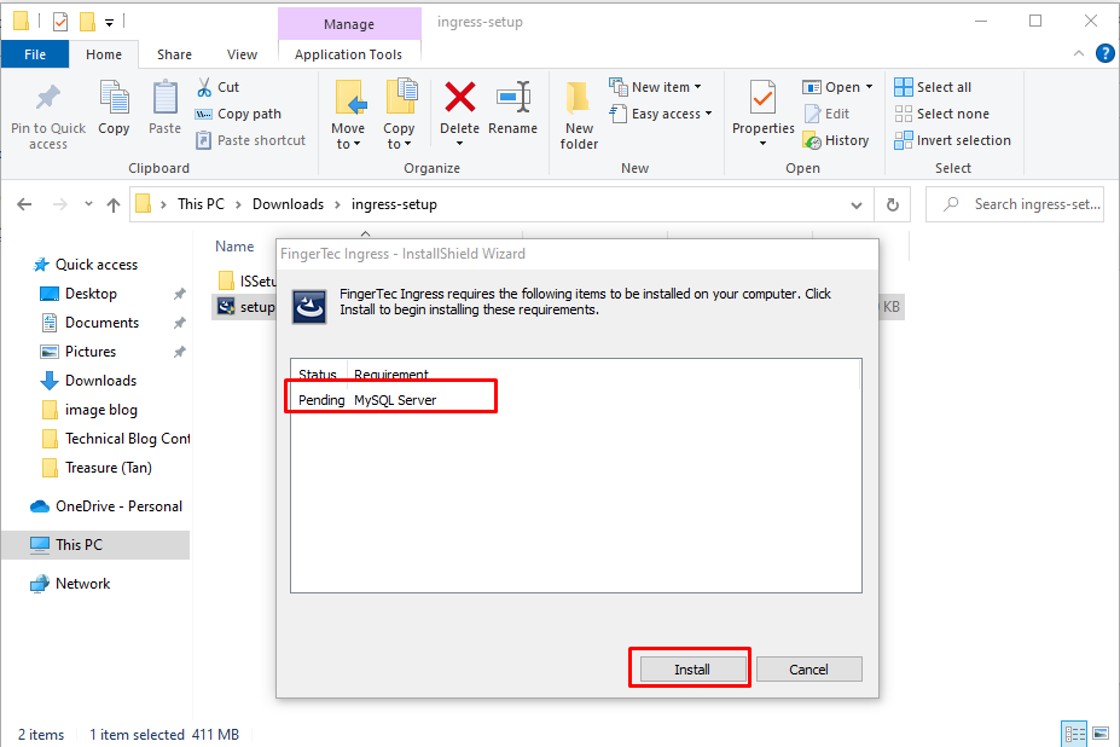
5. You will see MySQL Server 5.5. Setup Wizard screen and please click Next
6. Tick on “I accept the terms in the License Agreement” and click Next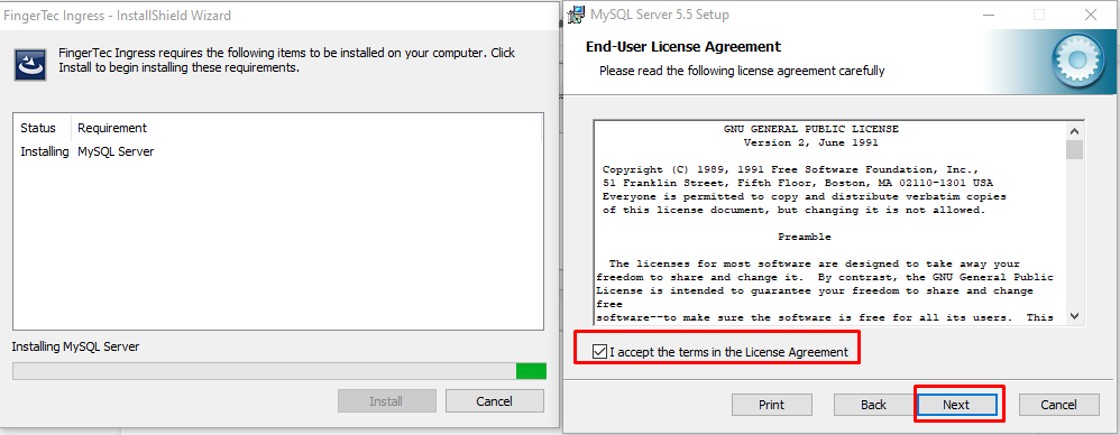
7. Select “ Typical”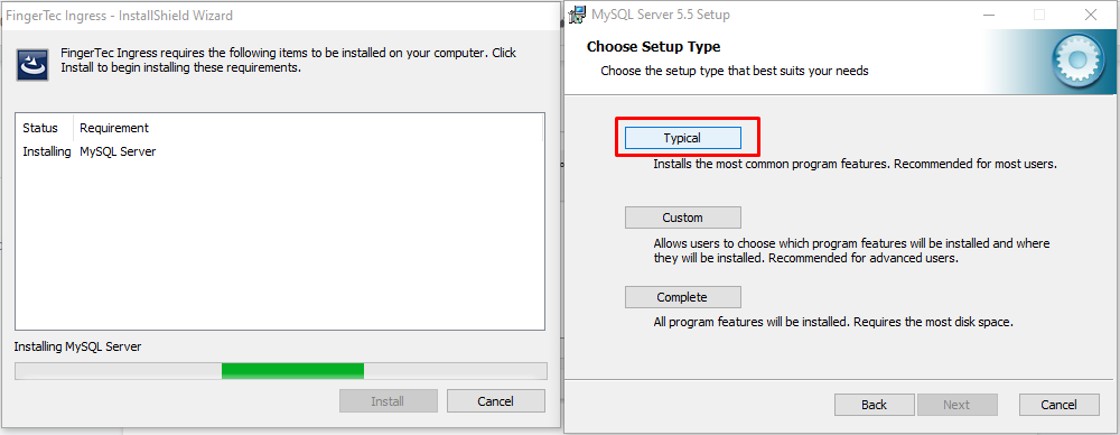
8. Click Install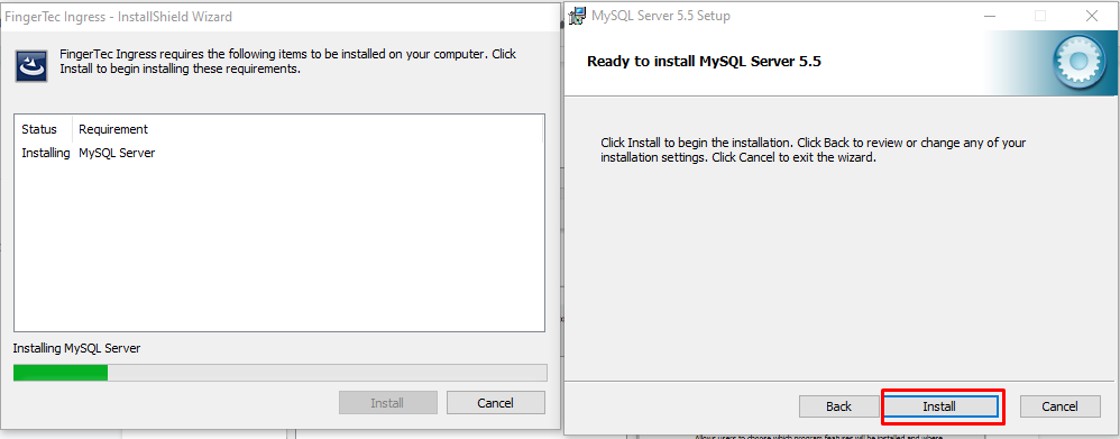
9. You will be prompted with the MySQL Enterprise screen. Please click Next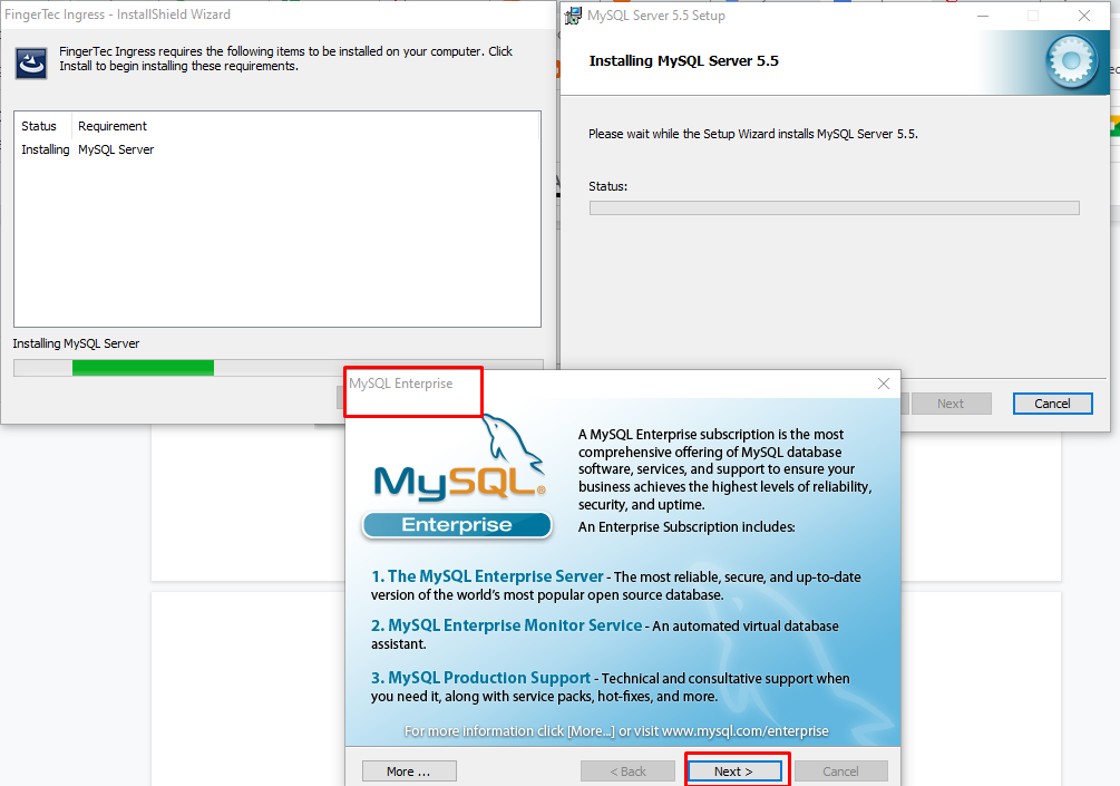
10. Click Next
11. Click Finish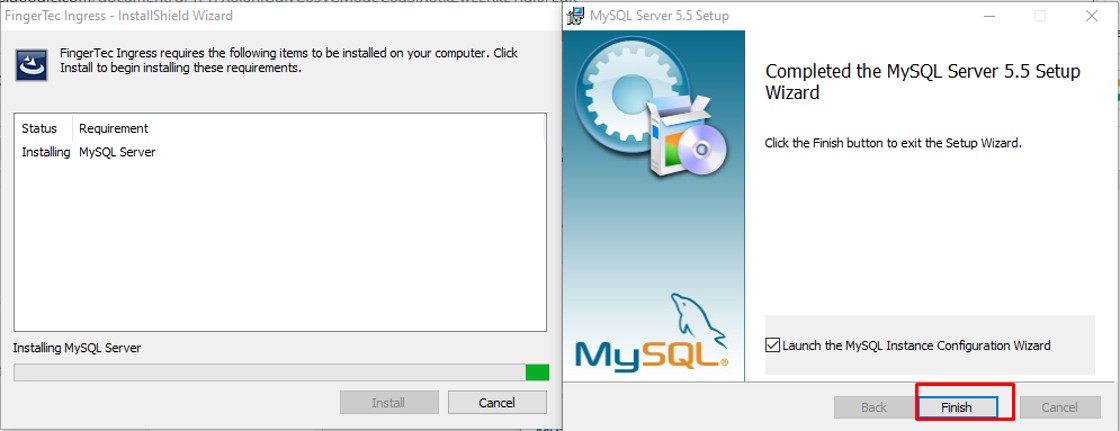
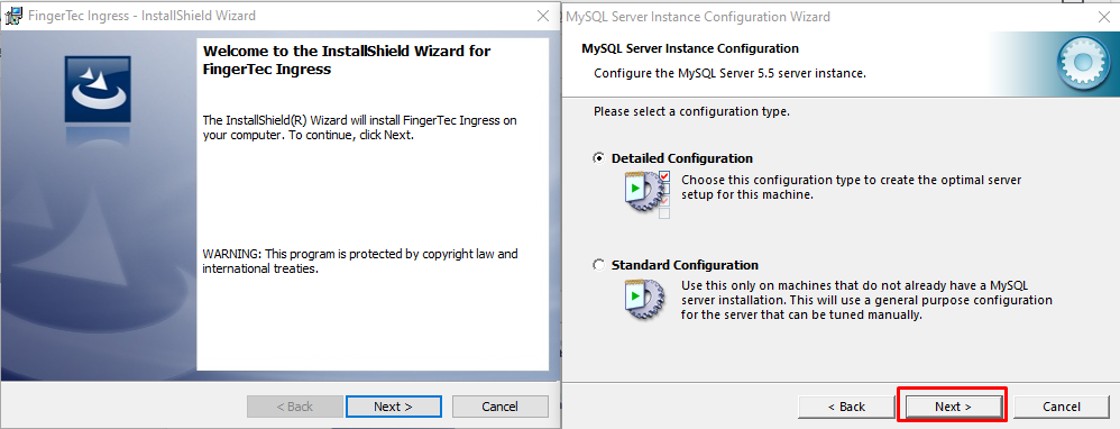
12. After selecting the Finish button as above, you will then see the MySQL Server Instance Configuration Wizard screen, please click Next
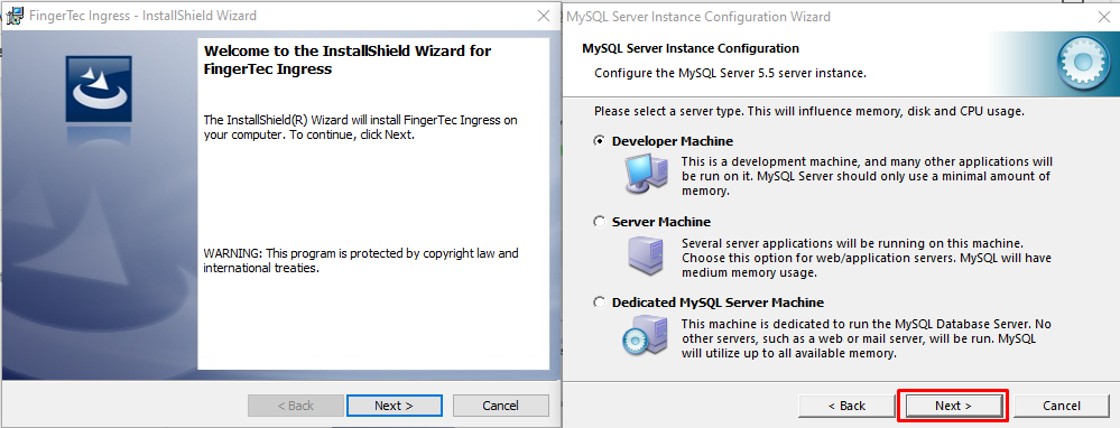
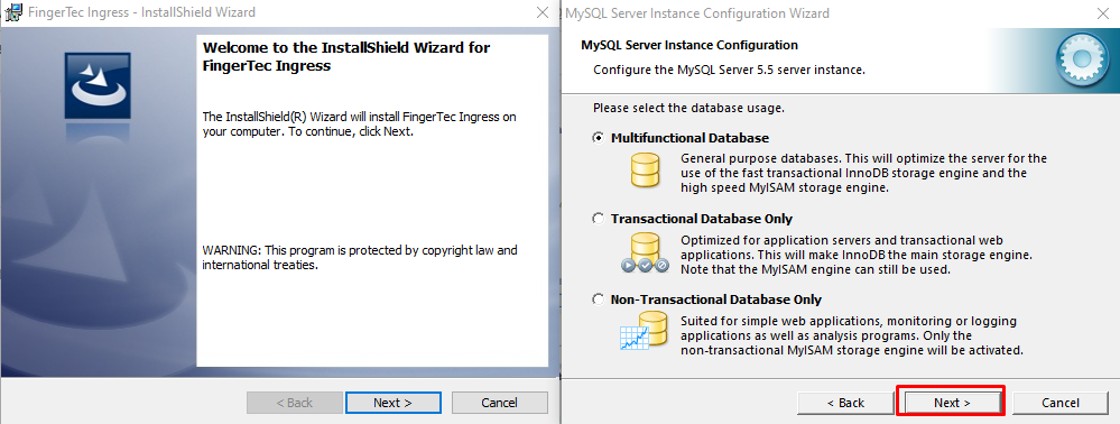
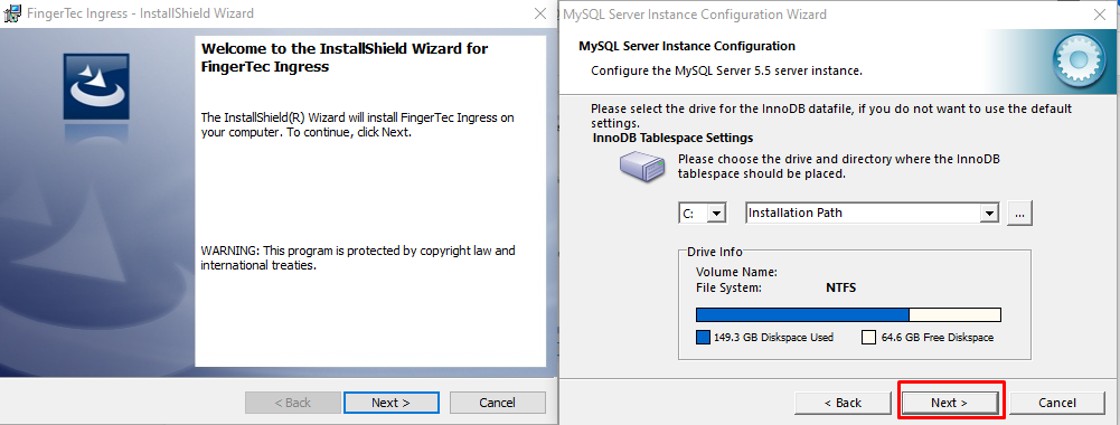
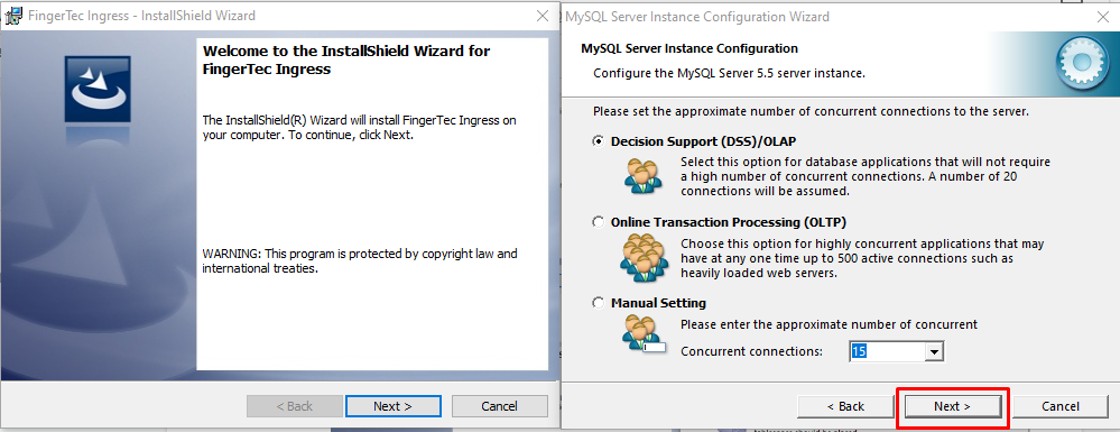
13. Click Next on the options below
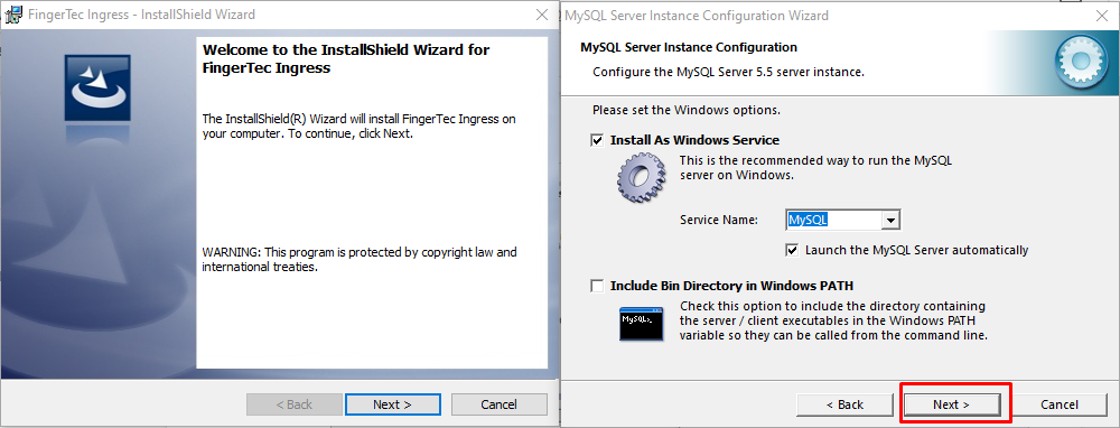
14. IMPORTANT: Click on the option “Add firewall exception for this port” and untick “Enable Strict Mode”
15. Select Next
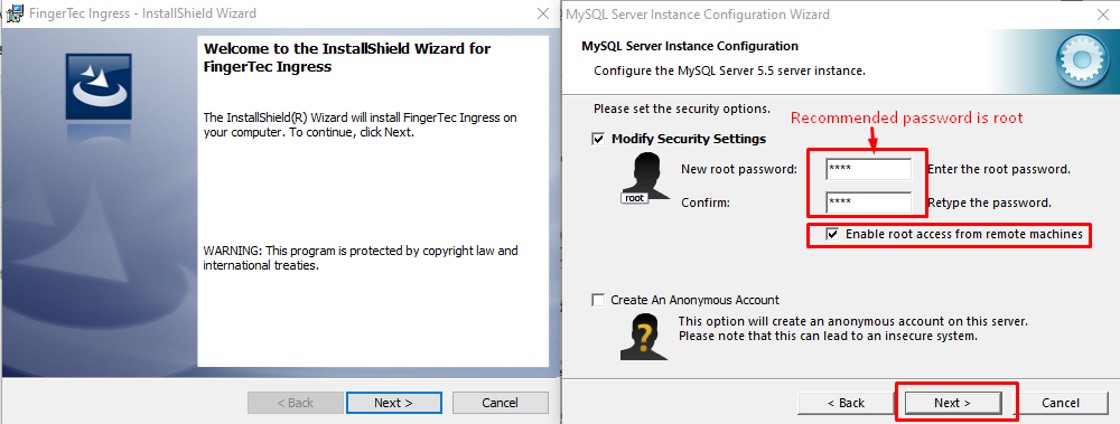
16. Insert the MySQL password and tick on the option “ Enable root access from remote machines” and click Next.
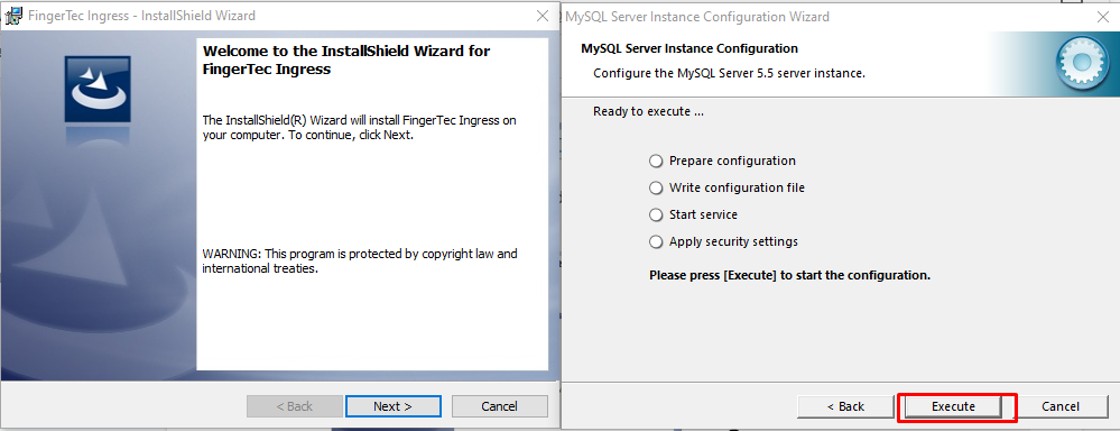
17. Select the “Execute” button to finalize the MySQL installation.
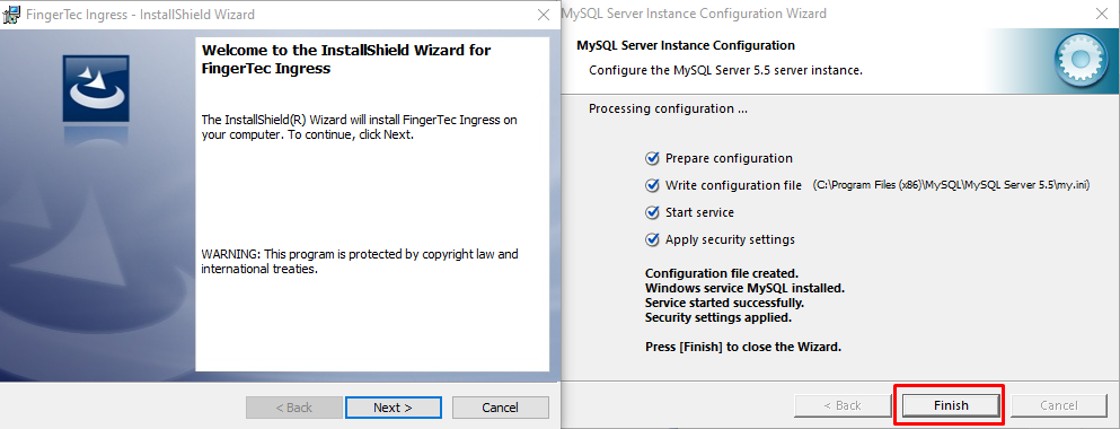
18. Once all stages have passed, click “Finish” to complete MySQL installation.
19. Once MySQL has successfully been installed, you are required to install the Ingress software. Click Next to begin the process.
B: Ingress software installation (Steps 20 - 26)
20. Select the “ I accept the terms in the license agreement” and click “Next”
21. Click “Next” on the options below
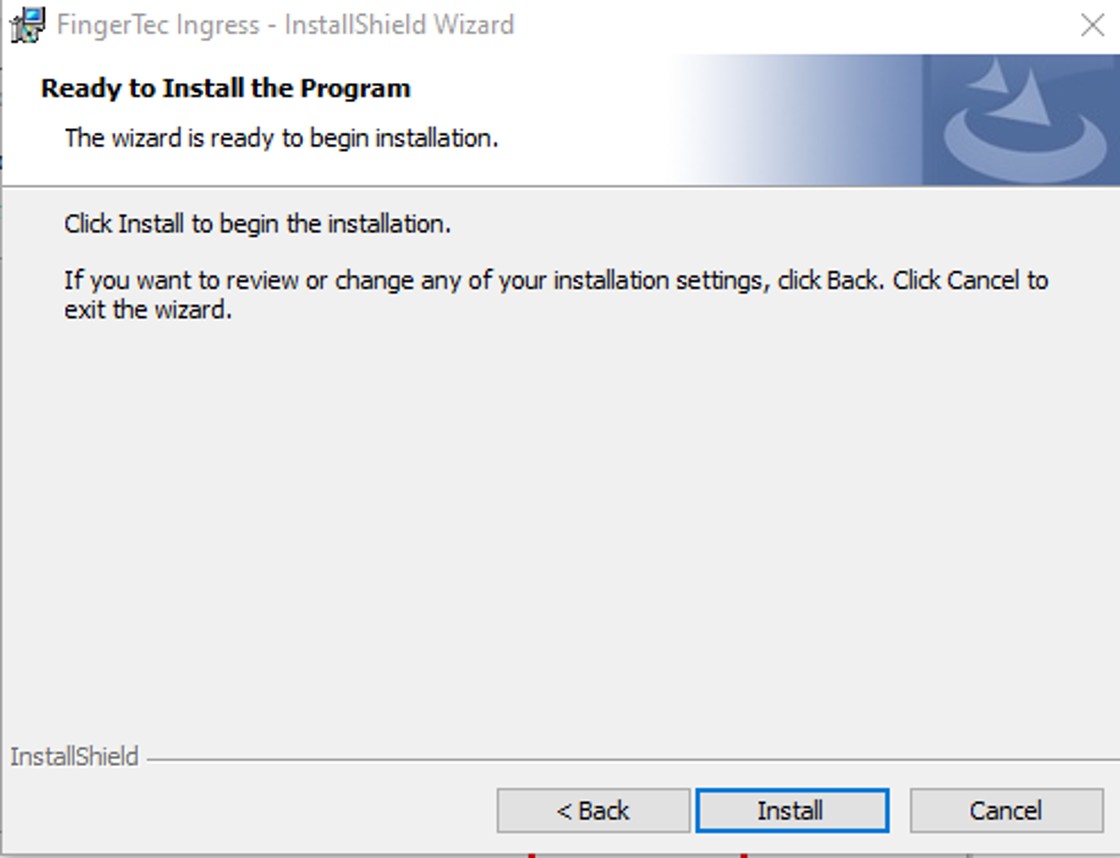
22. Now, click “Install” to begin Ingress installation
23. You will be prompted with Ingress dbInstaller at this stage. Insert the MySQL password which you configured on step 16 and click “Test Connection”
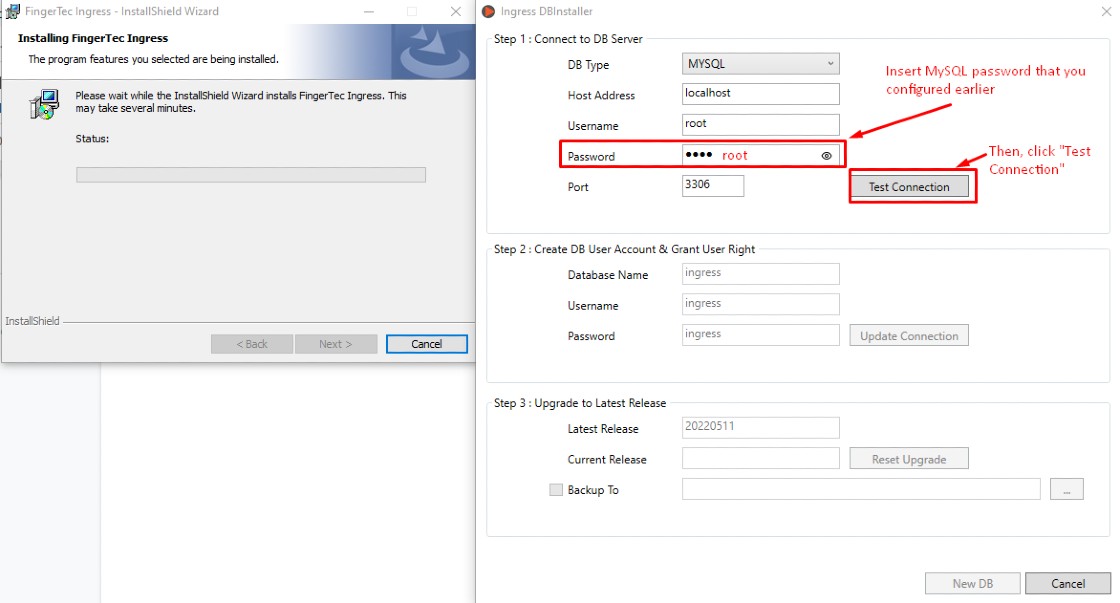
24. Once it shows “Connection Successful”, click on the second step which is “Update Connection”. It will then show “Database connection upgraded successfully!” and you can proceed to the third step, “New DB”
25. Once it reaches 100%, you will be prompted with a “Database created successfully” message. Click “OK” and “Close” to resume.26. Now you are done with the installation, please click “Finish” and reboot the computer to complete the process.
 Note: If some of the screenshots or steps viewed here are different from the ones in the current system, this is due to our continuous effort to improve our system from time to time. Please notify us at [email protected], we will update it as soon as possible.


.png)


