i-Account & i-Neighbour Integration Guide
Introduction
i-Neighbour and i-Account are two different systems, but all the information of these two systems is developed to synchronise. One of the crucial features for the owner/resident is the i-Neighbour e-Billing. This feature in the i-Neighbour Smart Community System aims to assist the Management and the Residents of the neighbourhood to manage their invoices or any payments.
With e-Billing, the Management issues all the billings using i-Account and upload them into i-Neighbour for the residents/owners to view their invoices, statements and receipts. This feature enables the Management to provide invoices to the residents without snail-mailing them, and residents can likewise pay their fees through the smartphone.
Below is the summary table for the documents that have integration between i-Neighbour and i-Account.
Summary Table
a. Batch Invoice
1. Batch Invoice - Click Upload (↑) icon. Once invoices are uploaded to i-Neighbour, the (↑) icon will be hidden in the listing.
Additional note: The same upload function is also applicable in the Late Payment Interest page.
b. Direct Sales Invoice
1. Direct Sales Invoice - When entering the invoice, tick the checkbox for “Upload Invoice” (Ticked by default).
2. If you unticked the Upload checkbox during invoice entry, you can still upload the previous invoices that have already been issued. Go to Accounting > Sales > Inquiries > Customer Transaction Inquiry and click on the Upload (↑) icon (The upload icon is only displayed for invoices that have not been uploaded to i-Neighbour yet; it will be hidden if successfully uploaded).
c. Admin & User Login View
1. Admin web login - View at E-Billing > Invoices
.jpg)
2. Email to User - Email is sent to the owner/resident with invoice details and download link (pdf).
.jpg)
3. User web login - View at My Account > E-Billing > Invoice & Payment
How to Upload Official Receipt
a. Upload During Customer Payment Entry
1. Customer Payments - When entering receipts, please make sure that the checkbox for “Upload Invoice and Payment” is ticked. When the checkbox is ticked, and you click the “Add Payment” button, the receipt will be entered automatically into the system. Furthermore:
: Invoice has not been uploaded to i-Neighbour previously - Upload Invoice & Payment details (and Official Receipt) to i-Neighbour
: Invoice already uploaded to i-Neighbour – Upload Payment details only (and Official Receipt) to i-Neighbour
2. Payment details are synced to i-Neighbour.
b. Admin & User Login View
1. Admin web login- View at E-Billing > Invoices > Payment Received2. User web login - View at My Account > E-Billing > Payment History
3. User app login- View at E-Billing. Status for the invoice will change to Paid once the payment is updated. Click on the receipt number to view/download the receipt (pdf).
c. Upload Later (If Not Uploaded During Customer Payment Entry)
1. If the receipt was not uploaded to i-Neighbour during the initial customer payment entry, you can upload the receipt at another page. Go to Sales > Transaction > Allocate Customer Payments or Credit Notes page.
2. Select the Owner.
3. Tick the checkbox “Show Settled Items” to display a list of all payments for the owner. Search for the payment that needs to be uploaded.
4. Click on the Allocate icon.
5. On the Allocation page for the selected payment, please ensure that the “Upload Invoice and Payment” checkbox is ticked. You do not edit any other details of the payment; just click the “Process” button at the bottom of the page. The system will upload the Payment details (and Official Receipt) to i-Neighbour.
6. Once updated the payment inside i-Account, Admin can check the invoice statuses inside i-Neighbour at e-Billing Module.
How to Upload Account Statement
1. Account Statement - Login to i-Account and go to Property > Account Statement. Click on the Upload (↑) icon to upload the generated Statement of Account into i-Neighbour. 2. Admin web login- View at E-Billing > Account Statement
3. User web login- View at My Account > E-Billing > Account Statement
4. User app login- View at More > Billing Info > Account Statements
How to Upload Statement Cum Invoice
1. Statement cum Invoice (SCI) - Login to i-Account and go to Property > SCI Batch Invoice. Click on the upload icon (↑) to upload SCI into i-Neighbour. The upload icon will be hidden once you have uploaded the batch.
2. Admin web login- View at E-Billing > Statement Cum Invoices
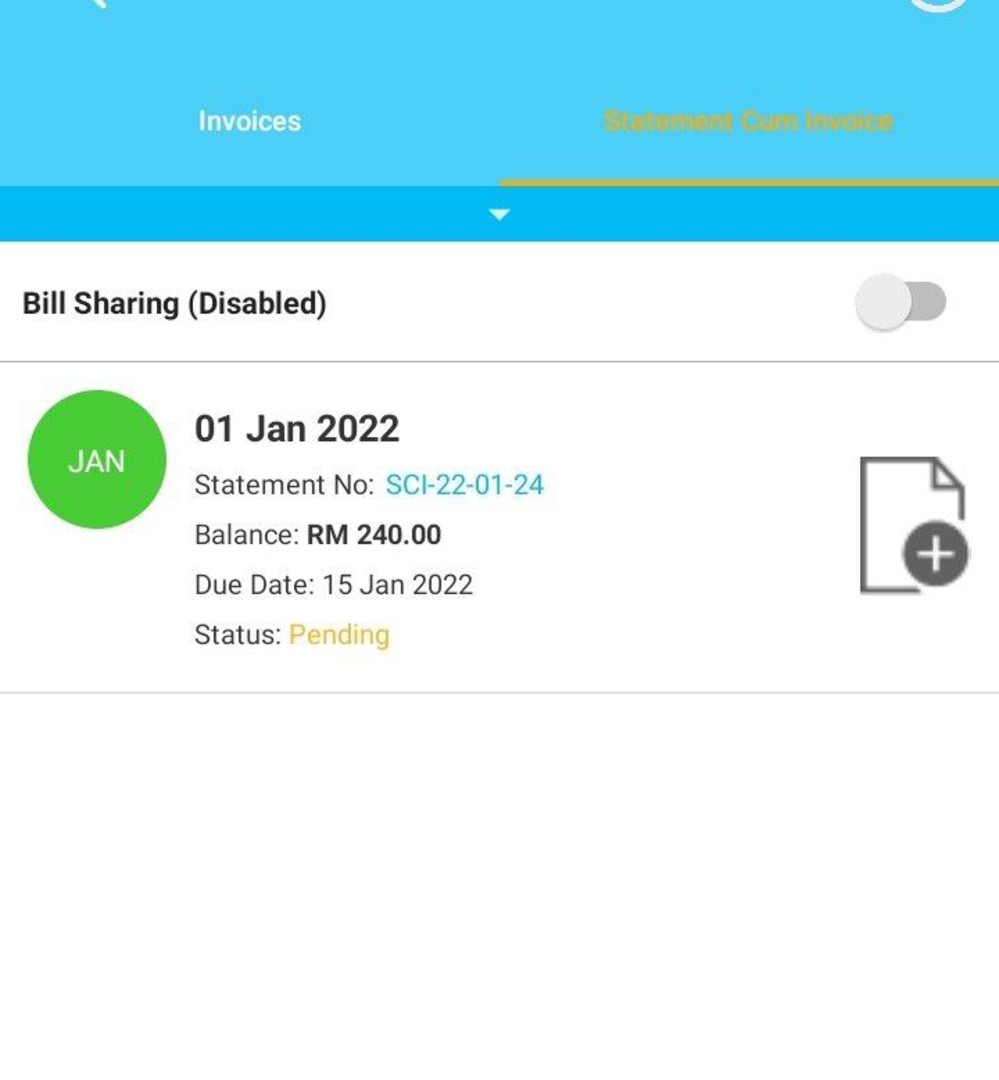
User app login- View at E-Billing > Statement Cum Invoice Note: If some of the screenshots or steps viewed here are different from the ones in the current system, this is due to our continuous effort to improve our system from time to time. Please notify us at
[email protected], we will update it as soon as possible.


.jpg)
.jpg)
2.jpg)
2.jpg)
1.png)
1.png)
1.png)
2.png)
1.png)
2.png)
1.png)
1.png)


.jpg)
.jpg)
.jpg)
.jpg)
.jpg)
3.jpg)
1.jpg)


.jpg)
.jpg)
.jpg)
.jpg)
.jpg)
.jpg)
.jpg)
.jpg)
.jpg)
.jpg)
.jpg)
.jpg)
.jpg)
.jpg)
.png)
.png)
.jpg)
.jpg)
.jpg)
.jpg)
.jpg)
.jpg)
.jpg)
.jpg)
.jpg)

.jpg)


1 comments:
Have any questions or inquiries about FingerTec? Drop your input here.