How to Create Patrol Schedule for TimeTec Patrol

Wednesday, June 29, 2022 TimeTec 0 Comments


Introduction
Scheduling guards is not an easy task because different sites may require different schedules and timings. TimeTec Patrol caters to that complexity by automating the whole scheduling process. Thus, a lot of time and money can be saved instantaneously. Furthermore, with this cloud solution, guards can view their upcoming routes easily via smartphone. This article provides a step-by-step guide on how to configure a schedule in TimeTec Patrol.

Process
1. After logging in as an Admin on the TimeTec Patrol web portal, go to Schedule.

2. Click on the + icon to add a new patrol schedule

3. Insert schedule number and schedule name, then select the schedule type whether weekly or customize. 

4. Weekly type will be the default schedule where it will automatically provide 7 days. You may key in the time slot for your patrol rounds accordingly for each day. Click the + sign to add another time slot for that day. 

5. Customize type will allow you to add the number of days according to your shift rotation pattern. For example, if the sequence will alternate every 2 days, you may set the schedules for the first 4 days while the following days will follow the sequence of the initial 4 days. Click on the + sign to add another time slot for that day while clicking on the + Add More button will add another day slot.
Note: It is recommended to use the customize schedule type and configure it for one day only, use the weekly type if the same schedule will be used every day, as the following days will repeat the same schedule as day 1.

6. Once the time slot has been set, click on the guard icon to assign patrol routes and guards. 

7. In the Edit Routes and Guards window, you may select the patrol routes and guards to assign to the time slot. Please note that only the route that does not exceed the time range will be visible for selection. Should you notice the required route is not available, you may set the time range of the schedule to be longer or amend the patrol route duration to be shorter. Submit once configuration is completed for each time slot.

8. Set the “Start schedule on” date for when the schedule begins to run. “Roll the schedule for coming” is to set the duration of the schedule to repeat the rotation. Minimum rotation can be set for 1 week while the maximum is up to 12 months. Should the schedules need to be used again after 12 months from the date the schedule starts running, you may amend the “Start schedule on” date and generate the schedule again.
For “Notify if routes didn’t start after”, you may select the recipients to be notified if guard(s) fail to start their tour. TimeTec Patrol app will send an alert message via push notifications to the personnel-in-charge.

9. Once the schedule configuration is completed, you may go to the Patrol Schedule Details tab to review the patrol schedule's detail configuration. Click edit if you want to change the guards or route assignments for a specific date.


Note: If some of the screenshots or steps viewed here are different from the ones in the current system, this is due to our continuous effort to improve our system from time to time. Please notify us at [email protected], we will update it as soon as possible.


0 comments:

Have any questions or inquiries about FingerTec? Drop your input here.

How to Enable TimeTec API for 3rd Party Data Integration with TimeTec TA

Wednesday, June 29, 2022 TimeTec 0 Comments


Introduction
An application programming interface (API) enables interaction between data, applications, and devices. It delivers data and facilitates connectivity between devices and programs. API enables access to services by adding codes to applications. It further enhances connectivity and bolsters functionality. TimeTec TA is a cloud-based time and attendance system suitable for small-medium enterprises up to large multinational companies. Its automated attendance database can be used to integrate with payroll or HR software to increase staff efficiency.

Process
1. Go to  Company > System Settings.

2. Go to General Settings Tab > Click Edit (Pencil Icon).

3. Click to Enable Timetec API Login.

4. Click Submit for acknowledgement on the developer Agreement.
Remark: You may click on the Developer Agreement highlighted in blue on the pop-up notification to learn more about the acknowledgement.

5. After that, you need to make sure the option is enabled > Click Save for setup done.


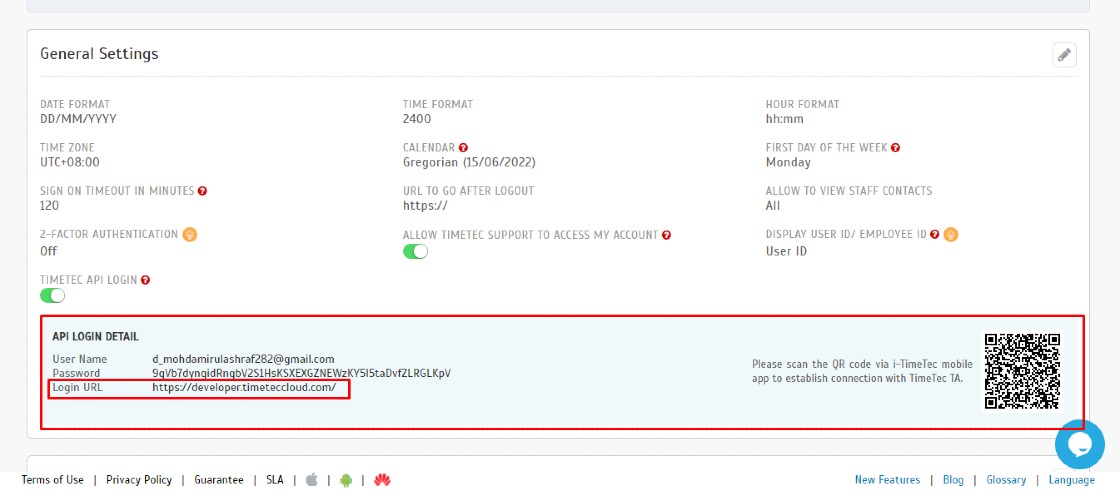
6. A new API login detail will appear once the setting is saved > Click on the Login URL.

7. You will directly go to the Timetec Developer Program website. You need to click on the Developer Login tab and fill up the Username and Password based on the new API login credential.


Note: If some of the screenshots or steps viewed here are different from the ones in the current system, this is due to our continuous effort to improve our system from time to time. Please notify us at [email protected], we will update it as soon as possible.


0 comments:

Have any questions or inquiries about FingerTec? Drop your input here.

i-Account - How to Transfer Invoices from Previous to New Owner

Tuesday, June 28, 2022 TimeTec 0 Comments


Introduction 
Periodically, there will be instances of sale or sub-sale of a unit in a property. When management is notified, the Admin has to change the unit owner information and add the new owner into the system. After changing owners, management needs to ensure all the future billing will be under the new owner.  
However, if the notification of sale is delayed and the billing has already been issued to the ex-owner, you can cancel the ex-owner’s invoices by issuing a Credit Note. Subsequently, generate new invoices for the latest owner. 

Process
A) Issue Credit Note for Ex-Owner
1. Go to Sales > Transactions > Customer Credit Notes to issue a Credit Note for the ex-owner. 

2. Select the Owner’s name. 

3. Set the Date for this Credit Note. 

4. Select the Item and enter the amount under ‘Price’. Click the “+” icon to add the item in the line to the credit note.

5. Admin can also add a Memo and click Process Credit Note to process the document. 

6. This message will appear once you successfully add the Credit Note. Click on the “Allocate the Credit Note to Invoice” link to knock off the invoice. 

7. You will be redirected to the ‘Allocate Customer Payment or Credit Note’ page. Allocate the newly issued Credit Note against the relevant invoices in the ‘This Allocation’ column. 

8. Once you are done, scroll down and click the ‘Process’ icon to save the allocation. The outstanding balance for invoices that should be transferred to the new owner will now be cleared.

B) Assign the Unit to a New Customer Group
1. If you are billing with ad hoc or direct invoices, this step and the next can be skipped. Proceed to direct invoice entry.

2. However, if you need to generate batch invoices or Statement Cum Invoice (SCI) for the latest owner, Admin needs to create another Customer Group and assign the new Account Code. Refer to this link on how to create and assign a Customer Group: /2021/10/i-account-how-to-assign-and-unassign.html

C) Generate Invoice for New Owner
After assigning the new Account Code to a Customer Group, you can generate the invoice as follows:
1. Go to Invoice > Batch Invoice to generate an invoice for the new owner by selecting the new Customer Group. 

Note: If some of the screenshots or steps viewed here are different from the ones in the current system, this is due to our continuous effort to improve our system from time to time. Please notify us at [email protected], we will update it as soon as possible.


0 comments:

Have any questions or inquiries about FingerTec? Drop your input here.

How to Enable Pop-Ups for i-Account site

Tuesday, June 28, 2022 TimeTec 0 Comments


Introduction
For new i-Account users, you may encounter an instance of Google Chrome blocking pop-ups from automatically showing up on your screen when you try to print an invoice, receipt or payment voucher from the system. The address bar will be marked Pop-up blocked when a pop-up is blocked. 
In order to view or print the document successfully, you will have to allow pop-ups. The steps on how to allow pop-ups are shown below: 

How to Enable Pop-Ups in Google Chrome
1. Open your Chrome browser. At the top right, click on the More icon (3 vertical dots) to enable the Pop-Ups. 

2. Click on ‘Settings’.

3. Click on ‘Privacy and security’.

4. After that, click on ‘Site Settings’. 

5. Then click on ‘Pop-Ups and redirects’. 

6. Go to ‘Customized behaviours’> ‘Allowed to send pop-ups and use redirects’. Click on the ‘Add’ icon to allow pop-ups for the i-Account site. 

7. Then, add this website: https://iaccount.i-neighbour.com to enable pop-ups for the i-Account site. And click ‘Add’ to save. Next, try to print or download the document from i-Account again

How to Enable Pop-Ups in Mozilla Firefox
1. Open Firefox. At the top right, click on the menu icon (3 bars) to enable the Pop-Ups. Click on ‘Settings’.

2. Click on ‘Privacy & Security’.

3. Scroll down to the Permissions category, search for the ‘Block pop-up window’ permission and click on ‘Exceptions’.

4. Enter the address https://iaccount.i-neighbour.com and click on ‘Allow’.

5. Check that the address is successfully added to the allowed website list below. Click ‘Save Changes’. After this, you can try to print or download the document from i-Account again.


Note: If some of the screenshots or steps viewed here are different from the ones in the current system, this is due to our continuous effort to improve our system from time to time. Please notify us at [email protected], we will update it as soon as possible.


0 comments:

Have any questions or inquiries about FingerTec? Drop your input here.

i-Account - How to Add or Remove Admin

Tuesday, June 28, 2022 TimeTec 0 Comments


Introduction 
i-Neighbour and i-Account are two separate systems that have been integrated to enable the synchronization of billing and payment data. As a result of the integration, access management for i-Account is also controlled through i-Neighbour.  
For i-Account subscribers, if you need to add new Admin users or remove user access, you can do this at i-Neighbour’s Manage Admin page. 
Refer to the below guide on managing users in the system.

How to Add New Admin User 
Note: Only i-Neighbour users assigned as a ‘Full Access Administrator’ or users that have edit permission for Manage Admin are authorised to add new Admin users. Refer to the user guide here: https://www.i-neighbour.com/UG_manage_admin
1. Log in to i-Neighbour. Go to the Community > Manage Admin page.

2. Click on the ‘+ Add’ button to add a new Admin user. 


3. Fill in the Admin’s Name and Email address. The email address entered has to be valid as the system will send an activation email to this address. 


4. Select the appropriate i-Neighbour system role from the dropdown menu. When you are first adding an Admin, you can only assign a role for i-Neighbour access. Access for i-Account can only be assigned after the new Admin has activated his/her account. 


5. Turn off the "Add as Emergency Contact" and click on the Save button.


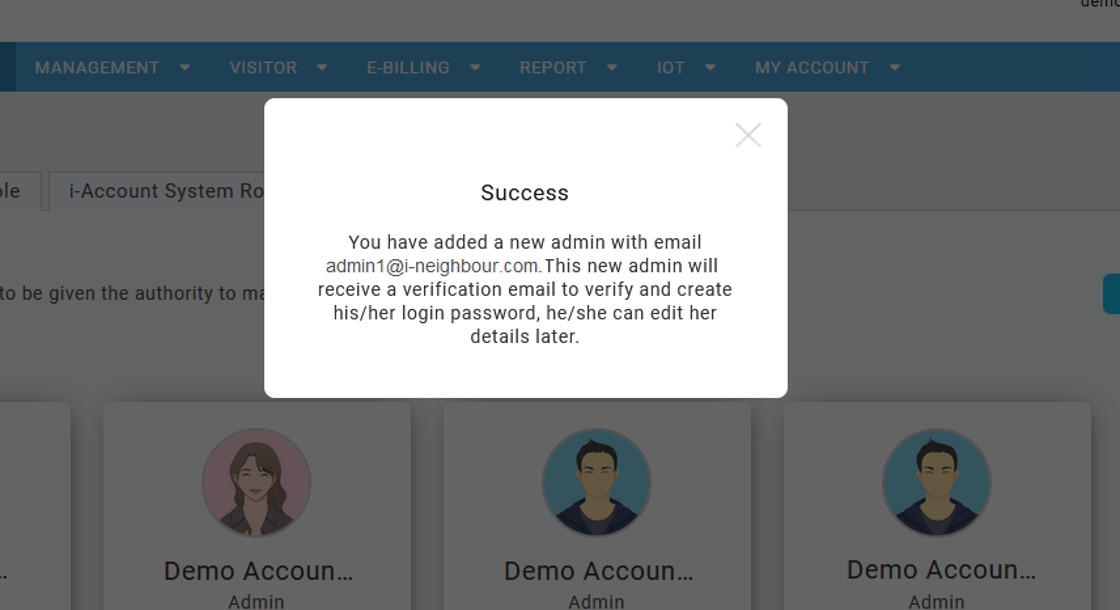
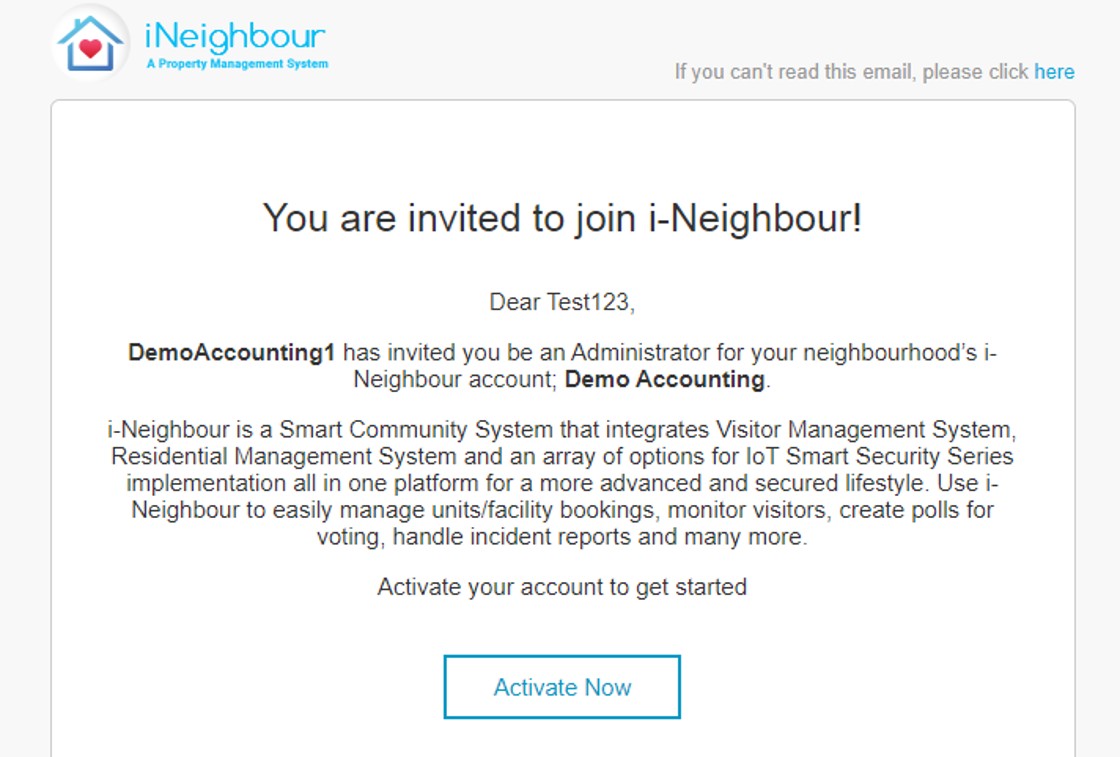
6. System will send an activation email to the Admin. 

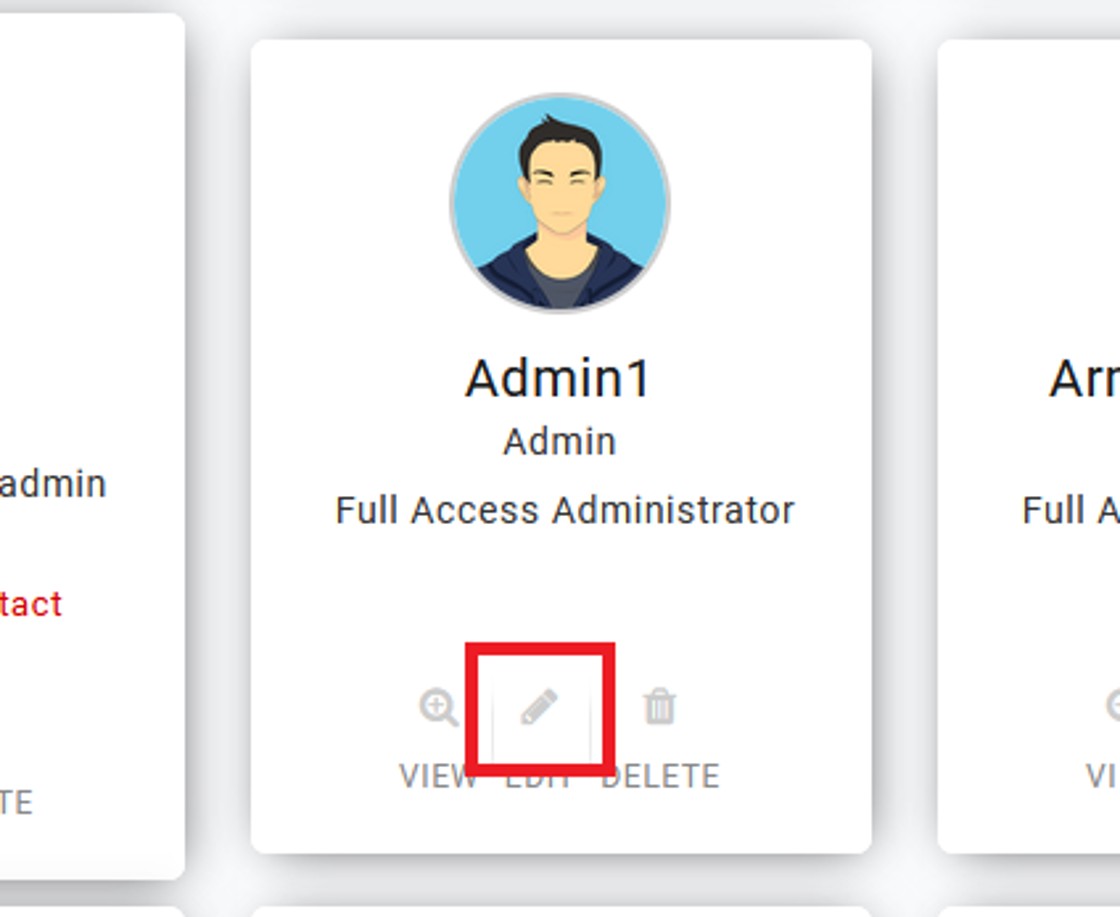
7. Once the Admin has activated his/her account, you can assign the i-Account system role. Go to the Manage Admin page and click on the Edit button for this particular Admin. 


8. You will see another dropdown for the i-Account System Role. There are six default system roles available. For example, you can choose the ‘System Administrator’ role to provide this Admin with access to all modules in i-Account. Select an appropriate role from the dropdown and click on Save. 


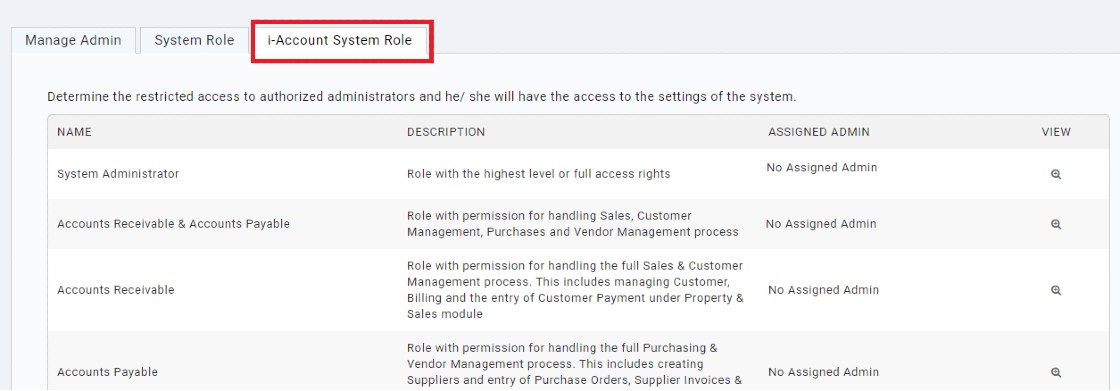
For more information on these six default roles, you can refer to the ‘i-Account System Role’ tab also under Manage Admin. 


9. After gaining access, the new i-Account Admin will also be able to view the i-Account login icon on the right side of the navigation menu.


How to Disable Admin Access to i-Account or Delete Admin 
1. If you need to disable or remove admin access to i-Account, there are 2 options:

i: Option 1: Disable Admin Access - Change the system role assigned from one of the six default roles to ‘No access to i-Account’
ii: Option 2: Delete the Admin from i-Neighbour

2. For option 1, log in to i-Neighbour. Go to the Community > Manage Admin page. Click on the Edit button.


3. Change the i-Account system role assigned from the existing role to ‘No access to i-Account’ and click Save.
Note: i-Neighbour ‘Full Access Administrator’ is allowed to make changes at Manage Admin. Thus, this option is not applicable if the user is still assigned as an i-Neighbour ‘Full Access Administrator’.

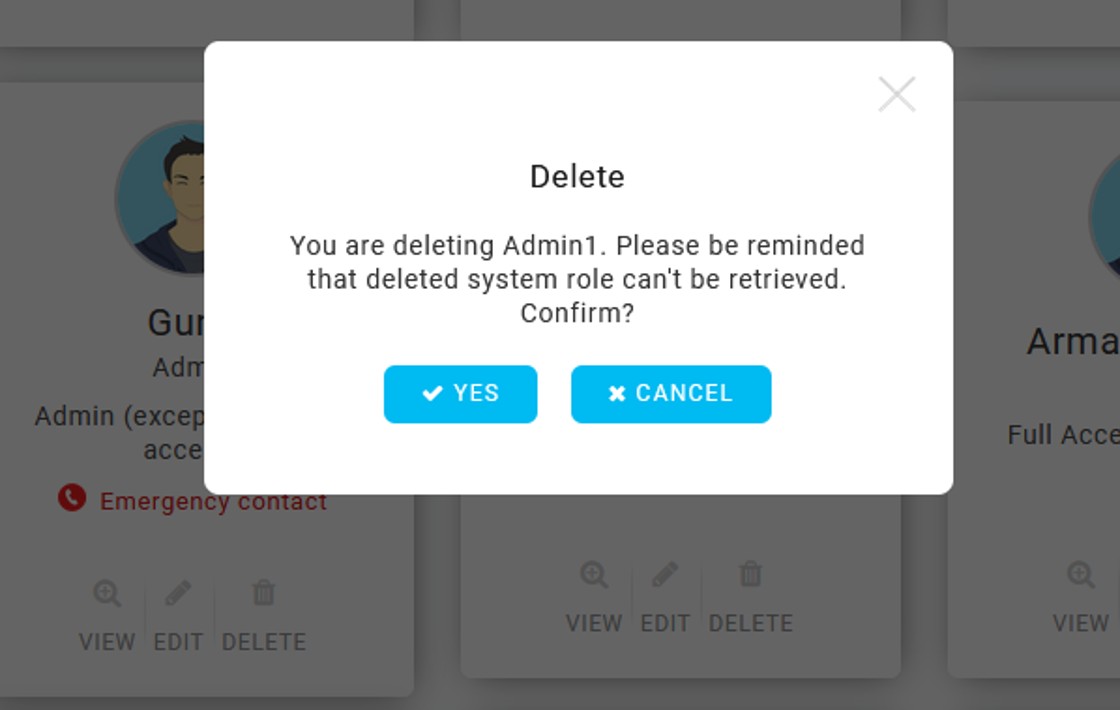
4. For option 2, at the Community > Manage Admin page. Click on the Delete button.


5. Confirm to delete the Admin from i-Neighbour. The deleted user will no longer be able to log into the system. The user deletion does not affect any i-Account documents or audit trails for historical transactions. 


Note: If some of the screenshots or steps viewed here are different from the ones in the current system, this is due to our continuous effort to improve our system from time to time. Please notify us at [email protected], we will update it as soon as possible.


0 comments:

Have any questions or inquiries about FingerTec? Drop your input here.